
Author: Janet Monk
Holiday Meal Prep Continued!

I went through all of my supplies and list that I start every year before the Holidays and found I was running low and missing a few items. So my Mom and I made our last trip to the Grocery store before Thanksgiving. It was crazy, but we did get what we needed. One of the items I was running low on was my Cream of Chicken Soup. I’m down to one container in the freezer, so I got the supplies I needed to make another batch.
Gluten Free Slow Cooker Cream of Chicken Soup
I Use this for Stuffing, Chicken and Dumplings, Green Bean Casserole, etc.
3 Pounds Chicken Breast (I buy a 3 lb. bag of additive free frozen chicken breast and just let it thaw in the fridge overnight)
1 stick Salted Butter
3 – 14.5 oz. Cans of Swanson 100% natural Chicken Broth (with no MSG)
2 Teaspoons Salt
1/3 Cup Argo Gluten Free Corn Starch
Wash chicken breasts, and place in crockpot whole. Chunk up the butter and place on top of chicken, sprinkle with salt, then pour in the cans of broth. Set crockpot on low for 6-8 hours. In that amount of time, chicken breast will be completely cooked and tender. Turn crock pot up on high heat, and dip out some of the liquid into a small mixing bowl, add corn starch, and whisk together. Add this back to crockpot, leaving the lid off, for 10 – 15 minutes. When liquid starts to thicken turn off heat. Using a potato masher, mash all of the chicken breast and it will shred the chicken into small pieces. Let cool, and dip out about 1 ¾ cups into 5 small plastic storage containers, dividing equally. Label and date, and freeze until ready to use. This will make enough to equal about 5 – 14 oz. cans.For those of us that cannot eat a can of soup boughten from the grocery store, this recipe will be a staple for the Holidays. It is real food no chemicals, no preservatives, & and it is much better tasting than what you can buy in the store. Hope you enjoy it!
*Please note if you buy chicken that already has broth added, this adds salt and sodium to your soup and can possibly be too salty. *
Holiday Meal Prep Continued!

Since I can’t have a lot of the chemicals and gluten that is in many of the bottled salad dressings, I make my own. So today I’m working on the Salad Dressings I use on my Salads for the Holidays. If you make them now it helps the flavors to blend with the oils so much better! I use this one on my Frito Salad!
Jan’s GF Catalina Dressing
This dressing just literally bursts with FLAVOR!…
½ Cup White Vinegar
3/8 Cup GF Thick Tomato Sauce
1 Cup Canola Oil
½ Cup White Granulated Sugar
2 Teaspoons Salt
1 Teaspoon Additive Free Paprika
½ Teaspoon Original Williams Chili Seasoning
1 Teaspoon Additive Celery Flakes
½ Teaspoon Additive Free Dry Mustard
1 ½ Tablespoons Additive Free Onion Powder
I like to use my smoothie maker or juicer attachment on my blender to make this, it grinds up the spices really fine. Or you can use the blender. Pour all liquid ingredients in first, then add dry ingredients and blend until all dissolved. Pour into pint jar, or air tight container, put lid on, and store in refrigerator. Shake before each use. Enjoy!
Holiday Meal Prep Day 3

Working on Gluten Free Mixes today. I have my Gluten Free Flour mixes for Pie Crust, Sweet Rolls, and Gravies all ready and waiting in the freezer for Thanksgiving! All I have to do is add the wet ingredients!
Here’s the recipe for my Honey Sweet Rolls.
Gluten Free Honey Sweet Rolls

Honey Sweet Rolls
3 ½ Cups Gluten Free All purpose Flour ( I used Tom Sawyer and Betty Crocker mixed)
½ Teaspoon Salt
½ Teaspoon Baking Soda
1 Heaping Tablespoon Gluten Free Baking Powder
1 Cup Pure Egg Whites
½ Cup Gluten Free Canola Oil
1/2 Cup Pure Butter Milk
½ Cup Pure Honey
In large mixing bowl whisk together flour, salt, baking soda, and baking powder. Then add egg whites, oil, butter milk, and honey. Gently fold liquids and flour together until all dry ingredients are wet. Don’t over mix! Cover mixing bowl and store in refrigerator at least 2 hours. ( I like to mix this the day before and let it set overnight.)
When you are ready to bake rolls, remove from fridge and prepare yeast mixture below.
Yeast Mixture:
¾ Cup White Granulated Sugar
½ Cup Scalded Milk (in microwave about 1 minute)
¼ Cup Cold tap water
2 Heaping Tablespoons Dry Active Yeast
In medium glass mixing bowl, add sugar, scalded milk, & water. Stir to dissolve sugar. Temperature should not be over 110 degrees. (It will kill the yeast) Add yeast and mix with plastic whisk. Set aside and let it foam about 15 minutes. I like to set it near the stove to keep it warm.
Preheat oven to 325* Add a 9×13 inch baking pan filled half way with water, to bottom rack of oven. This will keep rolls moist while baking.
When yeast is ready, add dough and yeast mixture to food processor or mixer. Blend on highest setting until well mixed. Do not over mix, it will make rolls rubbery. I usually blend no more than 30 to 40 seconds or until all lumps are gone and dough is smooth.
Pour dough onto wax paper that has been lightly greased and floured (with GF flour). Lightly sprinkle more flour on top of dough, just enough to roll out. Roll out dough to about 1 inch thickness. Using a 2 ½ in round cookie cutter, cut rolls and place in a lightly greased nonstick pan. Or if you are using a glass baking pan you must lightly grease and flour the pan or the rolls will stick. I can get 18 rolls into a 9×13 inch pan. This will make 24 – 25 rolls depending on how big you make them. I use a smaller pan for the rest of the rolls. Try not to handle the dough any more than you have to. The more it is worked the tougher it makes the rolls.
.
Melt ½ stick of salted butter and generously brush top of rolls. Let rolls rise in a warm place for about 20 minutes. Place in top rack of oven, above water, when rolls have risen and bake for 20 minutes then remove pan of water from oven and let rolls finish baking for another 5 to 10 minutes or until completely brown and done in the center. Insert a wooden toothpick in the center roll, if it comes back clean, then they are done.
Remove from oven and butter again while warm. Lightly cover rolls with foil that you have pierced with a fork, ( so rolls do not sweat) until you are ready to serve.
Day 2 of Holiday Prep

Today I’m working on the cornbread for my Stuffing. ( if your from the South, we call it Dressing) The Stuffing or Dressing recipe I use calls for 2 pans of corn bread, which equals about 12 cups of crumbled corn bread. So I double the recipe below. I try to make my corn bread early, measure it out and put it into bags and freeze it. That way when it’s time to make my dressing for Thanksgiving, all I have to do is add it to the recipe.
Gluten Free Corn Meal Mix
1–24 oz. bag of Bob’s Red Mill Gluten Free Stone Ground Whole Grain Corn Meal
2- 24 oz. bag of Bob’s Red Mill Gluten Free Corn Flour
Mix well with whisk, in a large mixing bowl, and pour in air tight container. Be sure and label container.
The reason I like to use the mix of corn flour and cornmeal, is because the GF corn meal is coarser than regular cornmeal. So when you add the corn flour it just evens it out. If you like the grit of the corn, then just use the cornmeal. ( I have a thing about texture. I don’t even like regular pears because of the grit!)
If you like the finer grind of the Corn Flour, just use the Corn Flour alone instead of adding the Whole Grain Corn Meal
Gluten Free Corn Bread
2 Cups GF Corn Meal/Corn Flour Mix (2 bags Bobs Red Mill Corn Flour, 1 bag Bobs Red Mill Corn Meal)
½ Teaspoon Salt
2 Teaspoon GF Baking Powder
½ Teaspoon Baking Soda
1 Tablespoon Sugar
¾ Stick of softened Salted Butter (6 Tablespoons or 3/8 cup of oil)
1 Cup Water or Milk
2 Eggs Beaten
In large mixing bowl whisk together dry ingredients, then add butter, water and eggs. Mix well and pour into a greased, 9 – 10 inch skillet, or baking dish. Bake at 350* for 25 – 30 minutes, or until set and browned around the edges. Remove from oven and let cool.
Prep for the Holidays, Day 1
Gluten Free Croutons
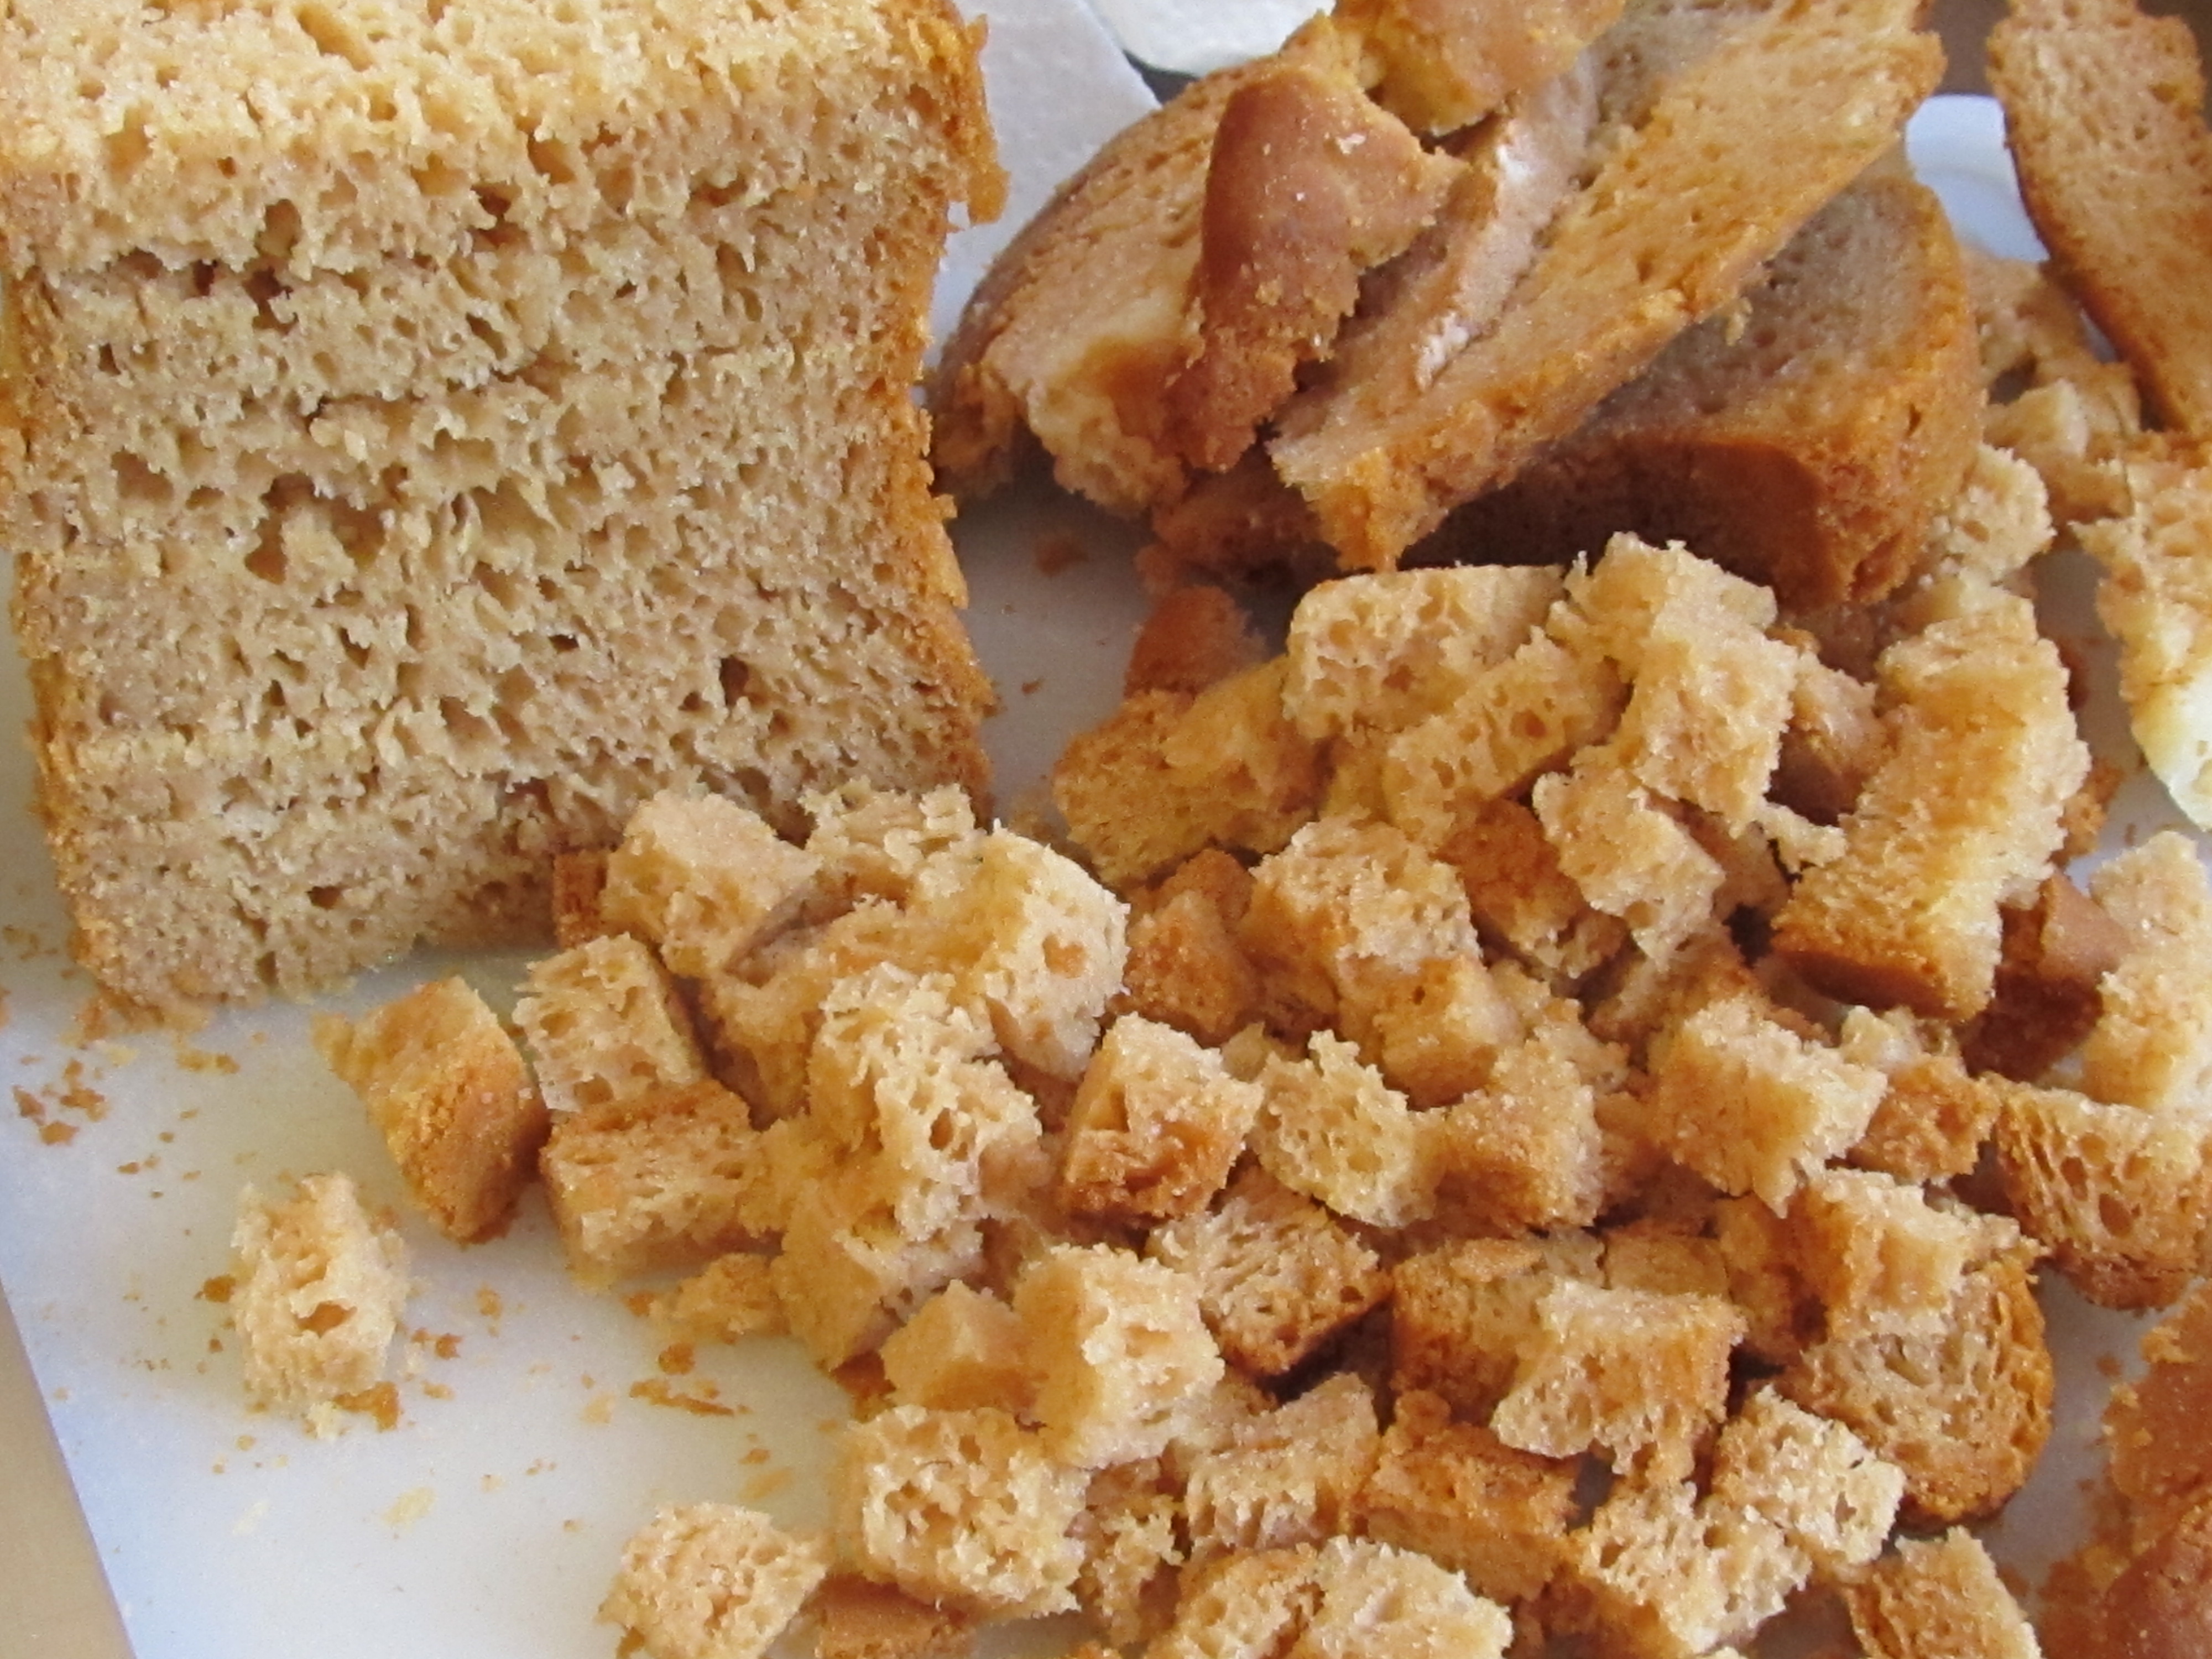
I’m starting my prep for Holiday cooking today. I’ve been saving the ends of my Gluten Free Bread in the freezer for a while now. So today I’m going to make Croutons for Stuffing.
Gluten Free Croutons
Preheat oven to 400*
Gluten Free bread
1 Teaspoon additive free garlic powder
1 Teaspoon salt
Per 2 ½ Cups cubed bread
I use leftover Gluten Free bread if I can, and I like to save the ends for croutons also. But if you need several cups at a time, one 9×4 inch loaf will make about 4- 5 cups of baked croutons. To cut each slice into small crouton size squares, I usually stack the slices of bread, then cut so it goes faster. And spread the little squares on a cookie sheet, or baking pan one layer thick. Sprinkle on garlic powder and salt, and bake. About 20 – 25 minutes or until crisp. Make sure to check them at about 15 minutes, they will need to be stirred. When done, let them cool, and store in an air tight container in the freezer until needed. To use in a salad, take out what you need and microwave about ten seconds. Or save them for stuffing.
My dressing (or stuffing) recipe calls for 4 cups of croutons. My baking pans will hold 2 ½ cups of cubed bread at a time, which equals (after shrinkage) 2 cups of croutons. So after baked and cooled the 2 ½ cups will shrink to about 2 cups.
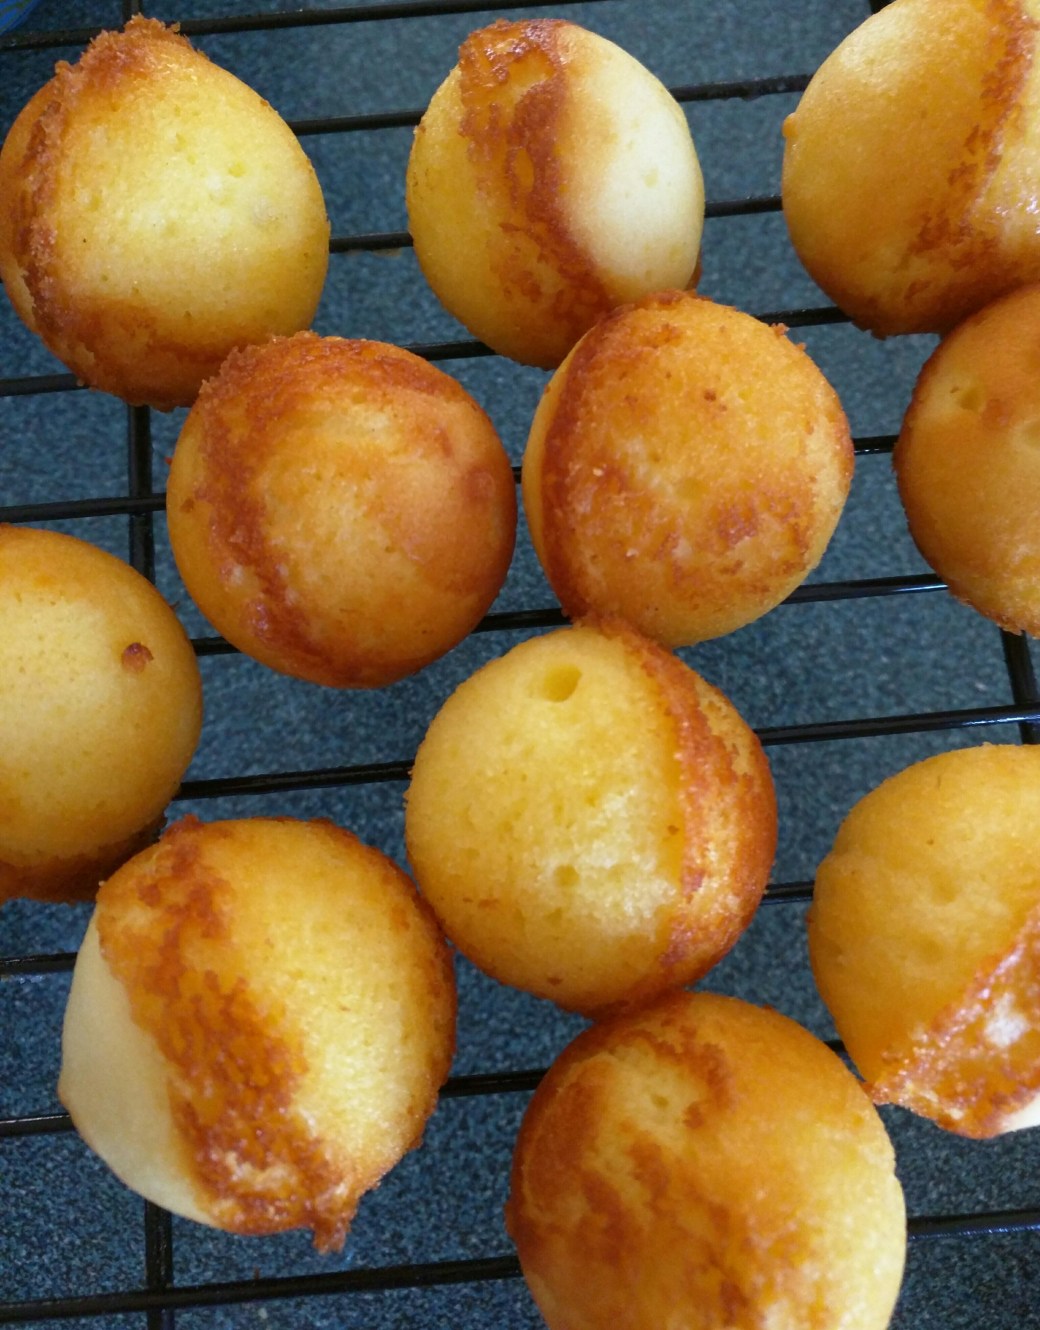
Cake Pop Eye Balls

Gluten Free Cake Pop Eyeballs
1/2 Cup Plain GF Greek Yogurt ( or 4oz. cream cheese)
1 Cup Sugar
3 Large Eggs
1 Cup All Purpose Gluten Free Flour (I used Better Batter)
1 Teaspoon Gluten Free (Clabber Girl) Baking powder
1 Teaspoon pure Vanilla
Cream yogurt, sugar & eggs. Add remaining ingredients & mix well on high speed until blended. Let dough set in fridge for about 30 min. When ready to bake preheat oven to 350*F. Butter both sides of non-stick cake pop pan and fill bottom half of pan with batter. (without the holes). Place top on, and lock together. Place in oven and bake for 9 minutes, then turn pan over and bake another 9 minutes. (18 minutes total). Remove from oven and let cool 5 minutes before removing top. If batter comes through holes in the top be sure and remove those little bits before cooling. After 5 minutes remove from pan and lay them out to cool on cooling rack ( It may be necessary to trim the seam side of pops) When cool dip in melted GF almond bark and decorate.
Or use the Simi Royal Icing recipe below. You must cover cake pops with a crumb coating ( thin glaze icing) then let set before covering with royal icing.
Simi Royal Icing
6 ½ – 7 cups Powdered Sugar (or icing sugar)
1/4 Cup Pure Light Corn Syrup
1/4 Cup Milk ( plus 1-2 Tablespoons if needed)
In food processor add 6 ½ Cups powdered sugar then add remaining ingredients. Blend well until all ingredients are smooth and forming a stiff dough. If dough is too wet then add the other ½ cup of powdered sugar 1 tablespoon at a time until dough is stiff. If dough is too stiff add 1 Tablespoon milk.
I would not advise adding water. It makes the icing too sticky.
Remove Icing from processor and place on wax or parchment paper covered with powdered sugar roll out icing to about 1/8 inch thick and cut a 3 inch square from icing to wrap around each cake pop. Trim bottom of eyeball and finish decorating with pipping icing any color you prefer.
White Chocolate Ghosts
Gluten Free Halloween Candy
Posted on October 22, 2014

Gluten Free White Chocolate Ghosts
“Buckeyes”
2 Packed Cups GF Peanut Butter ( Most peanut butter is GF but check the label. I used Peter Pan Crunchy)
3 Cups Additive Free Powdered Sugar
1 Stick Melted Butter ( salted or unsalted doesn’t matter)
In food processer mix all ingredients. TIP: If you add melted butter last, it helps to keep the powdered sugar from poofing up on the lid of the processor. (Yes I know poofing is not a word, but that’s what it does!) Keep processing and scraping down the sides until all is mixed, and there is no powdered sugar lumps. Refrigerate until cold, about 30- 40 minutes.
Roll peanut butter mixture into balls about the size of walnuts, and dip into melted chocolate one at a time. Lifting each little ghost out of the chocolate with a spoon or small spatula, place on cookie sheet lined with parchment paper. They don’t have to be perfect, when the chocolate starts to run it will look like a ghost. Depending on how big you make them, it will make about 4 -4 1/2 dozen.
White Chocolate:
2 – 20 oz. Packages Gluten Free Vanilla Almond Bark ( I used Best Choice)
Melting only half the package at a time in a small glass bowl for about 2 minutes, or until smooth when stirred. When the almond bark starts to get thick add more bricks to the bowl and microwave for about 2 minutes. Make sure not to get any water in the almond bark, it will make it gritty.
Ghost Eyes:
5 to 6 frozen strawberries, or blueberries, puréed in food processor. You can thicken the fruit with powdered sugar it you want. I didn’t because I like the red eyes. The powdered sugar mixed with the strawberries will give them pink eyes.
2017 Blogger Recognition Award

Bloggers Recognition Award
I am so excited to announce that I have been nominated for the Blogger Recognition Award! This is my first nomination and I am so honored!! This award was given to me by other Bloggers in recognition of the hard work and time it takes to put together content that people want and enjoy reading. And in my case using my recipes.
Cindy Seaton, at Beauty From Ashes Blog was the person that nominated me for the award, and I truly want to thank her! Cindy’s Blog is about the journey her family is on with their son Kyle, who had a number of health problems along with autism and her tremendous faith in God. During this journey Cindy became an author and blogger. Go over and visit Cindy at https://cindyseaton.com .
The Story of my Blog:
Several years ago my mother was diagnosed with Celiac Disease, and she had both genetic markers. So that meant that either my sister or I both would have it also, along with other family members. It also explained a lot of the health problems we have had over the years. So we started learning how to cook Gluten Free. It was a pain at first, way back then, there wasn’t much to choose from. The Gluten Free recipes that I could find called for 4 or 5 different kind of flours and were extremely expensive, besides being difficult to follow. The flour was very gritty and just didn’t taste very good. Then a friend of mine, which had just been diagnosed right before my Mom, found a finer grind of Gluten Free flour. That was a big help. Then other flours started showing up on the market, and started to make life a little easier. Anyway long story, short. I started to get the hang of it and figure out how to cook Gluten Free, and my family and friends really enjoyed it! So with a lot of encouragement from friends and family I decided to write a Gluten Free Cook Book and start this Blog. So hopefully what I have learned I can pass on to others.
For anyone starting a blog, don’t give up! At first it is kind of hard coming up with content, but if your heart is in it just keep after it. Do a lot of research on your subject and add your own experiences and just write. It doesn’t matter how many likes or comments you get, if you are passionate about your subject just don’t give up!
Below are the Bloggers that I am nominating for the Bloggers Recognition Award. Click over and visit their site! Also find the rules at the bottom of this post to nominate someone else for this award.
Alicia at https://yourhealthyhomebody.com/
Daleen at Sunday’s Child (trying to be full of grace).
Audrey, Lady Melady: My Castle, My Food
Jenn https://glutenfreeguru.wordpress.com/about/
Britt thefunctionalmama.wordpress.com
Christina You Read It Here First
Donna The Curious Mummy
Yanic A. Family, Faith, Food and
Aneequah Family, Faith and Ghaith
Anne and Ernie Homesteading101
Rules for accepting this award
· Thank the nominating blogger
· Write a post about the award
· Share a story of how and why you started your blog
· Offer at least two pieces of advice for new bloggers
· Pass on the nomination to another 10-15 bloggers
Respond to the nominating blogger with a link to this post on their blog
Chili Lime Avocado Dip
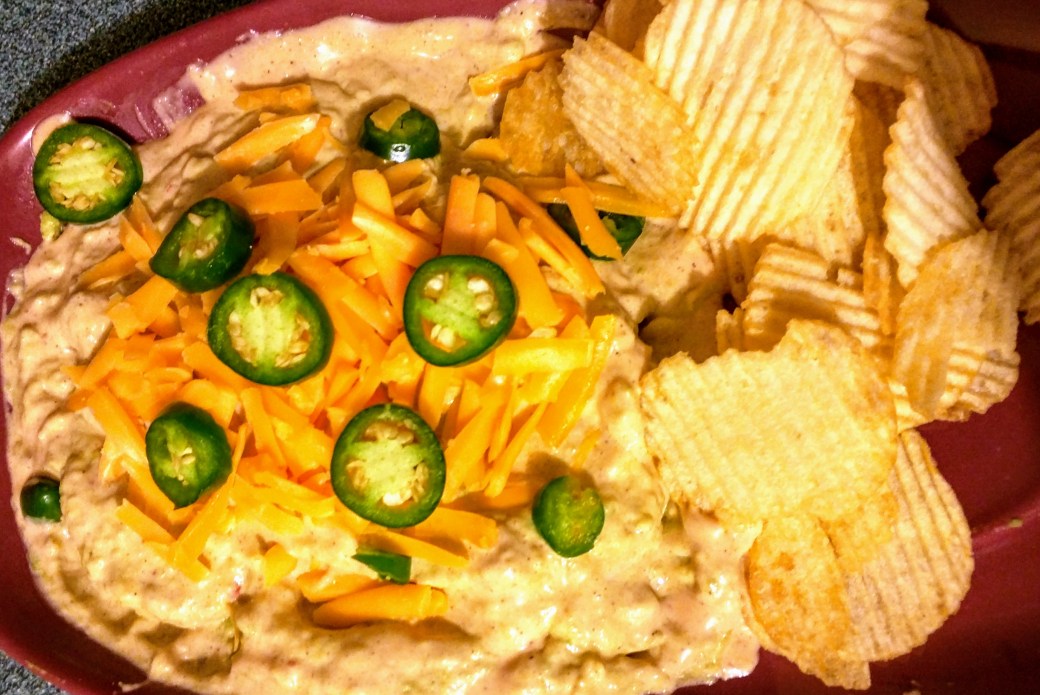
Chili Lime Avocado Dip
2 Ripe Avocadoes
1/2 Cup GF Hidden Valley Simply Ranch Chili Lime Dressing
1/2 Cup Freshly Grated Cheddar Cheese
Optional 1/4 Cup Chopped Ham
Optional 1 Sliced Fresh Jalapeno
Wash, remove the pit and scoop out avocadoes and mash with fork and add to a medium bowl. Add dressing, and mix well ( and add ham if you wish). Top with cheese, jalapeno and serve. Enjoy!
Apple Cinnamon Muffins or Dougnuts
Apple Cinnamon Muffins and Doughnuts

Apple Cinnamon Muffins or Doughnuts
1 3/4 Cups All Purpose G F flour, with xanthan gum already added
2 Teaspoons additive free ground Cinnamon
1/2 Tablespoon Baking Powder
1/4 Teaspoon Baking Soda
1 Teaspoon Active Dry Yeast
1 Cup Packed Pure Brown Sugar
2 Eggs beaten
1/2 Stick softened Butter (or ¼ cup gf oil)
1 Cup additive & sugar free Applesauce
1/2 Cup pure sweet Buttermilk
(optional 1 Cup chopped pecans or 1/2 Cup ground Chia Seeds)
In large mixing bowl whisk together flour, cinnamon, baking powder, baking soda, yeast, and brown sugar. Add eggs, butter, applesauce, and buttermilk. Mix on high just until smooth. Don’t over mix. Let batter rest for about 15- 20 minutes. Then fold in pecans. Preheat oven to 325*F. Using a ¼ cup ice cream scoop fill each muffin cup with batter. If you don’t use the muffin papers then you must grease and flour your muffin pan. If you are making doughnuts, grease a non-stick doughnut pan and fill each doughnut place with batter almost to the top. Bake muffins for 28- 30 minutes and doughnuts for 25 minutes. This recipe will make a dozen small cupcake size muffins and 6 doughnuts.
Glaze:
2 Cups additive free Powdered Sugar
1 1/2 Teaspoon additive free ground Cinnamon
1/3 Cup warm tap water
Whisk until smooth and dip or brush muffins and doughnuts with glaze. Enjoy for breakfast or treat!
What Gluten Is To Me

What Gluten is to Me
I’ve heard several people say lately that they are supposed to be Gluten Free by a Doctor’s order, but then I see them eating Gluten or they have offered it to me knowing that I have Celiac Disease. People PLEASE, PLEASE, PLEASE, take this seriously! If you have an Autoimmune Disease and have been placed on a Gluten Free diet then you need to know Gluten is poison to your body!
Poison Ivy, Bee Stings, Peanut Butter, for example are poisonous to some people. Well Gluten is poison to me. You may not be able to see the damage it does to me, but I do break out in a rash; It’s in my hair and mouth. You may not be able to see the pain it causes me because I hide it very well. ( The stomach and joint pain are horrendous) The damage it does to my stomach and intestine can’t be seen except by my Dr., but it’s there, and even the tiniest bit of Gluten ( by proven studies, only 1/64th of a teaspoon) can cause intestinal damage and eventually cancer . The days and days of extreme fatigue is what gets me the most, because I can’t do what I need to do. I can’t get my work done; housework, job, and chores. It all has to just wait and I HATE that!!!
So If you see me carrying wet wipes with me at the grocery store, or constantly washing my hands, its because, I’m wiping off Gluten that has touched something that I need to put in my cart to prevent cross contamination. I’m trying to stay healthy. Or if I turn down a perfectly nice treat you offer me, (because it contains Gluten) please don’t be offended. I’m trying to stay healthy. If you see me standing in the isle at the store for a long time looking at a product, it’s because I’m reading the label to make sure it’s safe. (My husband even has to use Gluten Free shaving lotion so that I can kiss him on the cheek and not get glutened.) It’s because I’m trying to stay healthy
If you are one of us that has an Autoimmune Disease, please take this seriously and stay away from even the tiniest amount of Gluten and STAY HEALTHY.
Fresh Apple Upside Down Cake
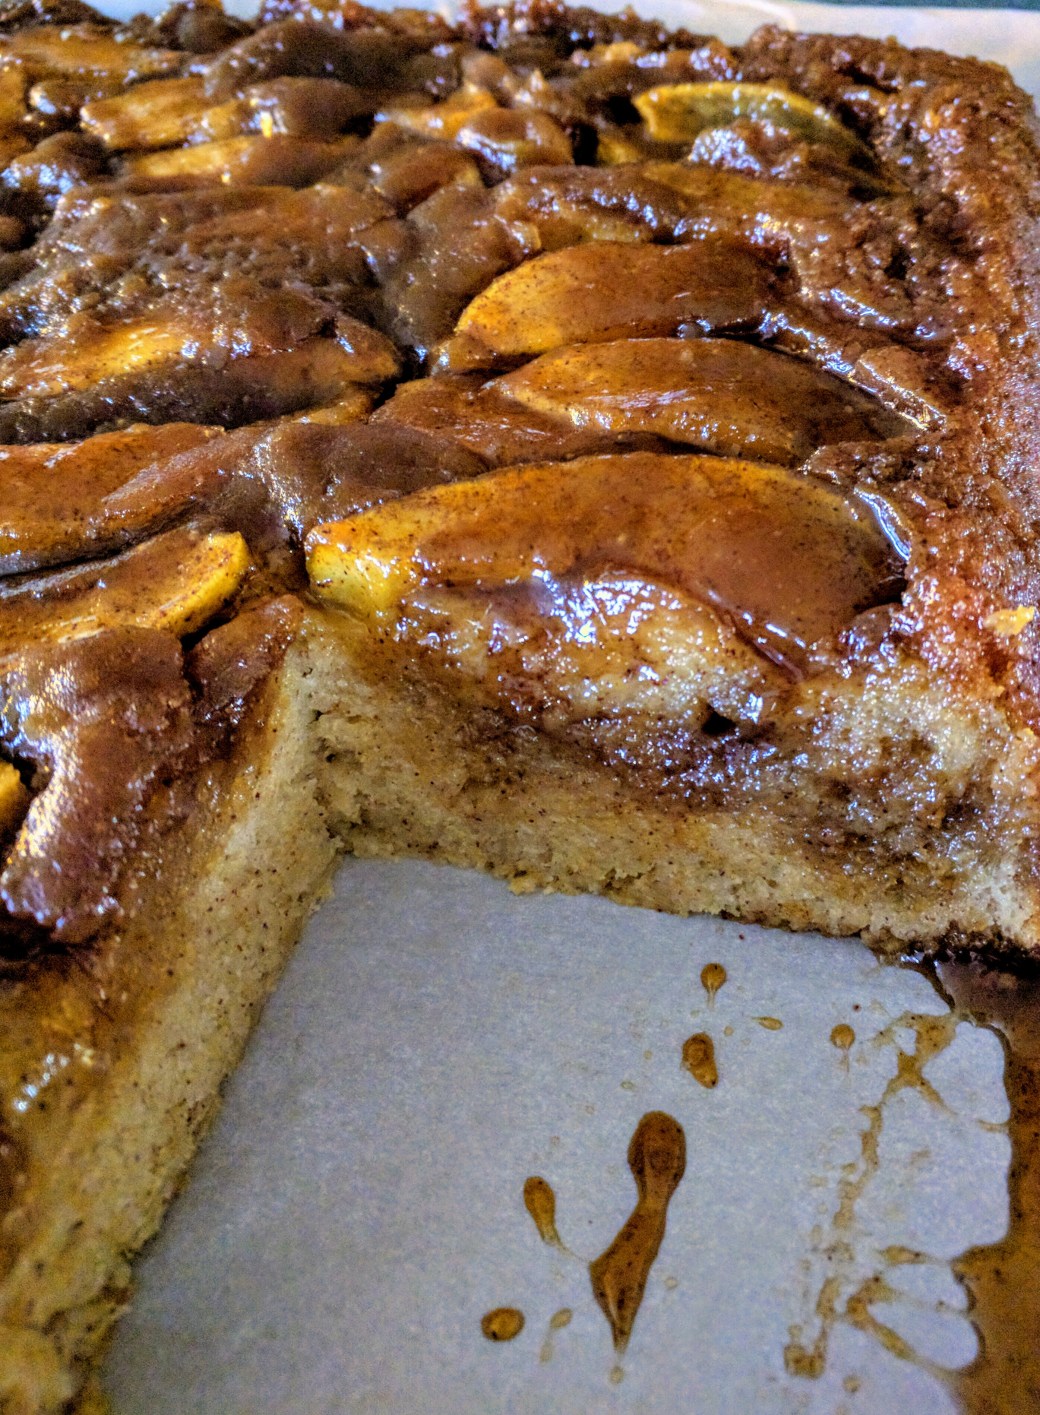
Fresh Apple Upside Down Cake
Bottom Topping:
1/2 Cup Butter ( 1 Stick )
2 cups Brown Sugar Packed
5 Medium size Apples washed peeled and sliced about ½ inch thick slices ( about 4 Cups )
In medium sauce pan melt butter and add sugar on medium high heat. Stirring constantly until mixture starts to bubble and sugar is dissolved. This will take about a minute to minute and a half. Remove from heat and pour into a buttered 9×13 inch baking pan. ( I use a glass baking pan, it seems to work much better). Lay sliced apples on top of sugar butter mixture, placing them very close together. The apples I used made 3 rows the full length of the pan. Set aside and let cool while you make the cake batter.
Cake Batter:
1 1/2 Cups All-purpose Gluten Free Flour with xanthan gum already added ( I used Better Batter)
2 Teaspoons Baking Powder
1/2 Teaspoon Baking Soda
2 Teaspoons Cinnamon
1 1/2 Cups White Granulated Sugar
1/2 Cup Butter Softened ( 1 Stick)
1/2 Cup Greek Yogurt
3/4 Cup Milk
4 Large Eggs Beaten
1 Tablespoon Vanilla
Preheat oven to 350*
In large mixing bowl whisk together all dry ingredients. Then fold in butter, yogurt, milk beaten eggs, and vanilla. Mix with electric mixer on high until well blended. (Note: batter will not be completely smooth, the yogurt likes to stay a little lumpy, but that is what it’s supposed to do) When mixed, pour batter over apples in pan and bake for 48-50 minutes. When almost done the sugar will smell like it is about to burn, but don’t panic. This is just the sugar caramelizing. When cake is set in the center, remove pan and let cool about 10 minuets. Then slide a knife around the edges of cake and invert onto cookie sheet or serving platter. Slowly lift cake pan up and remove, letting sugar bottom, topping fall onto apples. Enjoy!
Please note: If you use a cake mix in this and try to bake at a higher heat with a shorter baking time, the apples will not get done.
Hamburger Gravy

It’s been a rough week at our house! We have been dealing with a water leak, so this is one of our go to comfort foods.
Hamburger Gravy
1 pound Lean Ground Beef
1 ½ Teaspoons Season Salt ( or season to your taste)
1/2 Teaspoon Ground Black Pepper (optional)
Gravy
2 Tablespoons Meat drippings ( or Oil)
2 Tablespoons All-purpose Gluten Free Flour
1/2 Teaspoon GF Baking Powder
2/3 Cup Warm Water
1/2 Teaspoon Salt ( or more, depending on your taste)
(optional) ½ Teaspoon Ground Black Pepper
2 Cups Milk
In small mixing bowl whisk together flour, salt, pepper, baking powder and water. Let stand while browning meat.
In a 10 inch cast-iron skillet, on medium to high heat, break apart and crumble hamburger as it browns. When meat is cooked through, remove crumbled beef, but leaving the drippings in the skillet. Turn heat off and let skillet cool before pouring in flour water mixture. If you don’t have enough drippings then add 2 Tablespoons oil and slowly whisk in water, flour mixture. Turn heat back on, to high. Slowly whisk in milk, continuing to stir until gravy starts to bubble and thicken. Turn heat to low, and stir crumbled beef back into gravy. When gravy is almost done, turn off heat. As it cools it will thicken more. Serve with Gluten Free biscuits while still warm. You may want to add more seasoning according to taste.
Slow Roasted Grilled Chicken

Slow Roasted Grill Chicken
1 Whole Chicken ( gettry to the kind with no additives)
Rub
1/2 Cup Dark Brown Sugar
2 Tablespoons Garlic Powder
1 ½ Tablespoons Course Sea Salt
1/2 Teaspoon Black Ground Pepper
Preheat Grill to 300*
( Only the burners at each end. Leave the middle burners off)
NOTE: You can do this in the oven, it may not have the flavor that it will get from the grill.
In medium size mixing bowl whisk together all rub ingredients.
Remove giblets from inside bird and wash whole chicken very well, including the inside. Place whole chicken into a greased 9×13 inch foil pan. Using your hands dip rub from bowl and start rubbing entire chicken with the sugar and spice mixture, on top and under the skin and inside the cavity also. When you have used all of the rub, place pan on grill in the center between the outside burners. Close lid and keep grill at 300 – 350*F. After the first hour start rotating the pan a half turn every 30 minutes. Also as juices start to fill the pan baste the chicken with those juices. Try not to open the lid unless it’s time to rotate pan. Roast a total of 3 hours or until a meat thermometer is inserted into the thickest part of the bird and internal temp. is 165* F. or 75*C. (The last 30 minutes of cooking time, remove bird from pan and place over grate with fire under it, to crisp the skin for 15 minutes on each side.) Save drippings in pan to pour over chicken and serve! Enjoy!
Fresh Strawberry Lemonade
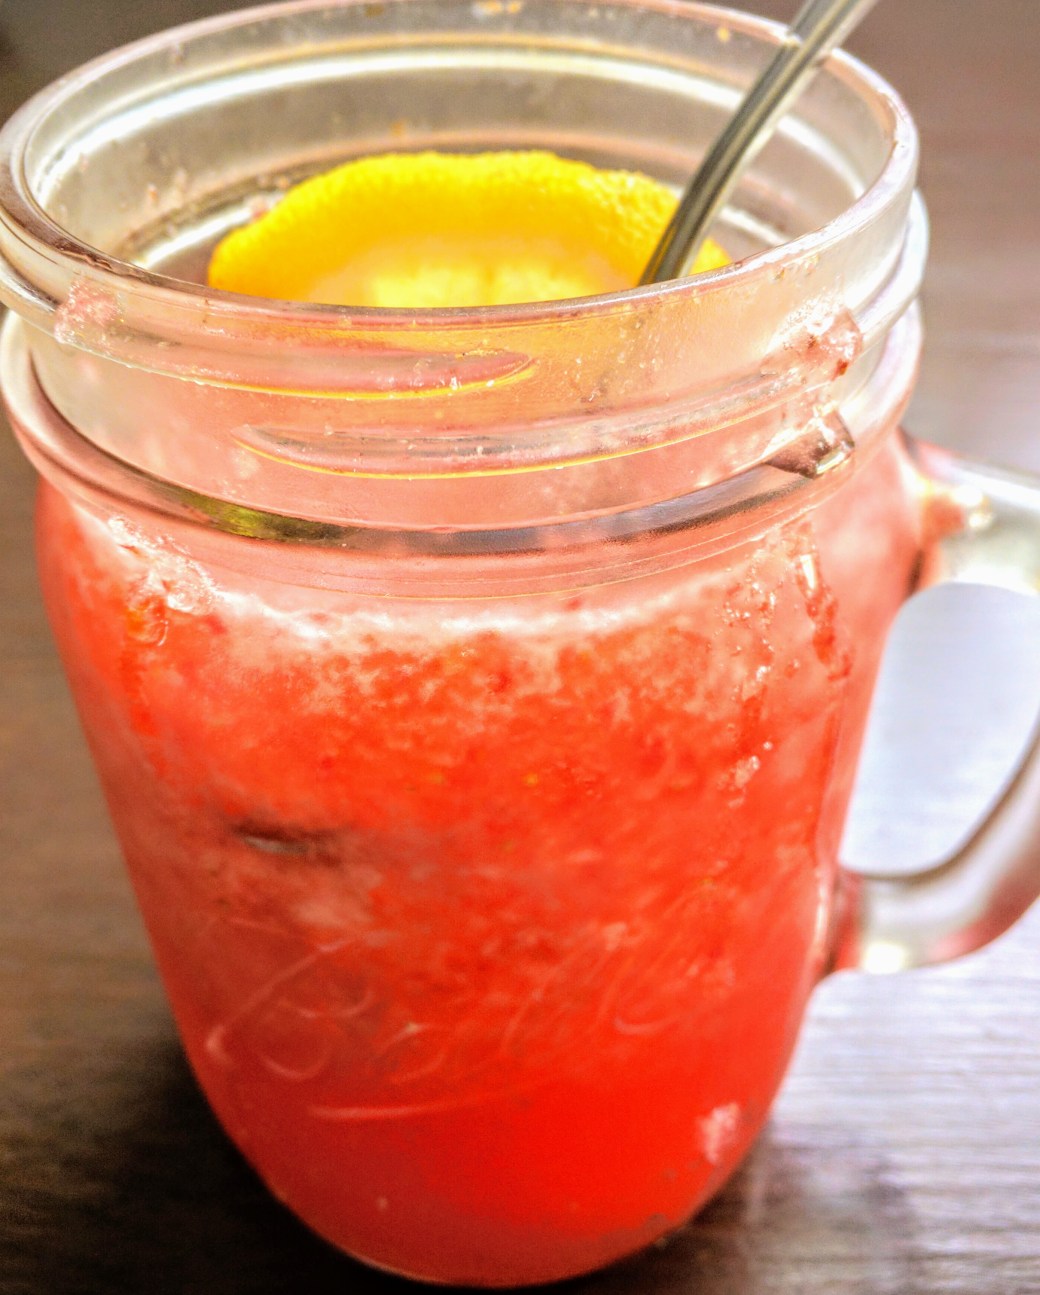
Fresh Strawberry Lemonade
The Juice of 2 Lemons ( about 1/2 Cup )
2 Cups whole Fresh Strawberries ( you can use frozen)
2 Cups Cold water
2 Cups Ice
1 Cup Organic Agave Nectar
Pour lemon juice and other ingredients into blender on crush setting and blend until all berries and ice is completely crushed and liquid. Pour into container and place in fridge (or freezer) until ready to serve. Makes almost 1/2 Gallon.
I like to place it into the freezer until slushy and serve on a HOT summer day!
No Crust Garden Quiche
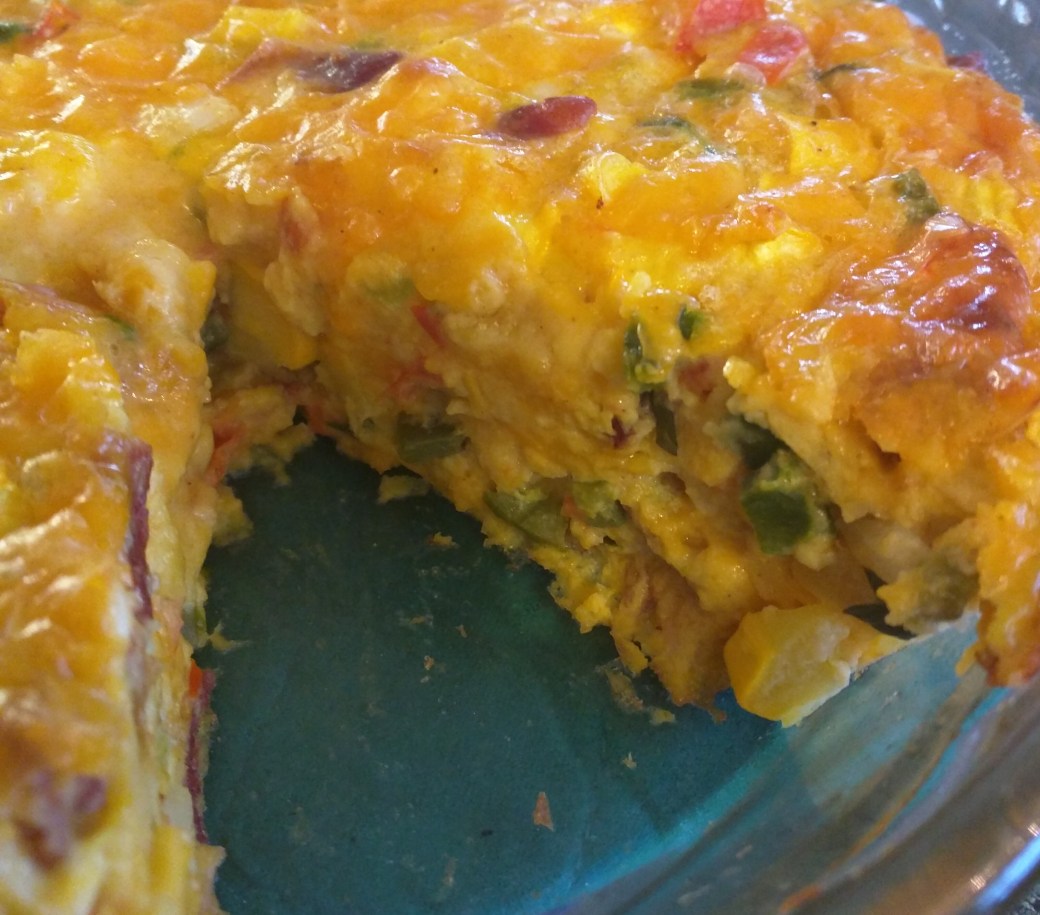
No Crust Garden Quiche
8 Eggs
1/2 Cup Milk
1/2 Cup Gluten Free all-purpose flour
1 medium yellow Squash, peeled seeded and chopped (about 2 cups)
1 Bell Pepper, seeded and chopped
1-2 Jalapenos’ seeded and finely chopped
1 medium Tomato, chopped
1 medium Sweet Onion, chopped
4-5 Minced Cloves of Garlic
1 Teaspoon Salt
2 cups Grated Cheddar Cheese
6-8 Slices Cooked Bacon, crumbled
Preheat oven to 350*F
In medium bowl break eggs, add milk and whisk together. Sprinkle in flour and whisk together until smooth. In another large bowl, add all chopped veggies. ( I like to chop all of my vegetables ahead of time and store them in the fridge until I’m ready to use them, they will last 2-3 days.) When you are ready to make the quiche sprinkle salt over veggies and stir in, fold in grated cheese and bacon. Then pour egg mixture over veggie mixture and fold together. When completely mixed pour into a greased deep dish pie plate. Bake for 35- 40 minutes or until set in the center. Serve warm. Enjoy!
Another do ahead tip: Fry extra bacon a day or two before you get ready to make your quiche.
Cucumber Mint Thirst Quencher
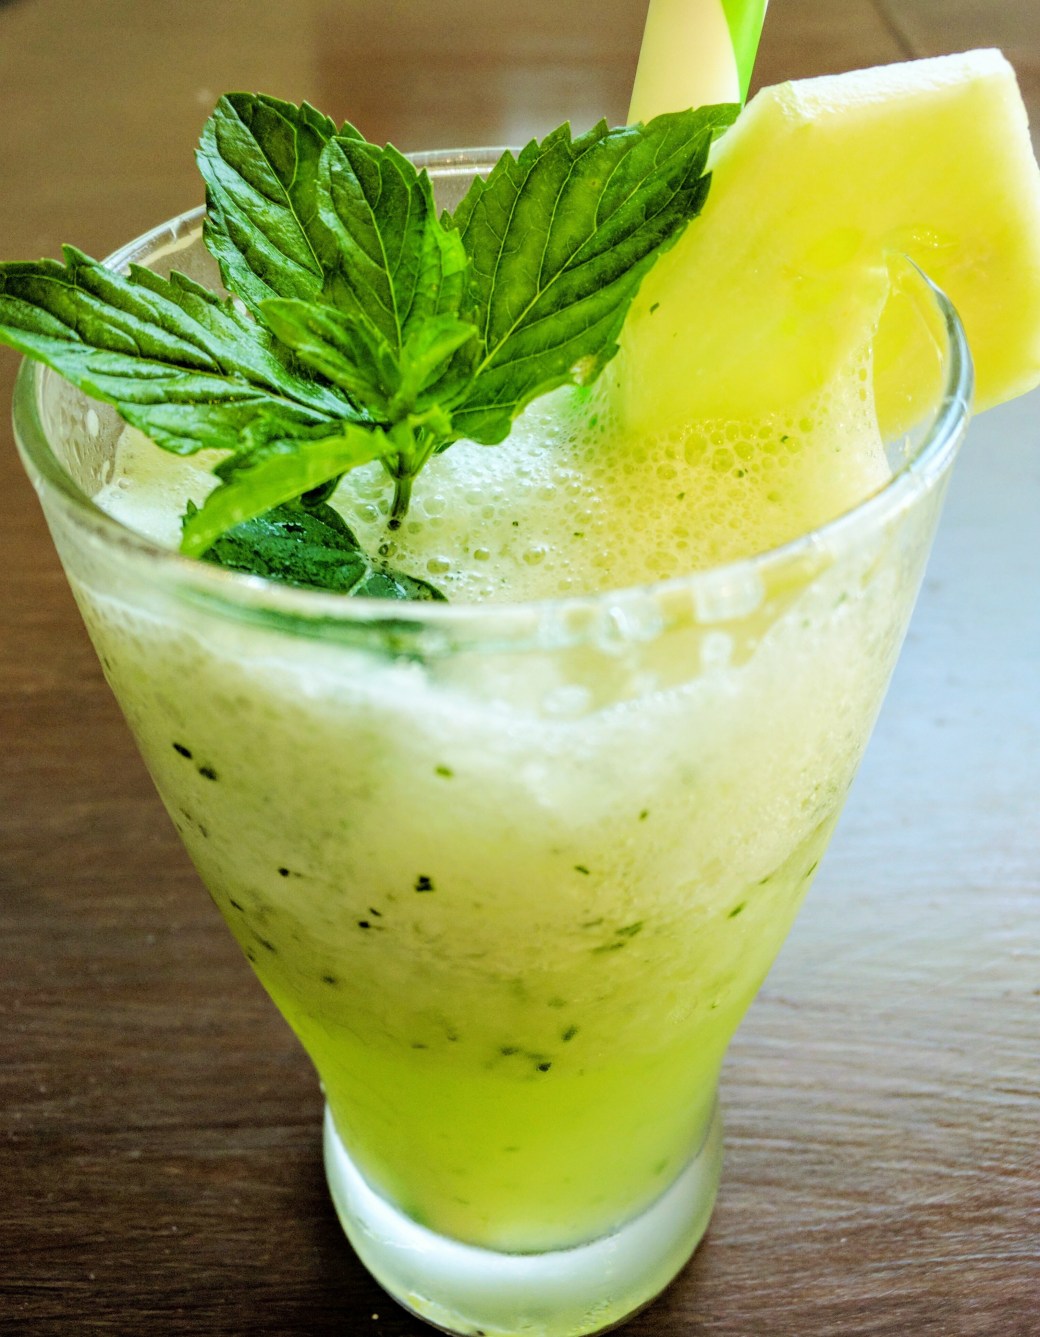
Cucumber Mint Thirst Quencher
2 Cups peeled, seeded and cubed Fresh Cucumber ( about 4 -5, 5 inch Cucumbers)
1/4 Cup chopped Fresh Mint Leaves
4 Cups Ice Cubes
2 Cups Cold Water
1/2 Cup Organic Blue Agave Nectar
Place all ingredients into large blender, set to crush and blend until ice and cucumbers are well blended. Serve cold. Enjoy!!!
Independence Day 2017

Deli Style Broccoli Salad
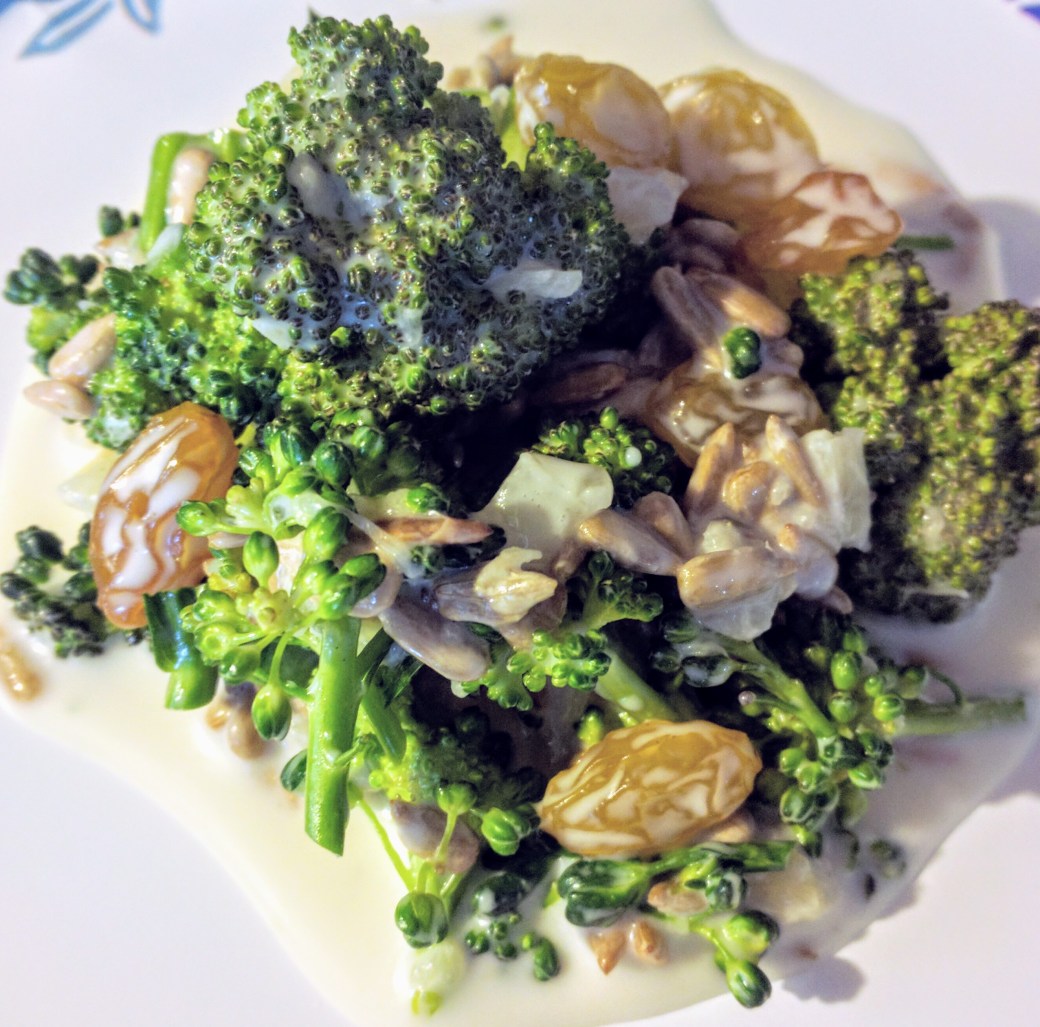
Deli Style Broccoli Salad
2 Small heads of fresh Broccoli about 4 Cups of Florets
1/2 Cup Golden Raisins
1/2 Cup Roasted and Salted Sunflower Seeds
1 Large Shallot or Green Garden Onion Chopped
Optional: 1 cup shredded carrots
Dressing:
1/2 Cup Crushed Pineapple with juice
1/2 Cup Gluten Free Mayonnaise
2 Tablespoons Stevia or Sugar
In medium size mixing bowl, cut up broccoli florets to bite size pieces. Add raisins, sunflower seeds, and onion. In small bowl mix pineapple, mayo, and sugar. Whisk together until smooth and pour over broccoli mixture. Refrigerate until chilled, serve cold. Enjoy!
Gluten Free Squash Fritters
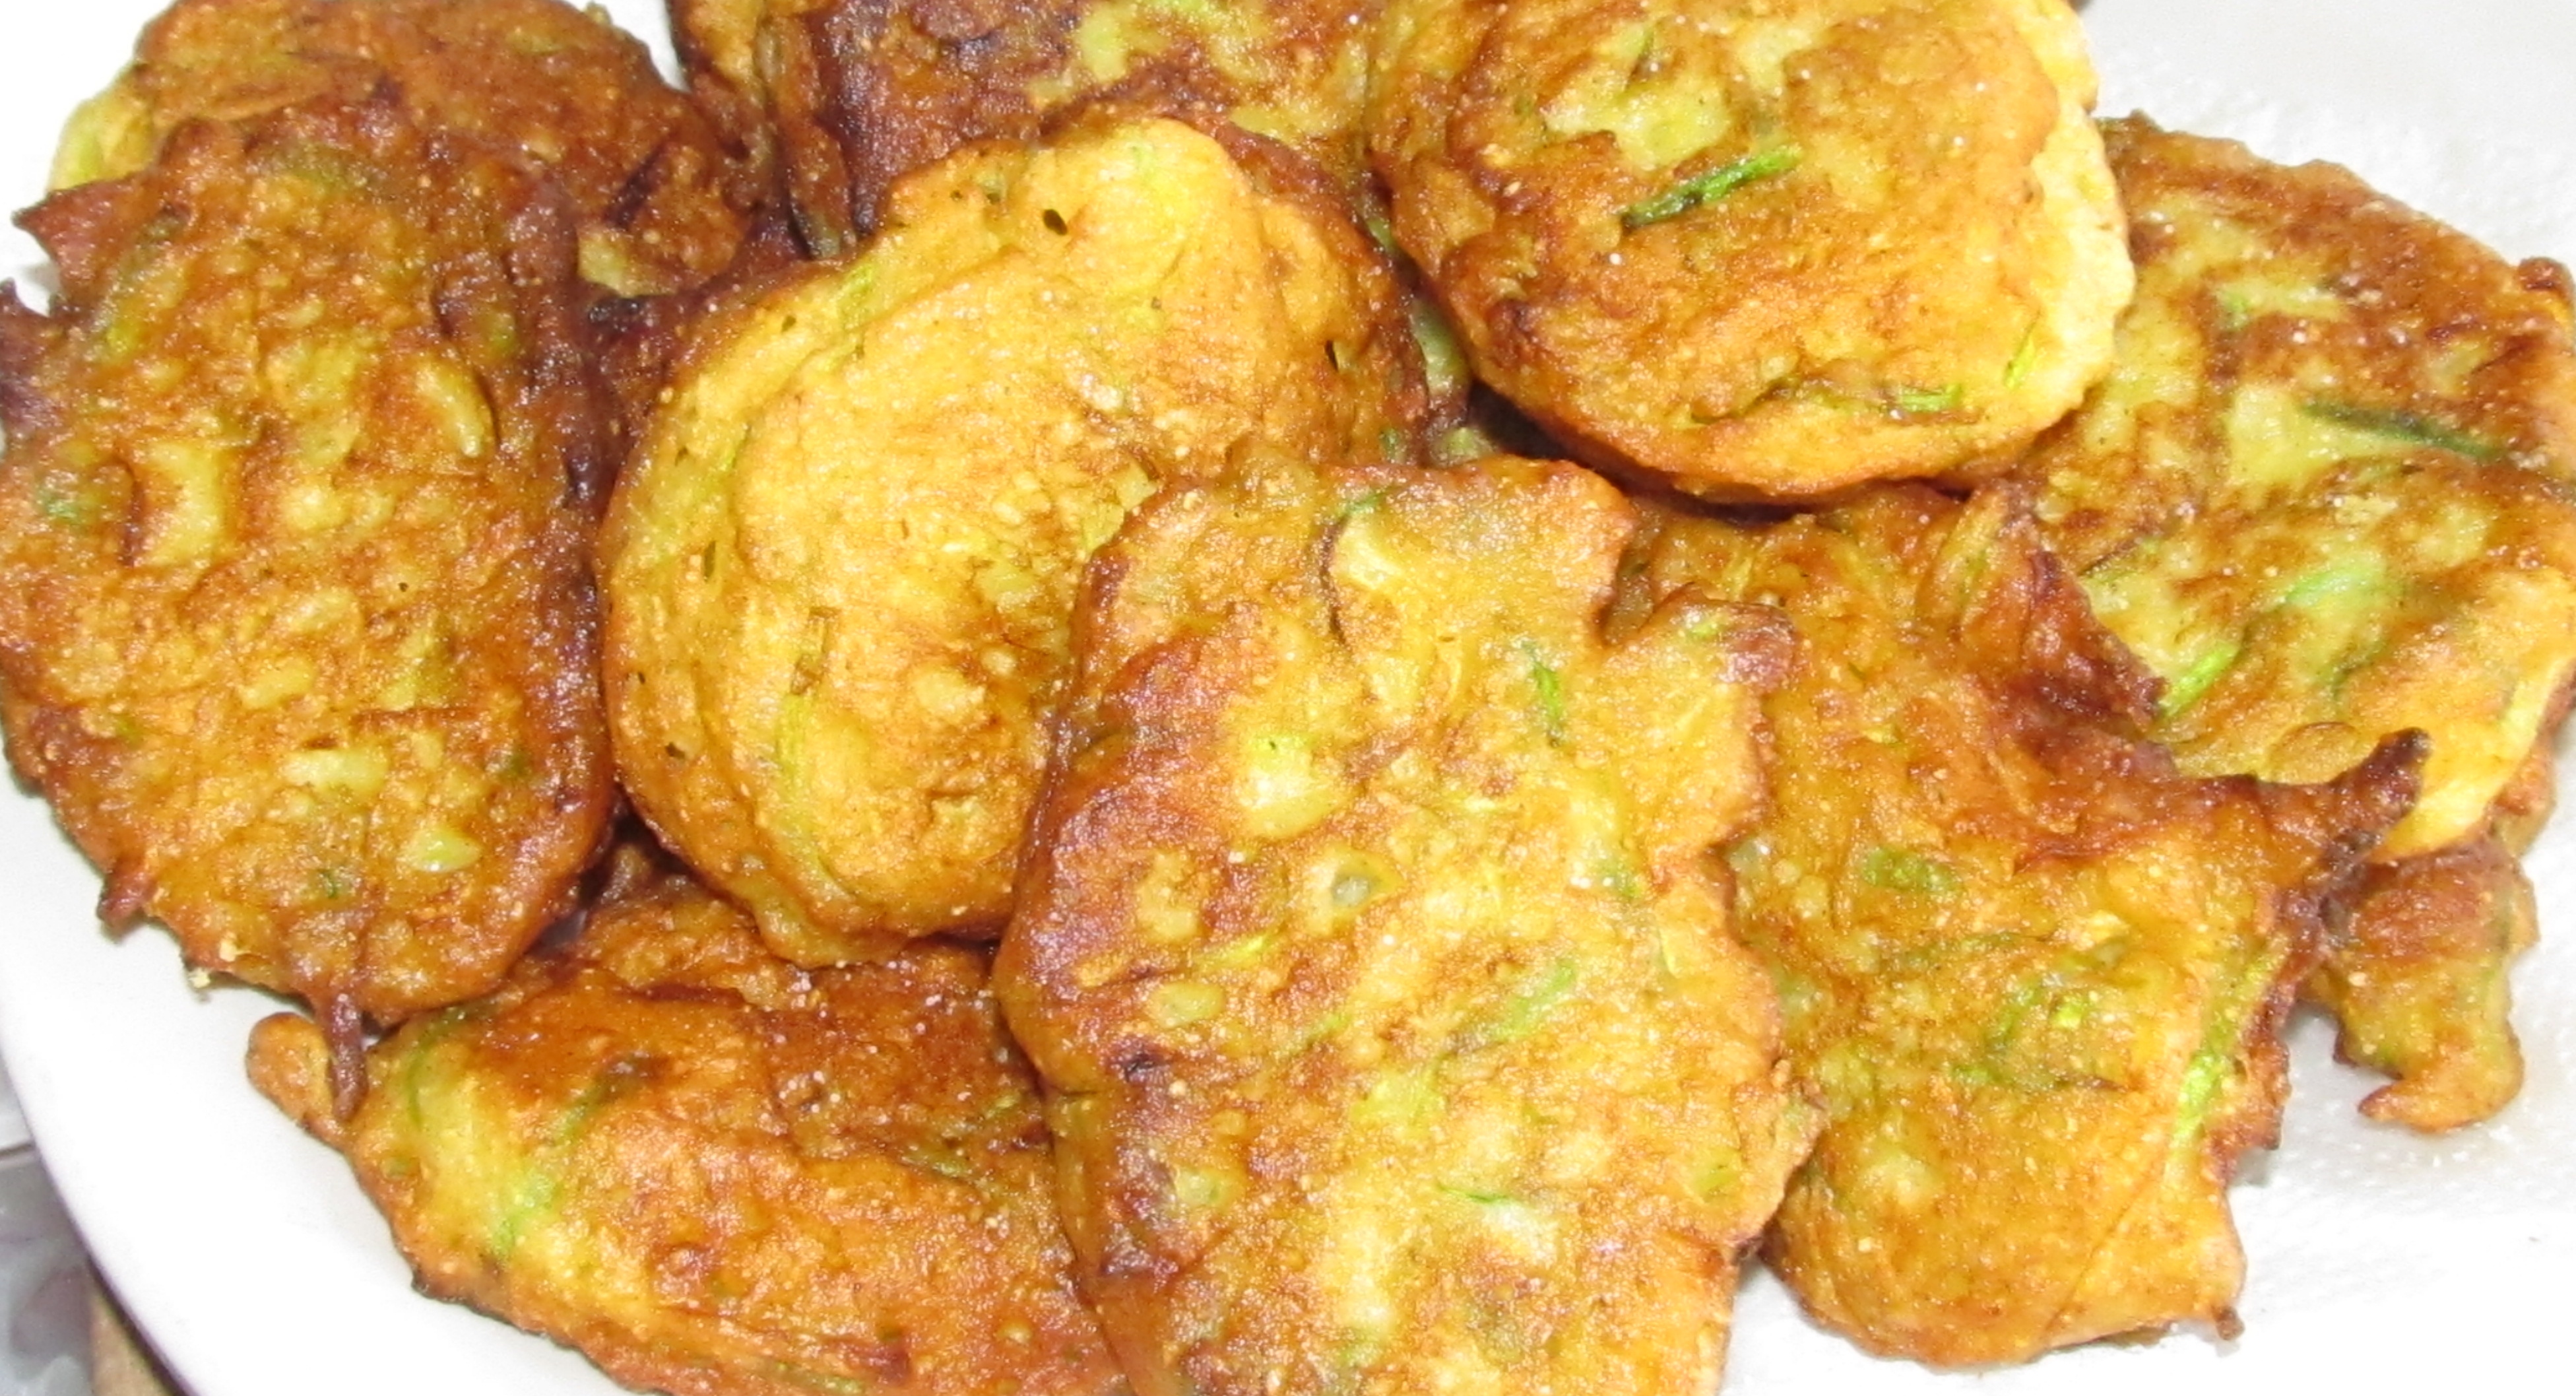
Gluten Free Squash Fritters
2 1/2 Cups Shredded Squash (zucchini, yellow, or any squash you prefer)
1/2 Teaspoon Salt
2 Eggs beaten
1/4 Cup Water (or milk)
!/2 Cup Chopped Onion (optional)
1 1/2 Cups GF Corn Bread Mix ( I used Bob’s Red Mill)
1/2 Cup GF Oil ( or enough oil to pan fry)
In medium size mixing bowl mix shredded squash and salt. Let set while you beat eggs and water together and cut up the onion. ( The salt will help bring out the moister in the squash) Then add eggs, water, onion and corn meal. Stir until corn bread mix is wet and well incorporated. Pour oil into 10 inch skillet and heat on high. When oil is hot drop squash batter by spoonful’s into oil and fry fritters 3- 4 minutes on each side or until golden brown. Remove from pan and drain on paper towels. Serve while warm and crispy!
Variations: Add chopped jalapenos’ or minced garlic.
Change out the squash for fresh cut or frozen corn (drained) to make corn fritters.
Cherokee Huckleberry Bread


Cherokee Huckleberry Bread
*Oklahoma Huckleberry/Blueberry Season*
2 1/4 Cups all-purpose Gluten Free Flour (Reserve 1/4 Cup for coating berries)
2 Teaspoons Baking Powder
1 Cup White Granulated Sugar
1 Stick Melted Butter ( 1/2 Cup)
1 Cup Milk
3 Eggs Beaten
2 Cups Huckleberries washed and stemmed ( or Blueberries )
Preheat oven to 350*
In large mixing bowl, whisk together 2 Cups of the flour, baking powder, and sugar. Then add melted butter, milk and beaten eggs. Mix ( by hand or with mixer) until batter is smooth and all dry ingredients are gone. In a small bowl sprinkle fresh berries with the ¼ cup of flour, turning them over by hand so you don’t mash them, completely coating berries with flour. Lift berries out of the excess flour and place them into the batter. Gently fold berries into batter. Then pour batter into a buttered 10 inch cast iron skillet. Bake for 40 – 45 minutes or until bread is set in the center and brown. If you want additional browning on top place under broiler for about 1 minute. Remove from oven, let cool and serve. We like to dust each slice with a little powdered sugar, or eat it with ice cream.
Beef with Sour Cream Herb Sauce

Beef with Sour Cream Herb Sauce
1 Pound Lean Ground Beef
2 Chopped Green Onions (or scallions)
2 Tablespoons Fresh Chopped Oregano
1 Tablespoon Fresh Chopped Parsley
3 Tablespoons Gluten Free Worchester Sauce
1/2 Cup Sour Cream
1 Cup Warm Water
2 Tablespoons Gluten Free all-purpose Flour
1/2 Teaspoon Salt
In medium skillet brown ground beef on medium high heat. When beef has lost almost all of the pink, then add onions and herbs. Raise the heat slightly and stir to break up any large clumps until beef is completely brown. Then turn off heat and let set until you get the sauce ready. In small mixing bowl, whisk together sour cream, water, flour and salt. Turn heat back on under skillet to medium high, then pour sauce mixture over meat and stir until thick. Remove from heat and serve warm over Gluten free pasta. Enjoy!
Note: If you use dry herbs only use half the amount.
Grilled Garden Veggies


Grilled Garden Veggies
2 Medium Yellow Squash
3-4 Green Onions ( or scallions)
1 Medium Head of Broccoli
Optional- 1 Bell Pepper or Jalapeño
2 Tablespoons Light Olive Oil
1 Tablespoon Softened Butter to grease pan
1 Teaspoon (additive free) Season Salt
½ Teaspoon Sea Salt
1 ½ Teaspoons Garlic Powder
Preheat Grill to 375- 400*
Butter a 9x 13 inch foil pan, or you can make a pan out of foil, but be sure and double layer it.
Wash and slice the squash and onions into 1/4 inch slices, then break apart Broccoli florets and place in pan. Drizzle oil over veggies and toss to coat. Then sprinkle seasoning salt, sea salt and garlic powder over veggies. Cover loosely with foil and place on grill. Close lid and let veggies stem for about 10 minutes. Raise lid and uncover veggies and toss them using a long spatula. If you want grill marks on some of the veggies take out a few of the squash slices and broccoli florets with tongs and place on a well oiled grill grate. Let them brown only for a minute or two, then return veggies to pan. Close lid on grill and cook for another 15- 20 minutes or until veggies are fork tender. Serve warm.
Southwest Ranch Salad
Gluten Free Southwest Ranch Salad

Southwest Ranch Salad
4 Cups chopped baby Kale
2 Cups Fresh or frozen cut Corn
1 Avocado peeled, seeded and cubed
1- 16 oz. can Bush’s Gluten Free Dark Red Kidney Beans (Drained)
10 -12 Small Red Cherry Tomatoes cut in half
Optional 1 Diced Jalapeno
1 Cup crushed Gluten Free Corn Chips
Assemble all vegetables in large serving bowl and top with corn chips. Mix dressing using recipe below and pour over salad just before serving.
Dressing:
1/3 Cup Gluten Free Mild Salsa
1 Cup Gluten Free Ranch Dressing (see recipe below using the yogurt to make it thicker)
Add salsa and ranch dressing to small mixing bowl whisk together, and pour over salad just before serving.
Gluten Free Ranch Seasoning Mix
2/3 Cup GF Dry Buttermilk (Saco Cultured Dry Buttermilk)
2 Tablespoons Additive Free Dried Parsley Leaves
2 Teaspoons Additive Free Dried Dill Weed
1 Tablespoon Salt
½ Teaspoon Pure Black Pepper
4 Teaspoons Additive Free Onion Powder
1 Teaspoon Additive Free Garlic Powder
Process in food processor until dill and parsley are completely ground fine. Store in a labeled container, in the refrigerator or freezer.
GF Ranch Salad Dressing
4 Teaspoons Dry Ranch Seasoning Mix (See Recipe above)
1 1/3 Cups Pure Butter Milk ( to make dressing thicker use half butter milk and half plain GF Greek yogurt )
1 Teaspoon White Vinegar
2 Teaspoons Sugar
1 Teaspoon Salt
1 Teaspoon GF Lea and Perrins Worcestershire Sauce
½ Teaspoon Kikkomans GF Soy Sauce
Place all ingredients in pint canning jar and whisk together. Put lid on jar and store in refrigerator.
Strawberry Thyme Frozen Yogurt Pie


Strawberry Thyme Frozen Yogurt Pie!
2 Cups fresh washed stemmed and sliced Strawberries
2 Tablespoons Fresh chopped Thyme (if you use dry, then only one Tablespoon)
1 Cup plain Greek Yogurt
1/2 Cup Stevia (you can add more or less of your favorite sweetener to your taste)
1 Gluten Free Graham cracker pie crust
Place strawberries, thyme, yogurt and sweetener into food processor. Chop on the puree setting until strawberries are finely chopped and other ingredients are well mixed. Pour into pie shell and freeze for at least 2-3 hours or until pie is set. Serve frozen, Enjoy!
This recipe also makes great yogurt popsicles, minus the pie crust of course!
Garden Duck Project
Garden Ducks
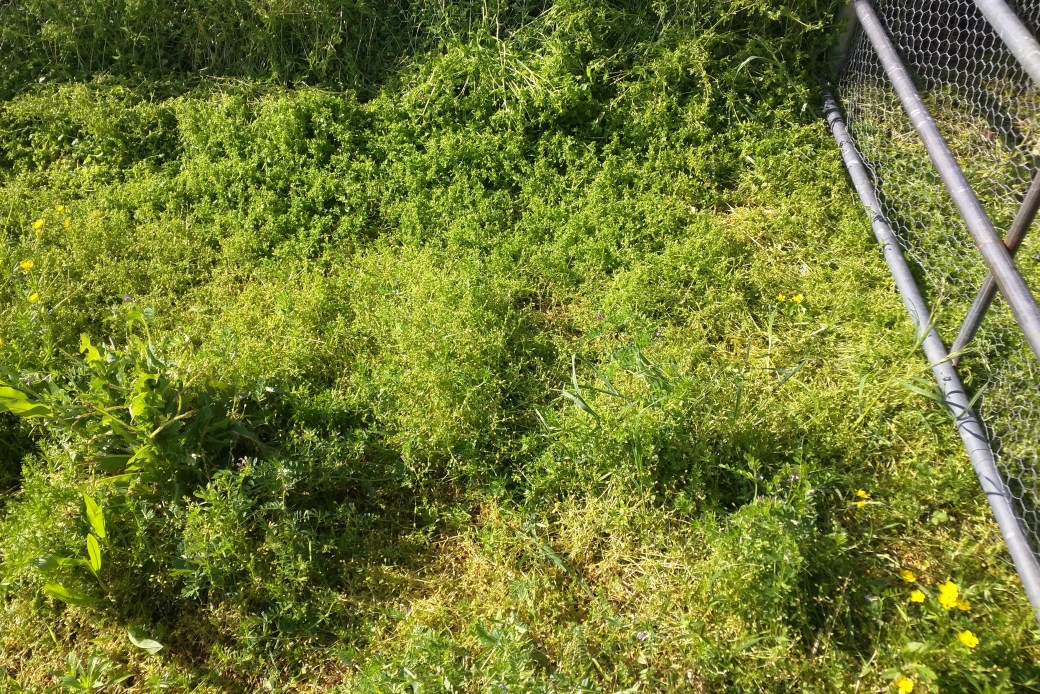
We have always had a very large garden, but it was just too big for us to take care of, so last year we decided to cut down the size of the garden. Actually we cut it in half and have been mowing one end of it. I know with all of the modern chemicals and additives they have now, makes gardening easier, but I absolutely refuse to use any herbicides or pesticides in or around our garden or my herb beds! If you have ever gardened, then you know it can be exhausting back breaking work to keep up with the grass, weeds harmful bugs, and feeding the plants in your garden! Even though we did cut down the size, it was getting to be more than I could keep up with….So I had an idea!
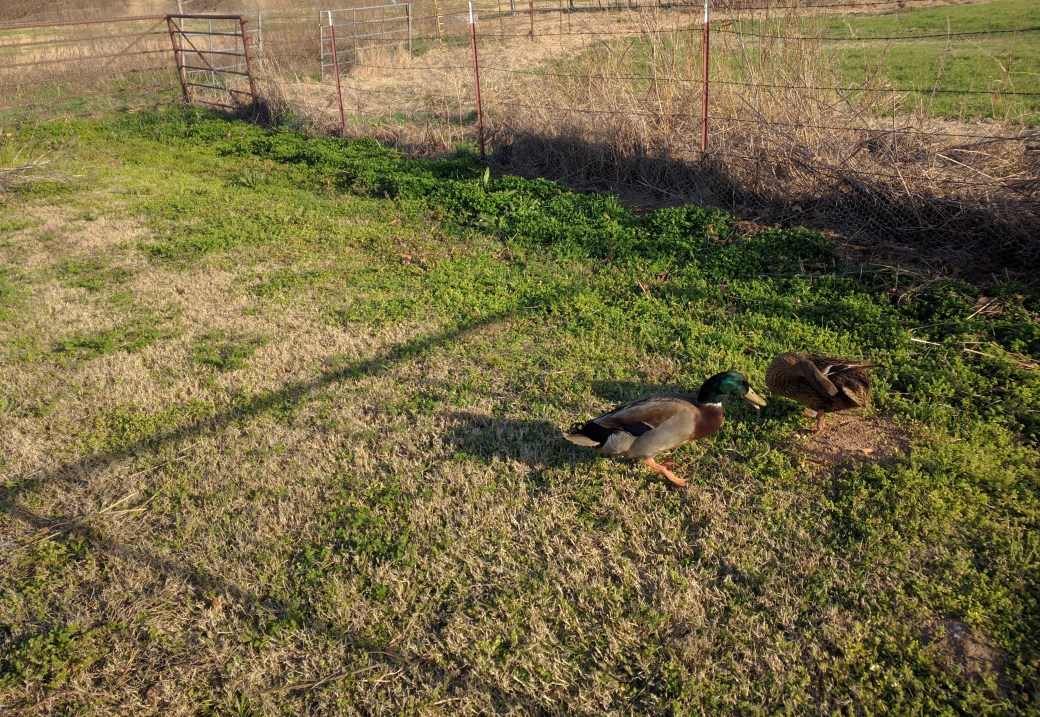
Earlier this year, my Mom decided she didn’t want the two Rouen Ducks she had; ( they didn’t get along with her chickens) so guess what? Yep I took them. What can I say I like Ducks, and I had heard that they are sometimes used in the garden to help control insects and grass. So I did some research and with the help of my Grandsons we put up a fence around the end of the garden that we had been mowing and lined the outside fence with chicken wire. I put the two Rouen Ducks that Momma had given me at that end and they got busy, but it was still too large of an area for only the two Ducks to take care of. So I jumped off into the deep end and ordered Fifteen more Ducks! (By the way, my husband thought I had lost my mind!) I got fifteen baby Runner Ducks from the Hatchery. They were one day old, and thus the Garden Duck Project started!

If any of you have raised Ducks I would love to hear from you! Even though I was raised on the farm and ranch all of my life, we never had Ducks. So I’m learning and can use all of the help I can get!
The Runner Ducks are now Two Days Old 3-23-2017
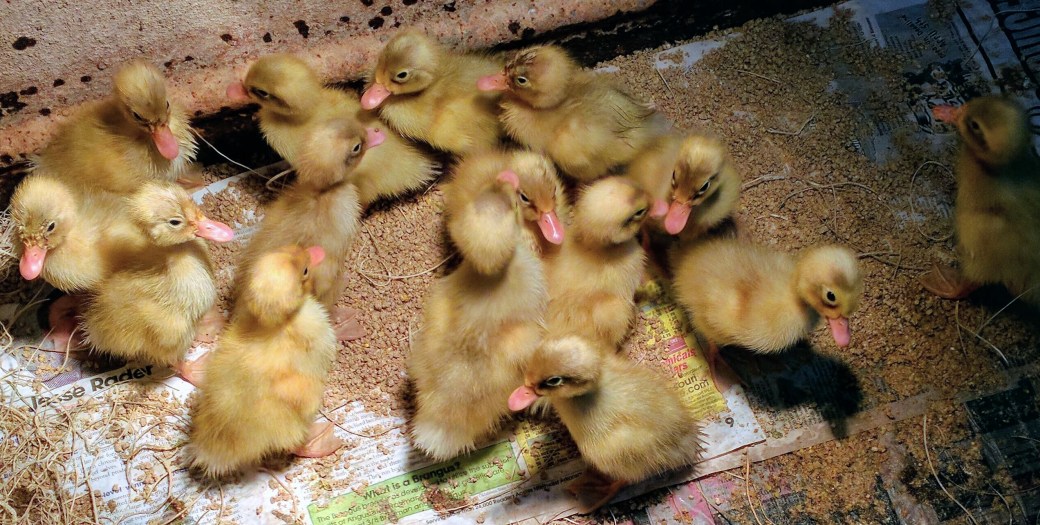
I had no experience with ducks and my Mom only had limited experience with the two Rouen Ducks, so I asked the Hatchery to send me some info, and of course I went to Pinterest. The Hatchery recommended non-medicated Chick starter to feed them. *(Be aware that the feed does contain Gluten, so you may need to wear gloves and a mask)* Ducks cannot have any kind of medicated feed. Simply because they eat so much they will overdose themselves on the medication. Believe me they do love to eat!!! I gave them free choice as much as they wanted, and those 15 babies were going through A LOT of feed!
Ducks do grow much faster than chickens, but they still need heat like a baby chick. Since we didn’t have a chicken house or Duck house yet, and both barns are open, so I had to use the shop to put them in. Since we have predators,( coyotes, raccoons, owls, etc.) roaming around at night then I had to put them in a secure place. I rounded up an old stock tank with holes in the bottom, and lined it with newspaper, and drug it into the shop. Then found some heat lamps and put at each end of the stock tank. The ducks loved it! I had to change the newspaper out daily because they do like to splash their water and they do poop a lot. But that’s fine. That is exactly what ducks are supposed to do. (They will also help fertilize the garden.)
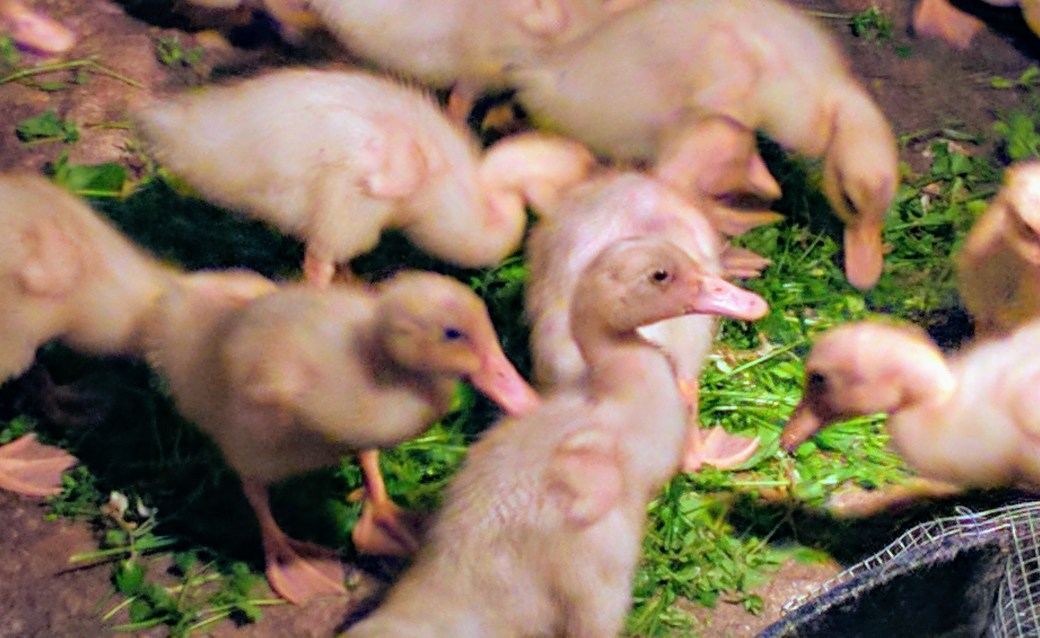
The Ducks are now Seven Days old 3-28-2017!
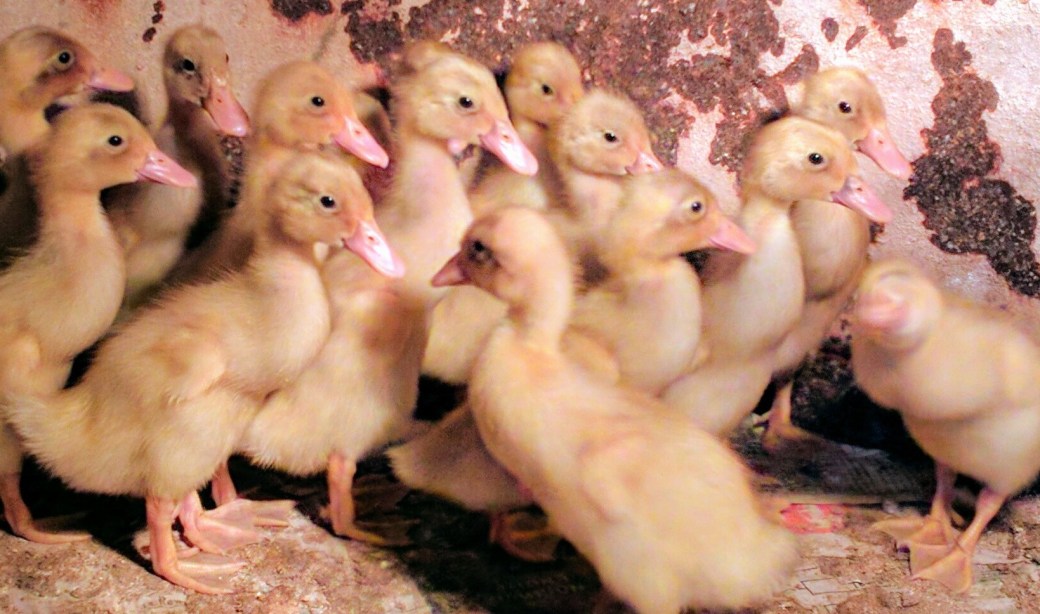
Ducks really have such a different personality than any other farm animals we have ever had. Notice the little smarty on the right!
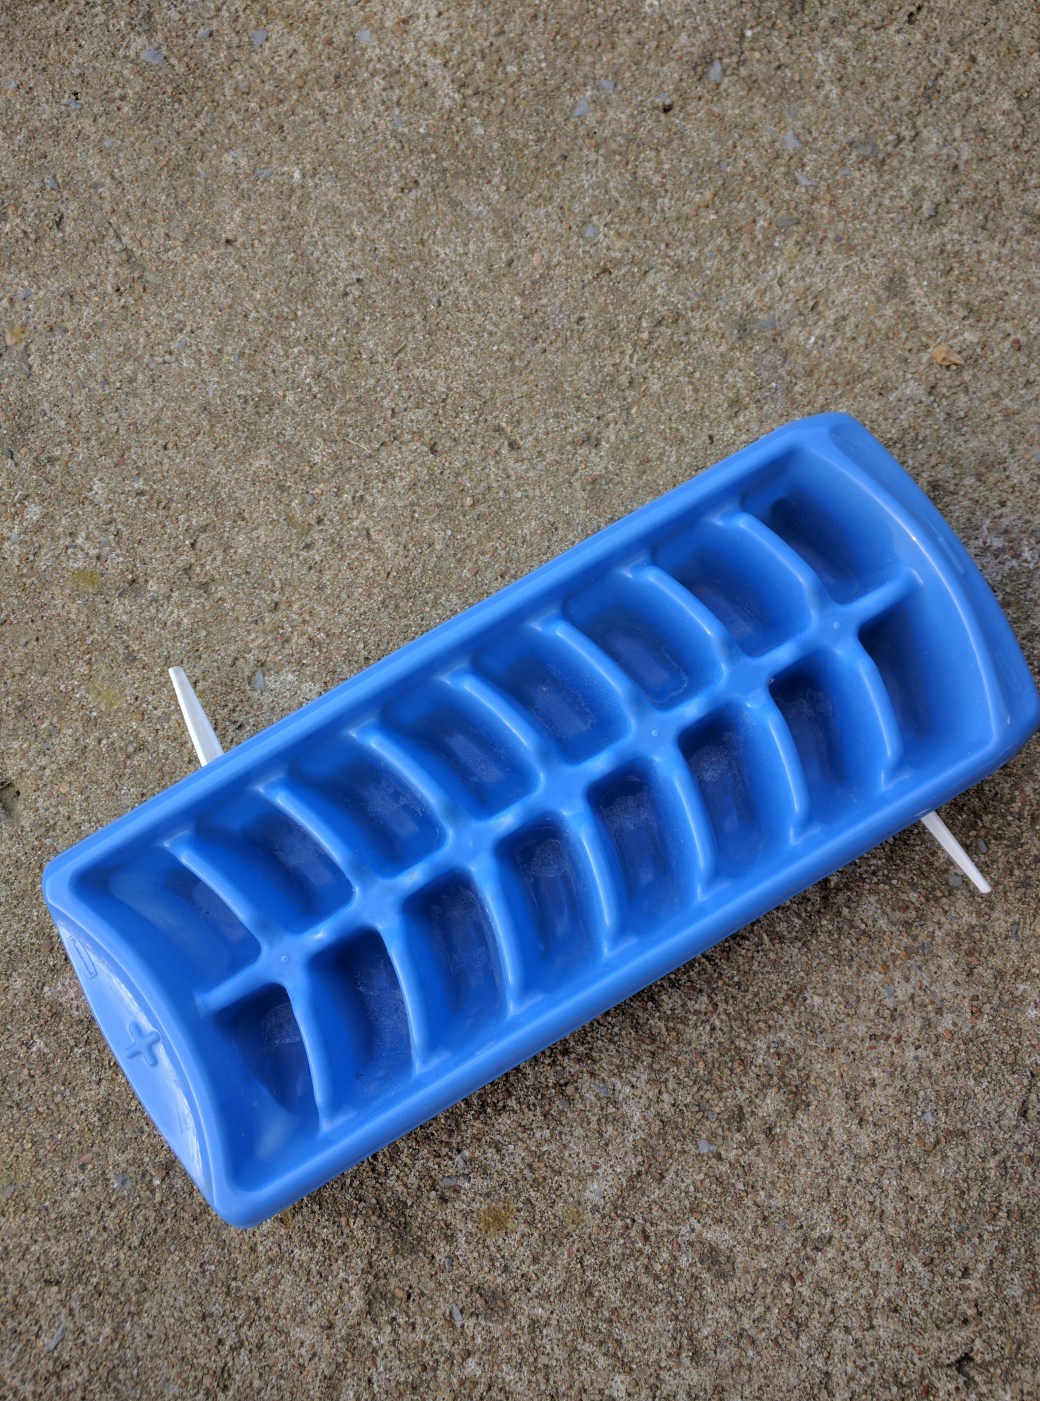
While the ducks are small you have to keep them warm and hopefully dry. That is not an easy thing to do with ducks! They really like to climb into their feed and water. At first I just spread feed on the newspaper and tried to water them in a shallow pan. Well they soon started climbing into their water pan splashing water everywhere! Also one of them flipped over on his back in the water pan and needed help getting out. The pan was very shallow with less than two inches of water, but still I didn’t want any of them to drown. So of course I went back to Pinterest and started looking for a low cost way to water them. Someone used plastic ice cube trays to water, but I knew they would tip them over so I taped a plastic knife to the bottom at each end of them for stability. It worked great! ( Oh and yes I did use Duct tape.)
The Ducks are now 2 Weeks old 4/4/2017
They are growing so fast and since it is getting warmer and I’m pulling weeds anyway, I thought I’d try giving them some Chickweed grass. They loved it! It was so funny they ran to the grass and just burrowed down into it while eating around themselves. I’m still feeding them Chick starter and a lot of water! They are up to almost a gallon of water a day. It is very important to keep water out for ducks, because they need it before they can swallow their food. I’ve seen them eat a lot of chick feed and hold it in the side of their throat then run to the waterer and stick their head all the way under water, then they stick their little beaks straight up in the air then swallow. LOL, then the lump on the side of their little neck will disappear.
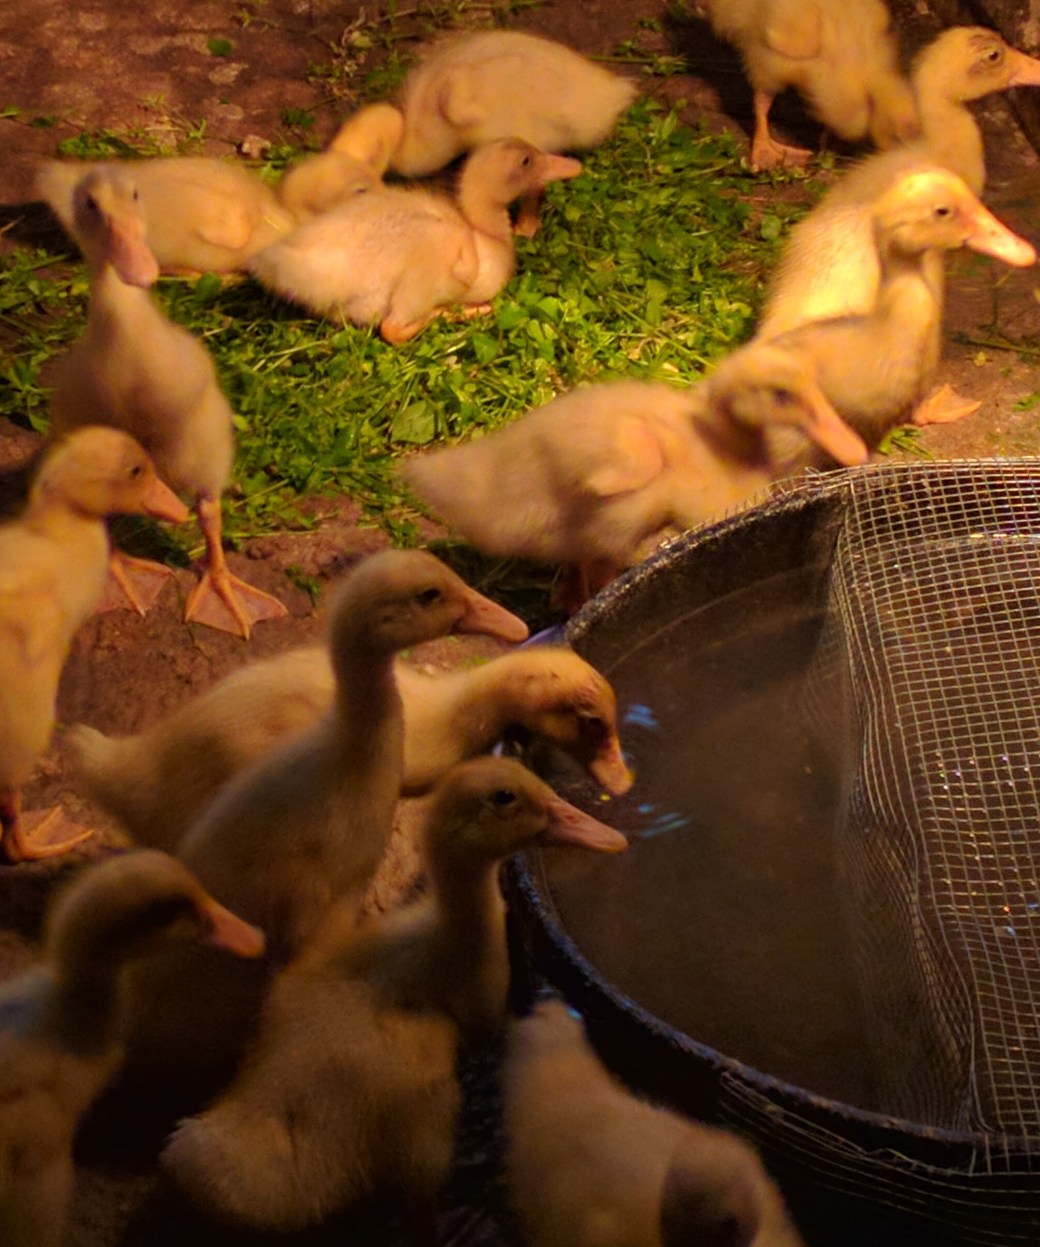
Since they are drinking so much water, I’m also trying a new water system. They still climb up into the ice cube trays, so in order to keep them from splashing so much water out I used a 3 inch deep rubber tub with wire over the top so maybe they won’t climb into it. We will see if it works?
The Ducks are now 3 Weeks old 4-11-2017, and they are outgrowing their area in the shop very quickly! Since we are having some warm days, I made a temporary day time pen for them outside the shop. The task of moving 15 ducks from one location to another is not easy though. I found the little wagon I had used for my Grandson’s when they were little and a plastic half barrel and put each duck into the barrel. They did not like it at all! In case you didn’t know, baby ducks do not quack. They peep and if you put them in a barrel they squawk! Loudly! And it gets even louder when you start pulling the wagon and the barrel slips to one side, nearly dumping them on the ground. We recovered quickly though and made it to the pen. Once I put them out onto the grass, they loved it! The Ducks immediately started picking bugs out of the grass and were very content. I also took the wire off of their waterer and they soon made a swimming pool out of it.

The Ducks are now 4 Weeks old, 4-19-17 and it is unbelievable how fast they are growing! I’m finding out that Runner Ducks are very hard to catch even in a small pen, and until they lose all of their down and get their regular feathers, we will have to keep them warm and in the shop at night. So I had to find a better system of moving them outside during the day, than the wobbly half barrel. Ta! Da! The Duck Wagon was invented! I found a pet carrier that fit perfectly on the little wagon and connected a board and plastic fencing with zip ties to make a little loading ramp. I’m finding out that Ducks learn very fast! I sprinkled a little feed in the bottom of the carrier and put them in. It only took a couple of times and they were running to get in. We have graduated from the stock tank in the shop, to a small pen. So no more chasing them around to catch them! This is great!
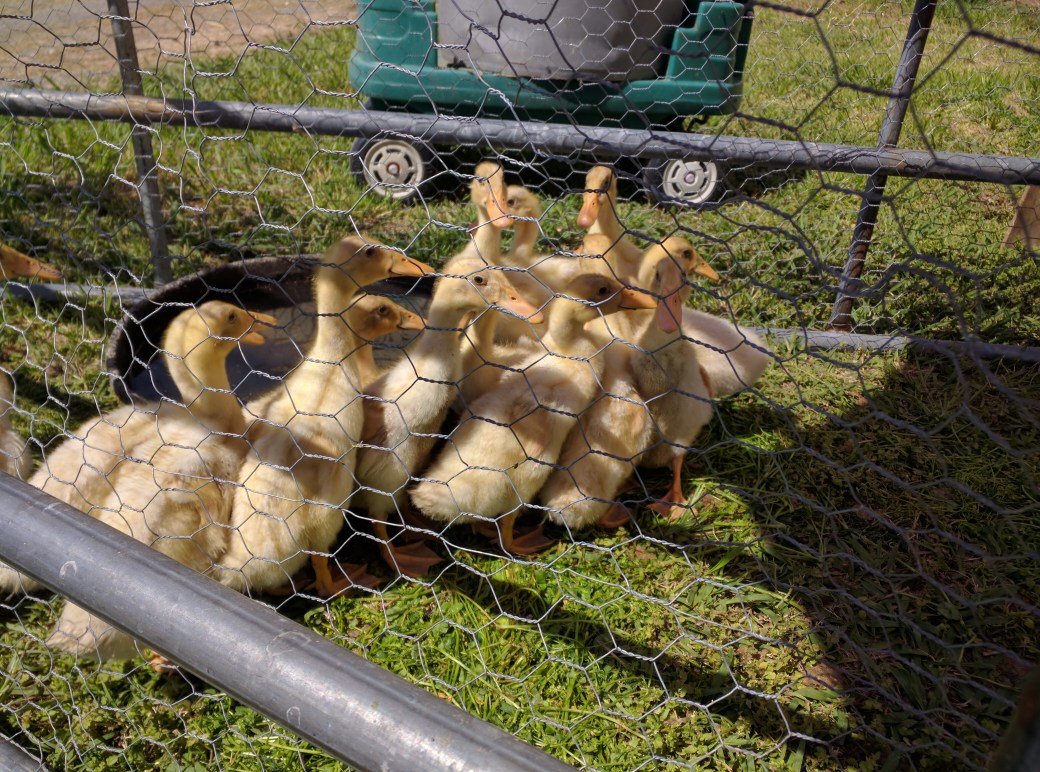
The Ducks are now 5 weeks old 4-25-17 and they have lost a lot of their down feathers now. Their new feathers are much darker and so pretty!
Now that they load themselves in the Duck wagon, we are going to the garden every day. I set up a pen away from the Rouen Ducks, so that the Runners could eat grass and bugs. The above photo is just a few days before I started putting them in, this photo is after they have grazed on the grass and weeds only for 2 days.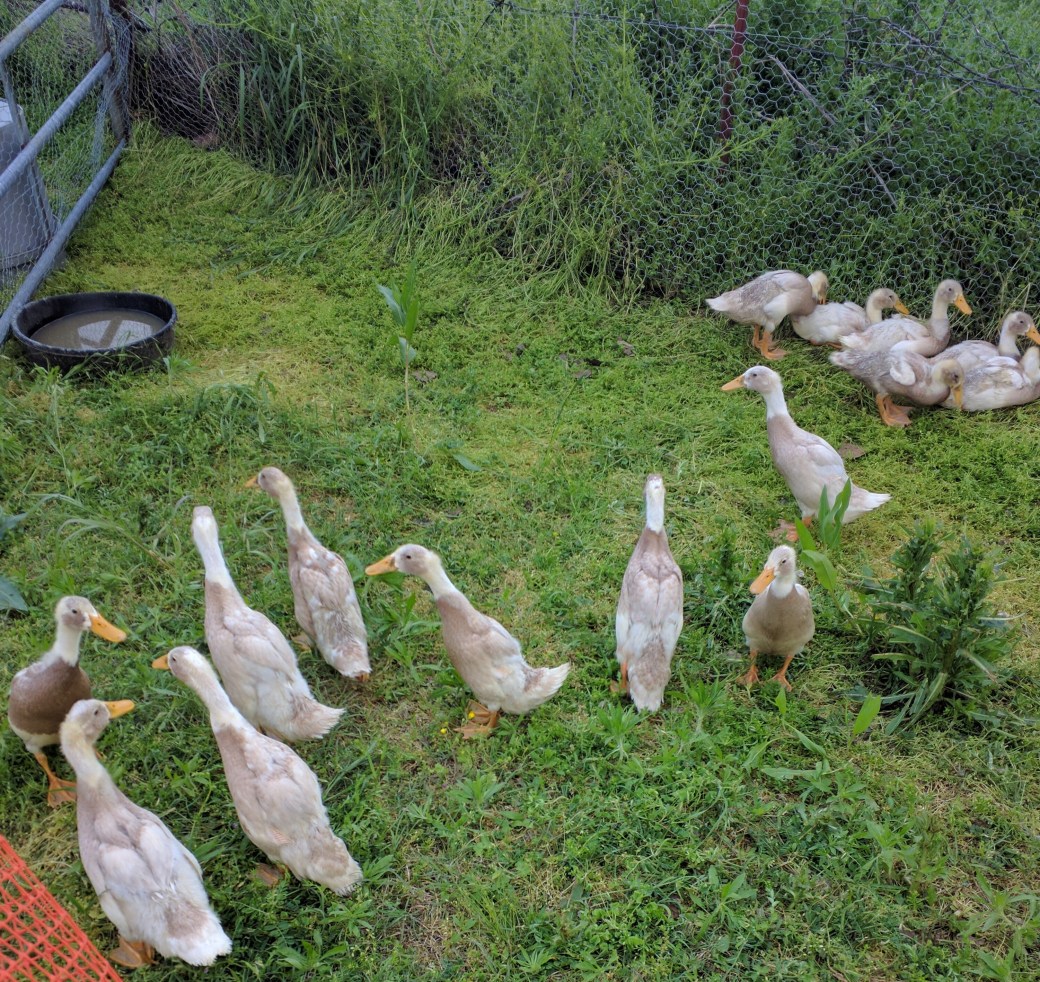 For very young ducks I think they did very well! Of course they go back to the shop every evening. We still haven’t gotten the Duck house built yet and they are no longer under the Heat lamp, but it is still too cool at night and they are too young to be out all of the time.
The Ducks are now 6 weeks old 5-3-17, and we are still going to the garden everyday about 7:30 every morning and coming back to the shop in the evening just before dark. I’m finding out that they would really rather eat bugs than grass. I hope they decide to like some of the weeds soon, or I may have to give them some help and start pulling some weeds.
They are still growing so fast, and just about too big for the Duck Wagon already! In the video below, you can see some of them have decided to walk instead of ride, which is great! It makes a lighter load for me to pull.
The Ducks are now 7 weeks old 5-10-17, and as you can see from the video all of them are now walking (or running) back and forth from the shop to the garden. We are really doing good! ( I think any way.) They listen to me very well! Much better than the Rouen ducks. Oh by the way, the big ducks don’t like the Runner ducks very well at all! Especially the drake. Sometimes I have to put him in the time out pen. I hope his attitude gets better before we move the Duck House into the garden area!
I hope you enjoy watching my duck pics and videos! I would love to hear from y’all!

The Ducks are 8 weeks old, 5-17-17 and are they are still growing so fast! I am just amazed at how fast they grow! As you can see I’m turning them loose in the garden now and they love it! The weeds are growing faster than they can keep up with and they still won’t eat some weeds. The guys are working on my Duck House and soon the Runner Ducks will stay at the garden all the time. I’m so excited!
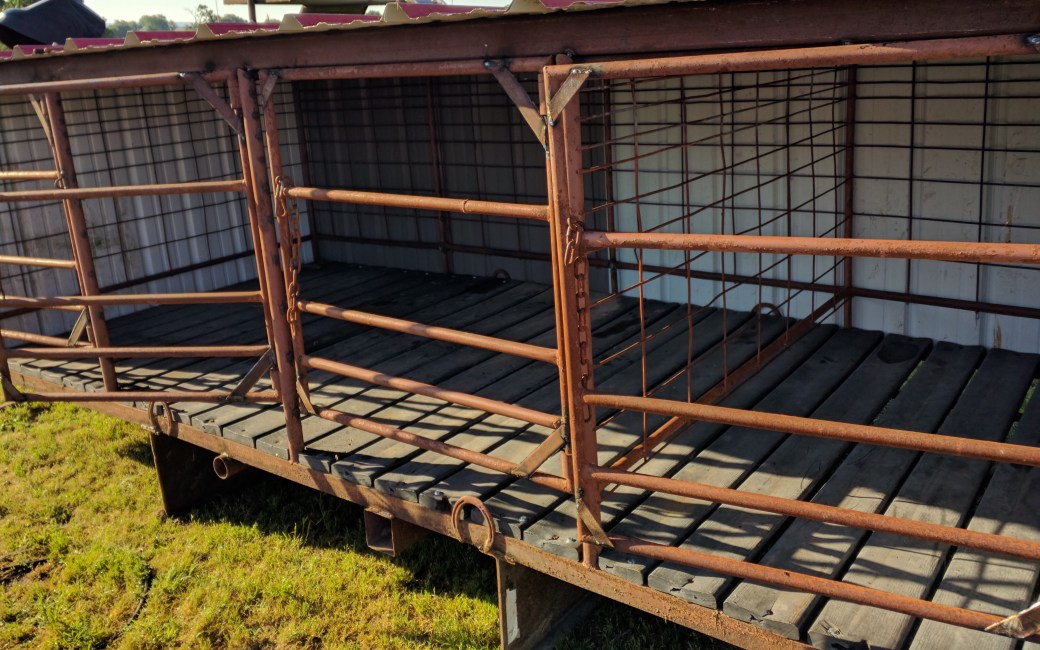
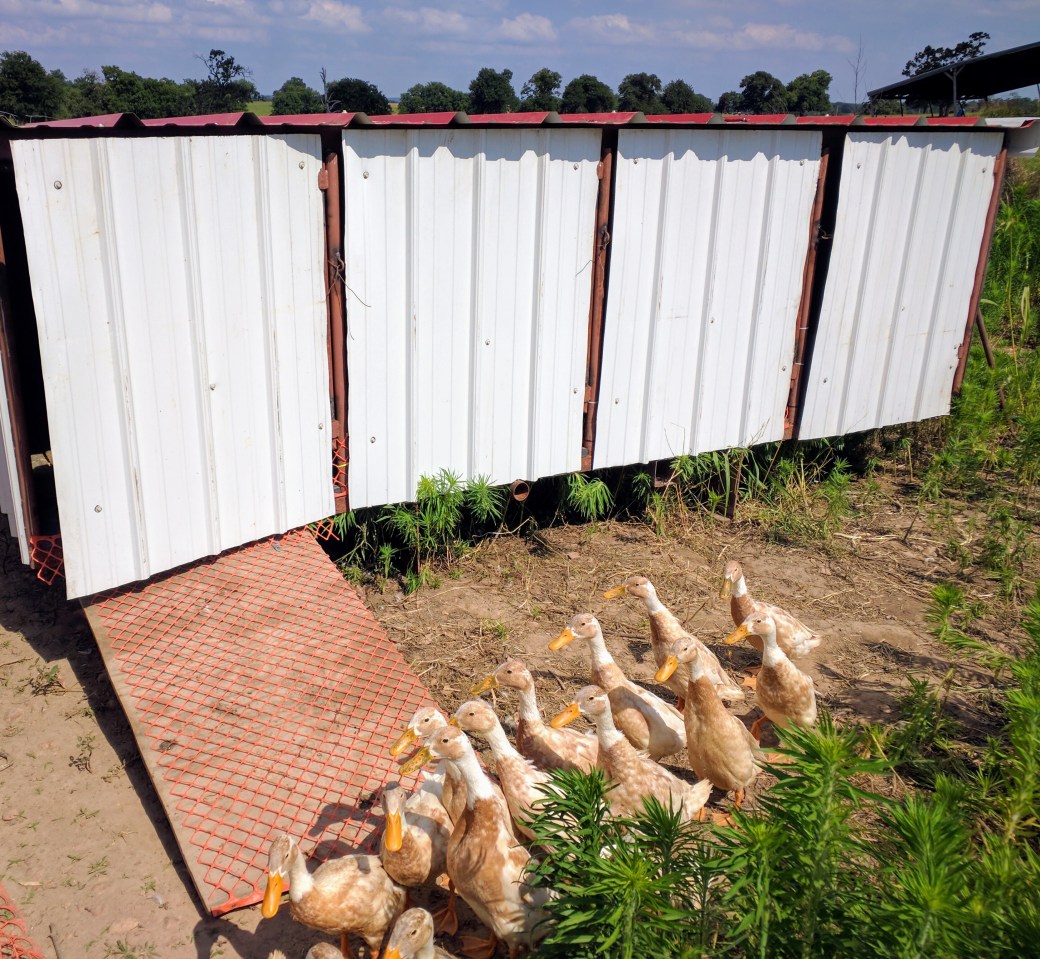
The Ducks are now 9 weeks old 5-27-17 and they are about to be kicked out into the real world on their own into their own house! As you can see from the photos, we converted a calf pen into a Duck House. It has recycled plastic boards, with 1/2 inch gaps in between each board, for the floor, and the whole house is raised up off the ground about 12 inches. This way I can wash it down with the water hose and the duck poop can fertilize the garden at the same time. We can pick it up with the tractor and move it to different areas of the garden to distribute the fertilizer evenly. I also added a ramp that is hinged to lift it when we move it.
The Ducks are now 10 weeks old and my garden plants are big enough that I can let the Ducks into the garden to eat bugs. So far they are mostly eating around the edge of the garden, which is fine with me, because we have had an abundance of baby grasshoppers pop up! It is so funny to watch the ducks go after them. When you walk through the grass around the garden, the baby grasshoppers literally do pop up out of the grass in front of you and the Ducks just snatch them out of the air! We have always had a problem with grasshoppers, but we won’t anymore!!!

I know I’m way behind with my Duck posts, but life just gets in the way sometimes. We have had a water leak in our house and if I would have brought the ducks in the house they would have loved it! We have been mopping water and ripping holes in the walls to find it. Thankfully we found it and finally have the mess cleaned up! 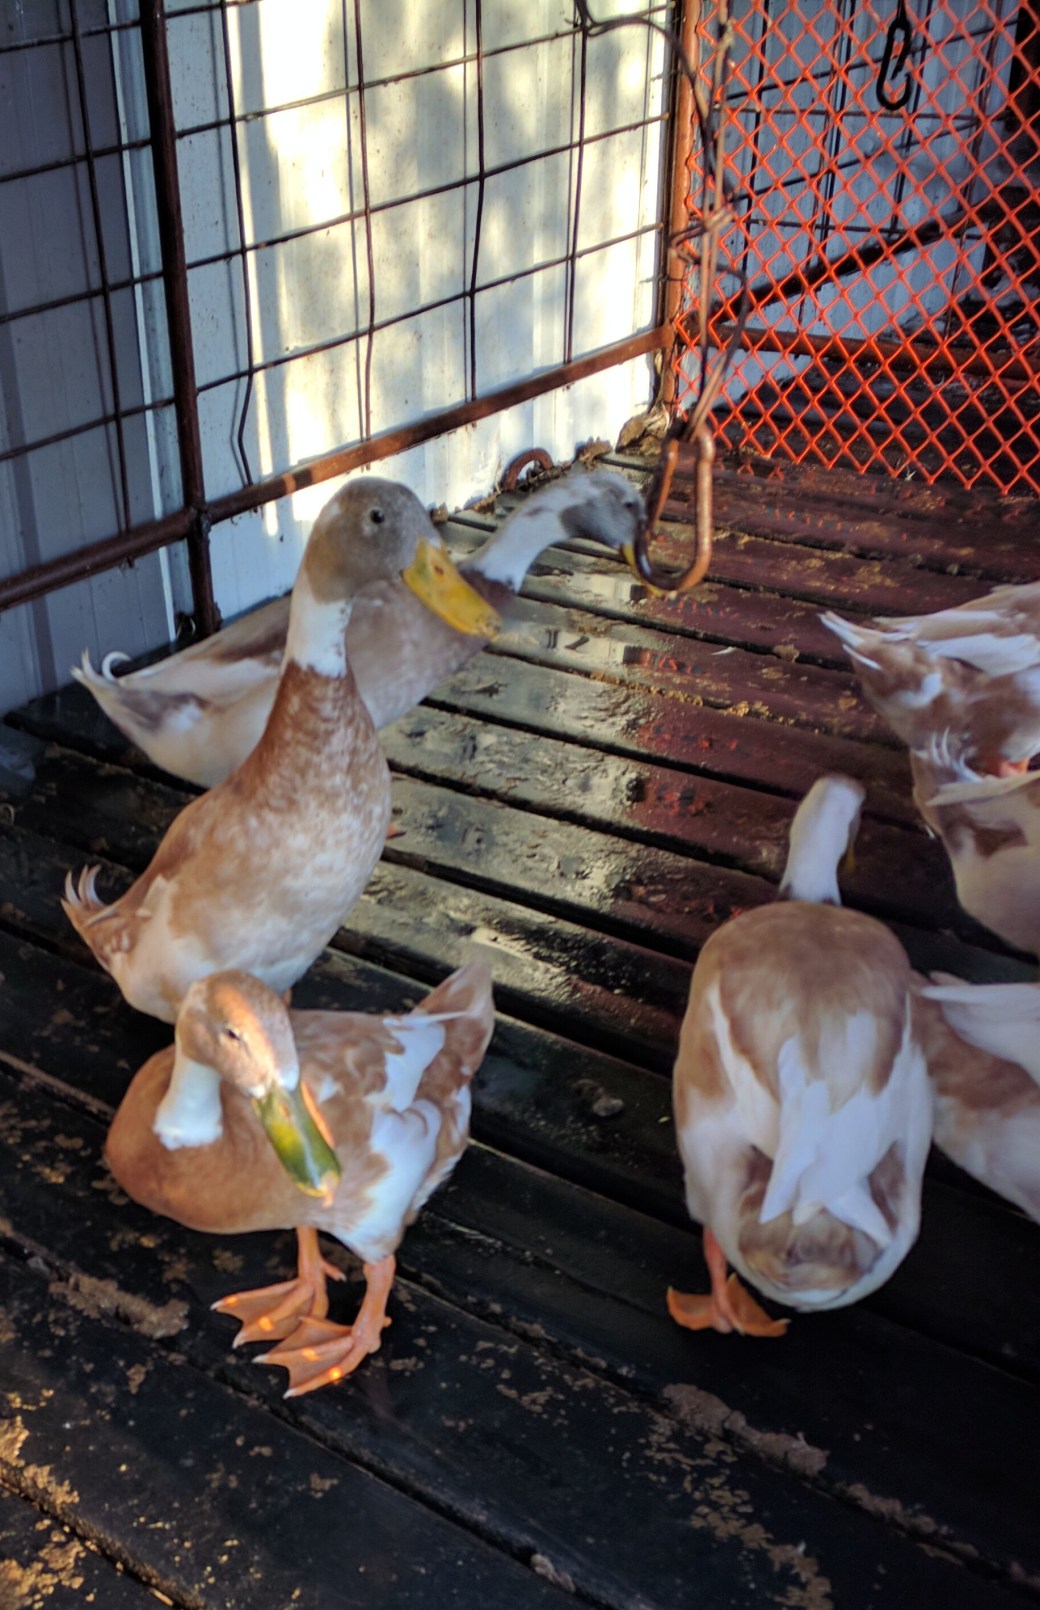
Since I’m so far behind I will fast forward to 20 Weeks Old! Which was 8/9/17. They are changing somewhat in their size and I can start to tell who is a Hen and who the Drakes are. As you can see in the pics, some of their tails are starting to curl, and the Drakes are getting a lot bigger than the Hens. Also I’m pretty sure the Hens are going to be the ones with the green/brownish colored bills.
Sometimes they can be little pests. I was trying to clean the Duck house and they wouldn’t stay outside until I could finish. That’s ok though, I’m glad they trust me!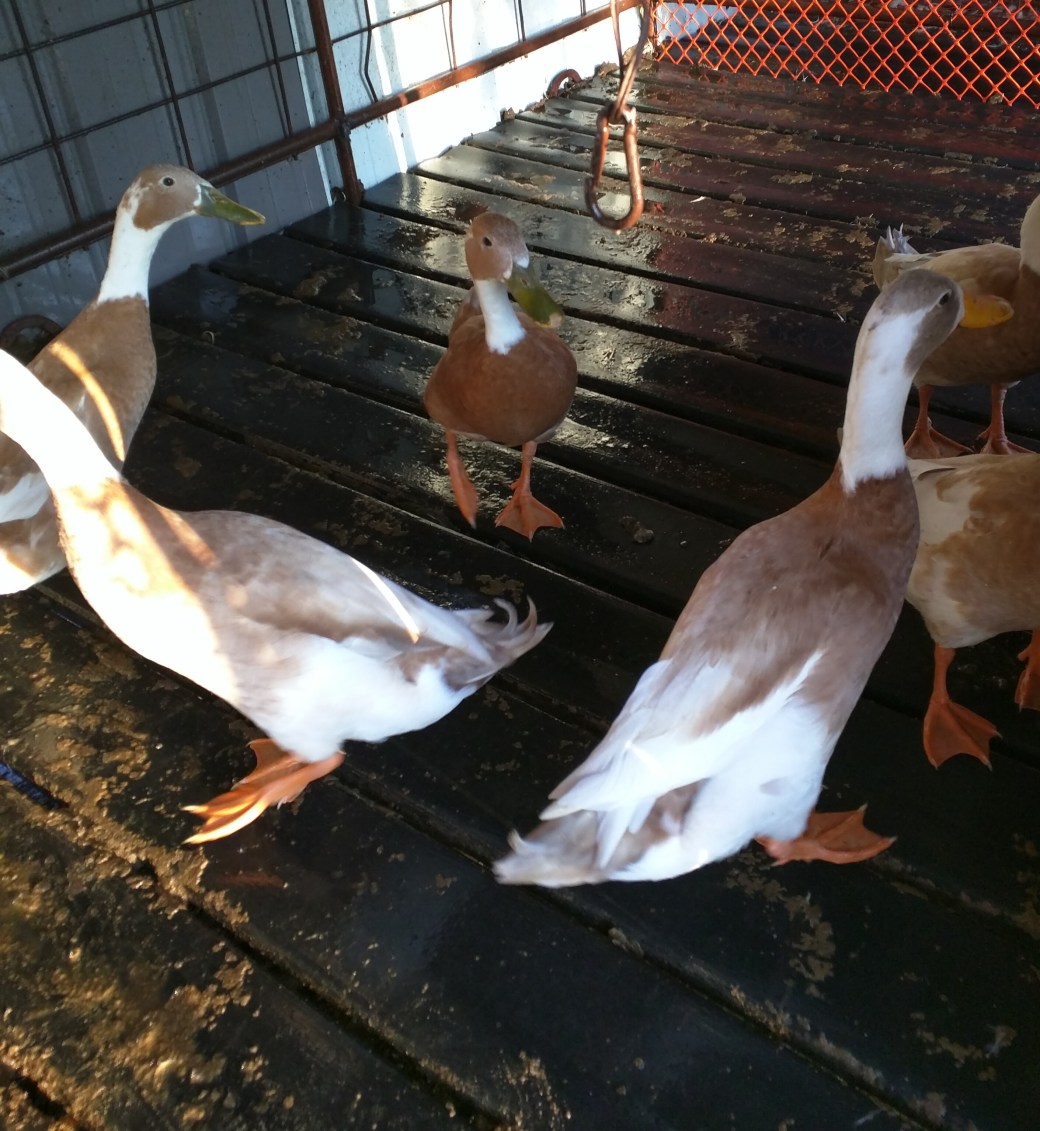
Herb Roasted Cauliflower


Herb Roasted Cauliflower
2 Medium size heads of Cauliflower
1/4 Cup Olive Oil
1 Tablespoon Chopped Fresh Parsley Leaves
1 Tablespoon Chopped Fresh Thyme Leaves
2 Teaspoons Chopped Rosemary
3 Large Cloves minced Garlic
1 Teaspoon Salt
1 Cup Parmesan Cheese
1/2 Cup Cooked Crumbled Bacon
Preheat oven to 400*
Wash Cauliflower and break off florets, place them single layer in a large baking dish. ( do not stack them) Drizzle oil over the top then Sprinkle herbs, garlic, and salt evenly over cauliflower. Place in oven and bake uncovered for 35 minutes or until fork tender. Top with cheese and bake another 5 minutes. When done remove from oven and top with bacon. Serve warm. Enjoy!
Happy Mother’s Day

Crunchy No Bake Chocolate Cookies
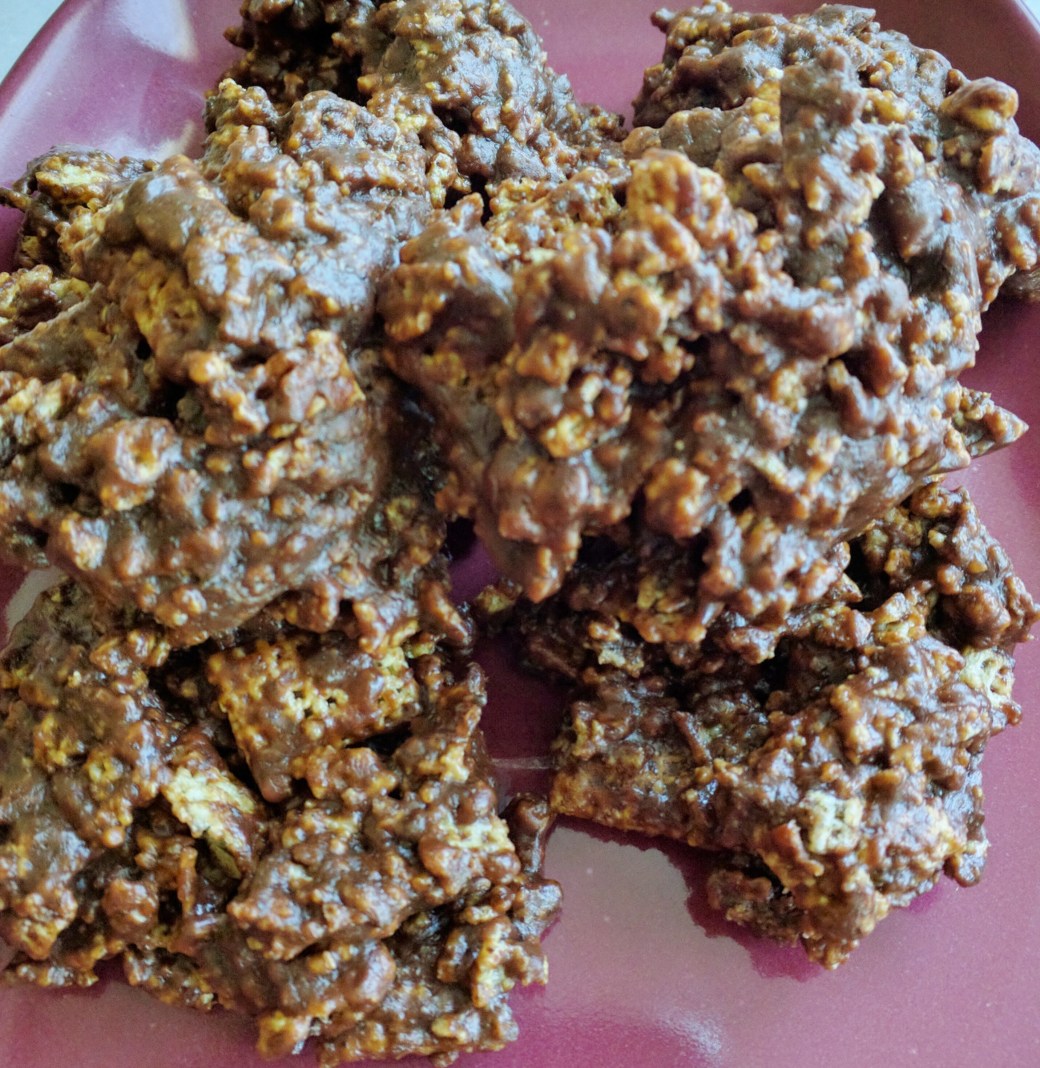
Crunchy No Bake Chocolate Cookies
2 Cups Gluten Free Chocolate Chips ( You can also use GF White Chocolate chips)
1/4 Cup or 1/2 Stick of Butter ( You can use a Butter substitute, Earth Balance, Coconut Butter, or mashed Banana)
1/2 Cup Organic Agave Nectar, or Honey
4 Cups lightly Crushed Gluten Free Rice Chex Cereal ( These work better than GF Rice Crispies)
1/2 Cup Ground Chia Seeds
In large mixing bowl melt chocolate chips and butter in microwave for 1-2 minutes or until chocolate is melted. Remove from microwave and stir in agave nectar. When well blended fold in crushed cereal and ground chia seeds. When cereal is coated, spoon onto parchment paper and let cool. They are ready to eat when cookies are set. Enjoy!