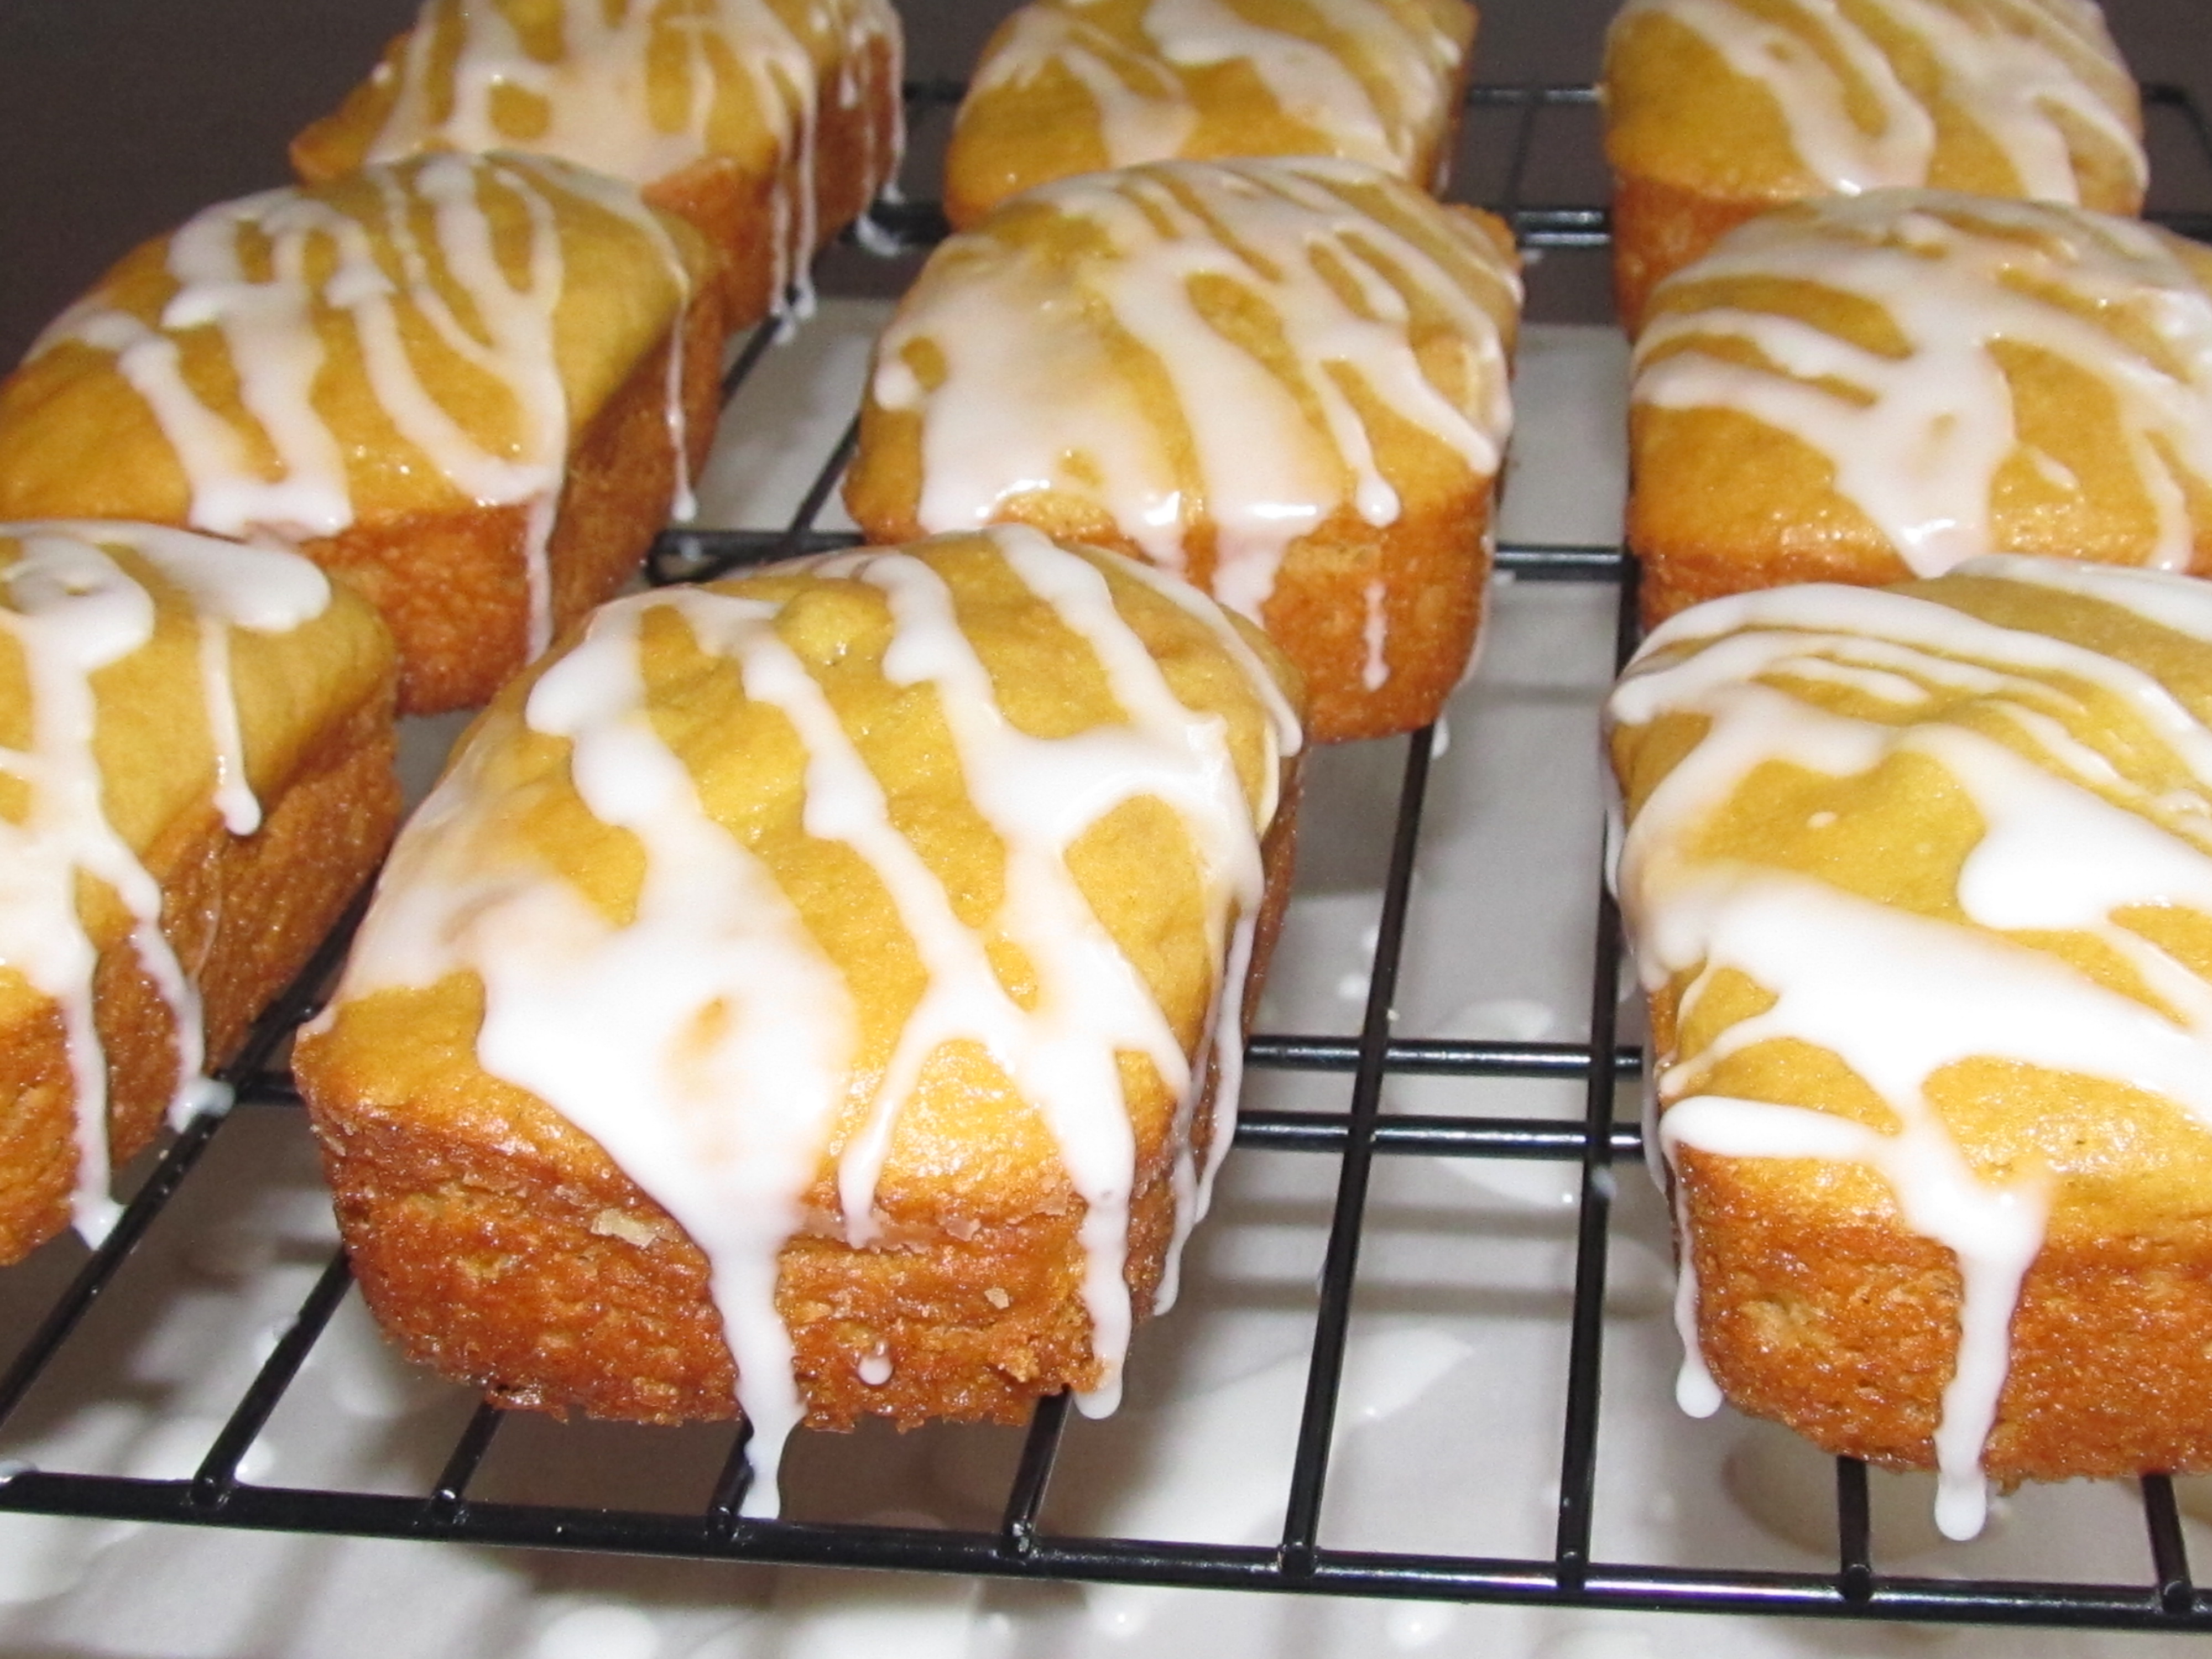
Quick Gluten Free Cream of Mushroom Soup

IMG_20151124_164947

Quick Gluten Free Cream of Mushroom Soup

1- 8oz. Can of Pieces and Stems Mushrooms ( blended slightly in food processor)

3 Tablespoons Salted butter ( or butter substitute)

1 Cup of Water or Milk ( I use water)

2 Tablespoons Corn Starch

1 Teaspoon Salt

Pour Mushroom pieces with liquid into medium sauce pan, turn heat on medium high and add butter. In small bowl mix water (or milk) with corn starch and whisk together until dissolved, and add to sauce pan along with salt. Stir and let mixture come to a bowl and cook for 1 minute. Remove from heat and let cool. Use in casseroles, or eat as soup with crackers.

Variations: Add ¼ teaspoon black pepper or garlic for a little kick.

To make a larger batch to freeze for later, just double or triple the recipe.

Glutnen Free Honey Sweet Rolls

IMG_1511

Honey Sweet Rolls

Gluten Free Flour Mix:  My favorite flour mix, 1 – 1pound box of Betty Crocker GF Rice Flour and 3 Cups of Tom Sawyer GF Flour, whisk together and store in airtight container. Using this mix there is no need to add xanthan gum.

Ingredients for rolls:

3 ½  Cups Gluten Free Tom Sawyer/Betty Crocker GF Flour Mix (see GF flour mix above) (Or Better Batter)

Note: If you use another flour that does not have xanthan gum, then you must add 1/4 teaspoon xanthan gum.

½ Teaspoon Salt

½  Teaspoon Baking Soda

1 Heaping Tablespoon Gluten Free Baking Powder

1 Cup Pure Egg Whites

½ Cup Gluten Free Canola Oil

1/2 Cup Pure Butter Milk

½ Cup Pure Honey

In large mixing bowl whisk together flour, salt, baking soda, and baking powder. Then add egg whites, oil, butter milk, and honey. Gently fold liquids and flour together until all dry ingredients are wet. Don’t over mix! Cover mixing bowl and store in refrigerator at least 2 hours. ( I like to mix this the day before and let it set overnight, also dough is much easier to work with when cool.)

When you are ready to bake rolls, remove from fridge and prepare yeast mixture below.

Yeast Mixture:

¾  Cup White Granulated Sugar

½ Cup Scalded Milk (in microwave about 1 minute)

¼  Cup Cold tap water

2 Heaping Tablespoons Dry Active Yeast

In medium glass mixing bowl, add sugar, scalded milk, & water. Stir to dissolve sugar. Temperature should not be over 110 degrees. (It will kill the yeast) Add yeast and mix with plastic whisk. Set aside and let it foam about 15 minutes. I like to set it near the stove to keep it warm.

Preheat oven to 325* Add a 9×13 inch baking pan filled half way with water, to bottom rack of oven. This will keep rolls moist while baking.

When yeast is ready, add dough and yeast mixture to food processor or mixer. Blend on highest setting until well mixed. Do not over mix, it will make rolls rubbery. I usually blend no more than 30 to 40 seconds or until all lumps are gone and dough is smooth.

Pour dough onto wax paper that has been lightly greased and floured (with GF flour). Lightly sprinkle more flour on top of dough, just enough to roll out. Roll out dough to about 1 inch thickness. Using a 2 ½ in round cookie cutter, cut rolls and place in a lightly greased nonstick pan. Or if you are using a glass baking pan you must lightly grease and flour the pan or the rolls will stick. I can get 18 rolls into a 9×13 inch pan. This will make 24 – 25 rolls depending on how big you make them. I use a smaller pan for the rest of the rolls. Try not to handle the dough any more than you have to. The more it is worked the tougher it makes the rolls. If you would rather make popover style rolls, then just use an ice cream scoop and place 1 scoop of dough into a regular greased nonstick cupcake or muffin pan.

.IMG_1507

Melt ½ stick of salted butter and generously brush top of rolls. Let rolls rise in a warm place for about 20 minutes.  Place in top rack of oven, above water,  when rolls have risen and bake for 20 minutes then remove pan of water from oven and let rolls finish baking for another 5 to 10 minutes or until completely brown and done in the center. Insert a wooden toothpick in the center roll, if it comes back clean, then they are done.

Remove from oven and butter again while warm. Lightly cover rolls with foil that you have pierced with a fork, ( so rolls do not sweat) until you are ready to serve. These freeze very well. To thaw and serve, remove from freezer bag and pop them into the microwave for 25-30 seconds per roll, longer for multiple rolls.

Gluten Free Rosemary Garlic Pork Chops with Gravy

IMG_2281My herbs are doing great! They smell so good outside my kitchen door! I just had to come up with a recipe for my rosemary. I gave some to my sister the other day and she used hers in a pork roast. I decided to try it on pork chops, but you could also do this with chicken.

Rosemary Garlic Pork Chops with Gravy

Pork Chops:

4 medium size Pork Chops

1/2 Teaspoon Freshly chopped Rosemary

1/4 Teaspoon additive free Garlic Powder

1/4 Teaspoon Salt

1/8 Teaspoon Black ground pepper ( optional)

In medium size skillet, place washed pork chops in single layer. On medium high heat, cover and brown pork chops on one side for 2-3 minutes. Turn pork chops then season with herbs and spices.  Cover and cook another 3-4 minutes depending on how thick your chops are. Cut through thickest part of meat to insure chops are no longer pink and they are done. Turn off heat and remove chops to a platter in order to make gravy.

Gravy:

(Tip: Have all ingredients measured and ready to pour into gravy before you start, it cooks quickly)

2 Tablespoons Salted Butter

1 Tablespoon minced Garlic

1 Teaspoon freshly Chopped Rosemary

1/4 Teaspoon Salt

2 Tablespoons all- purpose Gluten Free Flour

1 1/2 Cups Milk

Add butter to meat drippings, and melt on medium high heat. Add garlic, rosemary and salt. Using whisk, stir for about 1 to 1 ½ minutes, or until butter and garlic starts to brown. Reduce heat to low and whisk in flour and stir until all lumps are dissolved, this only takes 3-4 quick stirs. Pour in milk and raise heat back to medium high, continuing to stir with whisk until gravy thickens. Remove from heat, pour over pork chops and serve warm. Enjoy!

Gluten Free Dry Ranch Mix and Dressing

IMG_1496

Gluten Free Ranch Seasoning Mix

2/3 Cup GF Dry Buttermilk (Saco Cultured Dry Buttermilk)

2 Tablespoons Additive Free Dried Parsley Leaves

2 Teaspoons Additive Free Dried Dill Weed

1 Tablespoon Salt

½ Teaspoon Pure Black Pepper

4 Teaspoons Additive Free Onion Powder

1 Teaspoon Additive Free Garlic Powder

Process in food processor until dill and parsley are completely ground fine. Store in a labeled container, in the refrigerator or freezer.

GF Ranch Salad Dressing

4 Teaspoons Dry Ranch Seasoning Mix (See Recipe above)

1 1/3 Cups Pure Butter Milk ( to make dressing thicker use half butter milk and half plain GF Greek yogurt )

1 Teaspoon White Vinegar

2 Teaspoons Sugar

1 Teaspoon Salt

1 Teaspoon GF Lea and Perrins Worcestershire Sauce

½ Teaspoon Kikkomans GF Soy Sauce

Place all ingredients in pint canning jar and whisk together. Put lid on jar and store in refrigerator.

Gluten Free Grilled Teriyaki Pork Burgers with Sauce

IMG_2264

Gluten Free Grilled Teriyaki Pork Burgers, with Sauce

1 Tablespoon GF Oil

1 Tablespoon minced Garlic ( I use a heaping Tablespoon, we like garlic)

2/3 Cup Water

1 Tablespoon Pure Dark Brown Sugar

1 – 10oz. Bottle Gluten Free Teriyaki Sauce

1 Pound Ground Pork

1 Tablespoon 100% pure Corn Starch

In medium size sauce pan add oil and garlic. Turn heat to medium high and stir garlic for about 60 seconds or until garlic sizzles and starts to brown. Turn heat off, and add water, teriyaki sauce and brown sugar. Whisk together and remove 1/3 Cup of sauce, be sure to get some of the garlic.

In medium size bowl add ground pork and make a well in the center of the uncooked meat. Pour the 1/3 cup of sauce into the well and blend together with your hands until well mixed.

Preheat Grill to 350* – 375* F.  Make Pork into 5- 6 small patties and place on hot grill.  Grill for about 8- 10 minutes per side. When you have finished sauce below, drizzle sauce over burgers after turning them the last 5 minutes of grilling time.

Sauce: If you have a burner on the side of your grill, finish the sauce while the burgers are grilling. Add corn starch to the teriyaki mixture and whisk until dissolved. Set sauce pan on medium heat and continue to whisk until sauce is bubbling and thick. Turn heat off and drizzle over burgers when you have turned them the last time.

Oh, I usually grill veggies when I cook the meat, so I like to save some of the sauce to drizzle over the veggies when I take them off the grill.  Enjoy!

Gluten Free (Garden Fresh) Jambalaya

IMG_2254

Gluten Free (Garden Fresh)  Jambalaya

¼ Cup GF Oil

1 Cup chopped Onion

2 Large Cloves Garlic finely chopped or minced

1 Teaspoon additive free dried Celery Flakes

1 or 2 Jalapenos deseeded and chopped (Optional)

2 Medium Sweet Bell Peppers deseeded and Chopped

2 Cups Uncooked Chicken Breasts (cut into 1 -2 inch pieces)

3-4 Fish fillets (fresh or frozen any kind, as long as it is not catfish)

1 Tablespoon additive free Paprika ( I usually make this a heaping Tblspn.)

1/2 Tablespoon additive free Seasoning Salt

2 Cups chopped GF Ham ( I use leftover ham)

2 Cups thinly sliced fresh Okra

2 Cups cored, peeled and chopped fresh Tomatoes

1 – 12oz. Package frozen, peeled, deveined, tail-off, Shrimp ( I like the extra small)

1 – 14.5 oz. Can 100% Chicken Broth

1 Cup Red Quinoa ( I like Ancient Grains, it’s already rinsed)

In very large skillet, ( mine is 15 inches) pour in oil and set heat to medium high. Add onion, garlic, celery flakes, jalapeños and bell peppers. Let this start to sizzle and move vegetables to outer edges of pan. Then add chicken to the center of the skillet to cook and brown, about 15 minutes. Stirring and turning chicken pieces occasionally. Move chicken pieces to edges of skillet and add fish fillets to center of skillet, in a single layer. Sprinkle seasoning salt and paprika over meat and vegetables. Let this cook another 5- 10 minutes or until fish and chicken are cooked through. ( note fish will break up as it cooks). Then add ham and okra, and tomatoes. Stir in and cover for about 5 minutes. Then add shrimp, chicken broth and quinoa. Turn heat up until it starts to simmer, then turn heat down to medium. Cover and cook for another 15 minutes. Be sure to stir making sure quinoa is down in the liquid. Quinoa should be cooked by now, turn heat off and serve. We like to have this with hushpuppies or cornbread.  Enjoy!

There are many variations to this dish! Some add sausage, and cayenne pepper, others may add squash. Of course the original recipe uses rice. Just add anything that makes you happy!  It’s Jambalaya!

Gluten Free Indian Tacos (no rules)

IMG_2247 IMG_2245

I realize this is a regional dish, but this is such a treat, everyone needs to know what we, here in Oklahoma enjoy all the time. We grew up with these, you can find them sold everywhere. We even have Indian Taco dinners to raise money for church groups, ball teams or just about anytime we can find an excuse to have them! But now we can have them Gluten Free!

Gluten Free Indian Tacos

GF Indian Fry Bread (recipe below)

GF Chili ( make my own fresh chili)

Gluten Free Beans(  I used Bushes Black Beans)

Fresh Pico Da Gallo

Freshly Grated Cheddar Cheese ( as much as you want, there are no rules with an Indian Taco!)

After making your fry bread and chili, split open the bread and start assembling your taco. I start with chili, then beans and pico. Top with cheese or whatever you like on your taco. Remember there are no rules with Indian Tacos!

Variations: You can add GF Salsa, brown beans, onions alone or peppers alone, whatever you like on your taco!

Gluten Free Fry Bread

Please note: Different GF Flours will take more or less liquid. So add liquid slowly until you get a cookie dough consistency, while mixing. Dough will get thicker as it absorbs the liquids.

1  1/2 Cups Betty Crocker GF Rice Flour ( I usually use Tom Sawyer GF and Betty Crocker GF mixed) (This is not GF Bisquick)

1/8 Teaspoon Xanthan Gum ( if you use a GF flour with xanthan Gum already added then omit this)

1/2 Teaspoon GF Baking Powder

1/2 Teaspoon Salt

1/2 Teaspoon Baking Soda

1/3 Cup GF Oil

1/3 Cup Milk

3 Eggs Beaten

In mixing bowl whisk together flour, xanthan gum, baking powder, salt, and baking soda. Then add oil, milk, and beaten eggs. Mix until smooth. Let set for 15 – 20 minutes or refrigerate overnight. When ready to fry, cover bottom of skillet with oil, or if you want to deep fry add more oil. I like to turn the heat up on high just until the oil sizzles when adding a bit of dough, then turn down to medium high. Oil your hands and dip out a ball of dough about 2-3 inches around. Pat out dough until it is about the size of the palm of your hand. Gently turn it over into the skillet. ( Be careful you can get burned easily doing this.) Fry about 1-2 (if you make them thick, then fry 3-4 minutes per side) minutes per side or until browned on both sides. Remove from skillet and drain on paper towels. Repeat until dough is gone. As soon as bread is cool enough, place in zip lock bags and refrigerate until ready to use. You can heat in microwave or toast when ready to eat. I can get about 10 -12 flat breads, unless you make them really thick then I only get 4 or 5, from this.

Cajun Squash Sauce

 Cajun Squash SauceIMG_2241

1 Tablespoon minced Garlic

2 Teaspoons additive free Paprika

1 Teaspoon Cayenne Pepper

1/2 Teaspoon Fresh chopped Oregano Leaves

3 Cups puréed Yellow Squash

1 – 14.5 oz. can 100% Chicken Broth

1 Teaspoon Salt ( If you are watching your salt intake just use less salt )

In food processor add all ingredients except broth and salt. Blend until smooth.     ( the oregano leaves will not completely blend, but that’s fine.) Add broth and salt, blend again. (if you are going to freeze sauce, do not add salt) Pour sauce into medium sauce pan and heat to boiling. Or pour over chicken, pork or beef to bake. I like to pour it over left over grilled chicken.

Bacon Tomatoes and Okra

Bacon Tomatoes and OkraIMG_2224

Don’t worry,this is not slimy. When you add in the tomatoes, the acid breaks down the slime of the okra.

1/2  Pound of GF Bacon

4 Cups Sliced fresh Okra

2 medium Cloves of Garlic (chopped)

1 Small Jalapeno chopped (Optional)

2 Cups cored, peeled and chunked tomatoes ( About 3 medium tomatoes chunked into 1 to 1  ½ inch cubes)

1/2 Teaspoon Salt ( or less if you are watching your salt intake)

I medium skillet fry bacon just until crisp. Remove bacon from grease, to crumble into chunks and reserve for later. Add garlic, jalapeno and sliced okra to grease and fry on medium high heat just until okra is soft and starts to turn brown, stirring so that it cooks evenly. Reduce heat and add tomatoes and salt. Raise heat and let vegetables just come to a simmer. Remove from heat, stir in bacon and serve. Enjoy!

Note: You don’t have to peel the tomatoes. I just like mine peeled.

Gluten Free Blueberry Crisp

IMG_1449

on November 1, 2014

Blueberry Crisp

½ cup butter (=1 stick)

4 ounces cream cheese ( I use Philadelphia)

¼  cup cold water

2 large eggs, beaten

1 tsp. vanilla

2 cups Bob’s Red Mill 1 to 1 Gluten Free flour

1 cup sugar,(reserve ¼ cup to sprinkle on top)

2 teaspoon gluten free baking powder

1/2 teaspoon salt

½ teaspoon baking soda

1 – 12 ounce package frozen blueberries

In glass mixing bowl soften butter in microwave for about 40 seconds, add cream cheese to bowl and return to microwave for another 30 – 40 seconds. Cream together and add water, beaten eggs, and vanilla. In another bowl whisk together all dry ingredients (except ¼ cup sugar) and pour into the bowl with all of the liquids. Stirring and folding until there is no dry flour left. Cover and place in refrigerator for at least 20 minutes.

Preheat oven to 375* F.

Grease and flour a 9 to 10 inch baking dish (I like to use additive free powdered sugar for this). Remove batter from refrigerator and add frozen blueberries. Gently fold berries into batter, trying not to crush berries. Pour batter and berries into baking dish, sprinkle the ¼ cup of sugar on top and bake for 40 – 45 minutes or until crispy on top and set in the center. Let cool and serve. This is good for a dessert or for breakfast.

Please note: In my opinion this is not a bread flour. I tried it in bread, cookies and pizza dough. It is a dense flour and I still prefer Tom Sawyer G F and Betty Crocker GF. That’s just me, yall may have a better experience with it than I did.

Gluten Free Sticky Honey Buns

IMG_2213

Gluten Free Sticky Honey Buns

1 1/2 Cups All purpose GF Flour ( I used Betty Crocker GF and Tom Sawyer GF mixed, with xanthan gum already added)

1/2 Cup packed Dark brown Sugar

2 Teaspoons GF Baking Powder

1/2 Teaspoon Baking Soda

2 Eggs

1/2 Cup Pure Applesauce (or crushed pineapple with juice)

1/2 Cup Fat Free Greek Yogurt

1/4 Cup Pure Honey

I medium size mixing bowl, whisk together flour, sugar, baking powder, baking soda, and sugar. Then add eggs, applesauce and yogurt. Mix until well blended and smooth. Let batter rest to absorb liquids, for about 15 minutes.

Preheat oven to 325*F.

When ready to bake pour ¼ cup of batter into greased and floured mini loaf pans. Tip: Instead of GF flour, I like to dust the pan with Powdered Sugar, for these buns. ( I used the 2 ½ x 4 inch size, this is the kind that is 1 pan with 9 loaves). I also use a triggered Ice cream scoop (the ¼ cup size) to fill each loaf. Bake for 20 – 25 minutes or until loaves are set in the center and brown and pulling away from the edge. Remove from oven let cool for about 5 minutes, invert loaves onto cooling rack or parchment paper, and glaze with recipe below. These make great snacks or a quick breakfast bun!

Glaze:

1 Cup Pure additive free powdered sugar

3-4 Tablespoons water( depending on how thick you want your glaze)

In small bowl whisk together powdered sugar and 1- 2 tablespoons water then add a tablespoon at a time until glaze is smooth and you have the consistency you want. Then drizzle glaze over buns, as thick as you prefer. Enjoy!

Variation: Instead of applesauce you can use the same amount, only use crushed pineapple with the juice. I have also used pitted chopped cherries and juice.

Also instead of plain glaze, you can add cinnamon and nutmeg. Or dust with just plain powdered sugar.

NOTE: If you use Bob’s red mill, or Pillsbury GF flour, then you will need to let the liquids and flour rest a while longer, the flours that are not ground as fine, take longer to absorb liquids.

Chocolate Bunt Cake with Chocolate Butter Cream Frosting

IMG_2202 IMG_2204

Chocolate Bunt Cake with Chocolate Butter Cream Frosting

(This is a version of the Hershey’s chocolate cake recipe)

1 ¾ Cup All purpose GF Flour ( I used Better Batter GF Flour)

1 Cup Hot Water ( microwave about 1 minute)

1 Cup Milk

1 Stick Melted Butter

2 Teaspoons Vanilla

2 Large Beaten Eggs

Mix flour and all liquids in large mixing bowl, cover and let this rest for about 10 -15 minutes.

When you are ready to bake, set mixer on high and mix the rest of the ingredients.

Preheat oven to 325*

2 Cups White Sugar

¾ Cup Hershey’s Cocoa

2 Teaspoons Gluten Free Baking Powder

1 ½ Teaspoon Baking Soda

1 Teaspoon Salt

When all ingredients are blended well and there are no lumps left. Pour batter into a greased non-stick bunt pan. Bake for 40 – 45 minutes or until cake is set and pulled loose from the sides of cake pan. Remove from oven let cool for about 5 minutes and invert cake onto cake plate. Frost cake with icing below, while cake is still warm.

Chocolate Butter Cream Frosting

4 oz. Plain Philadelphia Cream Cheese, softened

1 Stick unsalted Butter Softened

2 Teaspoon Pure Vanilla

1/2 Cup Dark Brown Sugar

3 Cups Pure Powdered Sugar

1/4 Cup Pure Cocoa Powder

In food processor blend all ingredients until smooth. Frost cake while cake is still warm, so frosting will melt and run down sides of cake.  Warning this cake is so moist and rich, it can be addicting!

Trouble Shooting Tips For Gluten Free Bread

IMG_2186 This is what my dough looks like when it is done mixing.

Trouble Shooting Tips for Gluten Free Bread

Over the years I’ve tried to keep track of all of the things I did wrong making GF bread as well as the things that worked. So here is a list of some of these tips.

If your bread sinks in the center.

  1. Possibly your dough is too wet.
  2. Baking time may not be long enough, if bread is not done in the center, that will cause it to sink.
  3. You may be putting too much oil or butter on top when you smooth out the dough.
  4. If you use a second mixing cycle in your bread machine or punch down the dough for a second rise. GF dough does not like to be disturbed after the first rise.
  5. If you are have a recipe that calls for a different GF flour than you are using. The reason for this is GF flours are so different, they do not absorb liquids at the same rate. Some absorb more liquid than others and some just don’t want to absorb liquids at all. For example Coconut flour absorbs much more liquid than rice flour. This can also be the reason your breads turn out so dry, even though it does rise.


Roasted Green Tomato Salsa

IMG_2117

Roasted Green Tomato Salsa

4 Large green tomatoes

3-4 Large Jalapeños ( 4-5 inches long)

5-6 Large Whole Cloves of Garlic

2-3 Green Onions

1 Teaspoon Salt

Preheat grill to 375* – 400*F.

Wash all vegetables, clean and peel outer skin off of garlic and onions. Core and cut tomatoes into quarters. Cut stems off of jalapenos. Place all vegetables in large foil pan, arrange so there is only one layer. Make sure to place the tomatoes with skin side down. Sprinkle with salt over all vegetables and place pan over center burners. Lower the flame on the center burners and close lid of grill. Check occasionally to make sure vegetables are not burning, you only want to roast them. The green onions will cook faster than the other veggies, when the green ends turn dark brown take them off the grill. Cook rest of the vegetables for 30 to 40 minutes or until vegetables are soft and turning brown. They are cooked when you can pierce through with a fork.  Let cool for about 10 minutes, then add all vegetables, including onions to your blender and blend to desired thickness. I like mine a little chunky. You may like yours pureed, taste and add more salt if desired. Serve as a dip or as toppings for tacos or tostadas.

Note: I like to go a little heavy on the garlic, if you don’t care for a strong garlic taste, then don’t roast as many cloves as I do.

If you plan to can or preserve your salsa, before you add to jars, you will have to boil blended vegetables, and follow canning directions, according to Ball or Kerr canning books.


Garden almost Planted

IMG_1963 IMG_1966 IMG_1965The Garden is almost planted.

Earlier in April we planted onions, broccoli, and two kinds of cabbage. They are doing great. We had to wait on hopefully the last frost before we planted the rest of the garden. Today we planted three different kinds of tomatoes, 3 kinds of squash, bell peppers, jalapeno peppers, and habanero peppers. Also cucumbers, corn and beans. We still lack the okra, the row is ready, but I’m just going to let it warm up a bit more before I get it in the ground.

Our garden goes along way toward lowering our grocery bill. Plus having all of the fresh vegetables I don’t have to worry about preservatives, or gluten being added to any of the canned or frozen vegetables, because I control what goes in them.

More Gluten Free Baking Tips

gfbaked

More Tips and Tricks for Gluten Free Cooking

Gluten Free flours have gotten a lot better over the years, but there are still some tips that will help you a lot in exchanging regular wheat flour for Gluten Free flour.

  1. Right off the bat, NO I have not found a GF flour that you can just exchange in the same amounts that you would use in wheat flour. It just doesn’t work the same.
  2. There are so many different blends of flours, some use corn starch, or potato starch, or tapioca starch, (none of them are the same) and they do not react the same to the other ingredients in the recipe. That is why so many Gluten Free recipes fail. When you figure out the positive chemical reaction for each GF flour. Then you will have a successful recipe! That is why I name each Brand of flour I use in all my recipes.
  3. A lot of the Gluten Free Flour blends have a rice base. Some are bean flour. Rice and Beans are both hard when they are dry, so in order for them not to have a gritty texture, you must let the dough or batter set for a while and soak up the liquids before baking or cooking. Except fried foods, when fried at high heat the rice flours become crisp not grainy. Also the flours absorb oils better than it does butter, if the butter gets cool. But you also give up a lot of flavor when using oil.
  4. Because Gluten Free flours are heavier than wheat flour, it takes gluten free flours longer to rise than wheat flour. So I add more baking powder and more yeast than I did for wheat flour. I also let most of my dough set longer in a warm place to rise. (Except my sour dough, it doesn’t need the extra time) The warmth of steam, seems to help activate the yeast so it can rise. So when I start to bake a loaf of bread, I will start a pot of water to boil on the back of the stove.
  5. When baking Gluten Free yeast breads, you should not try to punch down the loaf for a second rise. Most Gluten Free dough will not rise a second time. When it rises, it is ready to bake.
  6. Baking times usually will be at a lower temperature setting, but they will need to bake longer. Most of the time I will use 325*F. setting and about 10 -12 minutes longer baking time. It depends a lot on your type of oven, and the thickness of the item you are baking. For instance, bread dough will always take longer to bake than a cake batter.

Entering the Spooky World of Gluten and Food Additives

spooky world of glutenand additives

Entering the Spooky World of Gluten and Food Additives

I am constantly amazed at the number of people that still don’t know what gluten is, but I do enjoy helping to educate anyone willing to listen. I was checking out at the grocery store the other day and the girl noticed as she was scanning my groceries, that I had several items labeled Gluten Free. She asked what is that like for diabetes? So I explained to her what gluten was and that we had Celiac Disease and why we had to avoid gluten. I could see the light come on behind her eyes! ( I love it when that happens) ( Oh and BTW, I was the only one in line, there was not anyone behind me waiting while we had a gluten lesson.)

Anyway I’ve noticed that a lot of you are new to eating Gluten Free are having trouble figuring out what is and what isn’t gluten free. It is confusing I know, with all of the food additives that have hidden gluten. So here is a partial list to help get you started.

Anything that obviously contains wheat

Barley

Rye

Malt ( is derived from barley)

Cellulose ( this can be made from wood chips, wheat or barley straw)

MSG, monosodium glutamate  ( a lot of people believe that this is not gluten, but when you research how it is made, it becomes clear, that the base of this product is wheat gluten) MSG, is a big scary one for our family. My sister and I both have extreme reactions to it.

The FDA says there is not gluten in MSG, but here are some links that prove them wrong.  http://msgtruth.org/msgand2.htm

http://msgtruth.org/

http://ajcn.nutrition.org/content/90/3/728S.full

https://en.wikipedia.org/wiki/Monosodium_glutamate

http://www.truthinlabeling.org/HowIsItManufactured.html

http://dogtorj.com/what-is-food-intolerance/gluten-vs-glutamate-vs/

Other Possible sources of gluten are:

Maltodextrin ( in the US maltodextrin is supposed to be safe, my problem with this is, how do you know that a product made in the US did not buy some of their ingredients from other countries?) That is why we have to be diligent and do our research.

Citric Acid

When in doubt go to the company’s web site or some have phone numbers you can call and just ask.

If you have a reaction to a product, don’t eat it. There are most usually alternatives.

This is not a Recipe or maybe it is

CheerRecipe

This is not a Recipe

Or maybe it is. I’ve been having some health issues so I’m a little behind in getting my recipes posted. So just bear with me, while I give myself and some of my other Celiac friends a little pep talk.

I know this disease is not easy to live with, but it could be worse. We are still here. If you have just been diagnosed or if you’ve known for awhile that you have CD or Gluten Sensitivity, then you do know. By that I mean you know what you have to do to stay healthy. For so many years I didn’t know what was wrong with me. I knew there was something, but doctors just kept treating me for the wrong things. Now that we know, there is light at the end of the tunnel.

For me I do a lot of praying. I go outside take a walk, clear my head and know that life will get better. It is within my control to make my health better. I don’t have to wonder anymore what I need to do to get better.

We can do this! Celiac Disease does not have to control our lives. We can take control, eat healthy, get the exercise we need and enjoy life. It may not be what we had before, but it has to be better than the suffering we had before our diagnoses.

Just know that me, and a lot of us are right there with you! Reach out if you need support.  I guess this is my “Cheering You On Recipe.” We will do this together!!!

Gluten Free or Not Gluten Free?

Pure Ingredients = Pure FLAVOR!!

Not only is eating Gluten Free a necessity for some of us, it is a choice for others. Gluten free cooking has so much more flavor! Simply because you cook with pure ingredients. There are no fillers in the spices, no additives to the meat, you actually taste the real food.

I have had this conversation so many times with people. They always ask me or tell me that soy sauce is already gluten free, it is made from soy not wheat. So why is some soy sauce labeled gluten free and some soy sauce is not? Because some food companies like to cut corners and add wheat or gluten containing fillers that are cheaper. The same with spices, I’ve also had people wonder why do I put in my recipes “additive Free”?  Sometimes the product has been produced in the same plant or on the same equipment as gluten containing products, thus it will contaminate the pure spice. If the company did not clean their equipment, that bottle of cheap spice that you just purchased may contain the remains of what was previously processed, then you did not get an additive free product.

I’ve also had a conversation about turkeys, they are not made from gluten so they are gluten free right? Well they should be, but if the meat was injected with flavorings or preservatives that contain gluten, then the turkey is no longer gluten free. Ham is the same way, if it has been injected in the curing process with gluten containing products or preservatives, then it is not gluten free. People just assume that food products are pure. Anyone with food allergies or celiac disease will tell you this is not true. If you have ever had your throat close up and you can’t breathe because of MSG or other food additives, then you become very diligent, even to the point of being paranoid about what is in your food. Or you’ve had body aches, stomach pains or other digestive problems so bad it puts you down for a week or sends you to the hospital; or your child cannot control himself and the school is calling you every day because he has gotten gluten or other food additive that sends him into a tailspin, then you become obsessed about what you put in your mouth, or on your child’s plate!

So whether it is by choice or necessity, pure true ingredients win out over fake every time!

Gluten Free Steak Marinara

IMG_1626

Steak Marinara

4 – 6 Tenderized boneless Beef Steaks (after the steaks are tenderized they are about 3/8 inch thick and 4 to 5 inches around)

1 Cup Gluten Free Rice Flour ( any kind you prefer)

1 Heaping Tablespoon Additive Free Dried Basil

1 Heaping Tablespoon Additive Free Dried Oregano

1 Tablespoon Additive Free Garlic Powder

1 Teaspoon Salt

1 Cup Gluten Free Oil

2 Cups Gluten Free Marinara Sauce

1 – 8 oz. package Additive Free Mozzarella Cheese sliced

Optional- ½ Cup freshly grated Parmesan Cheese after serving

Preheat oven to 350*F. and pour oil into large skillet on high heat.

Whisk together flour and all of the spices. Wash steaks and dredge in the flour, spice mixture. I like to press the steaks down into the flour, coating them as completely as possible.  When all steaks are coated and oil is sizzling hot, place all of the coated steaks into hot oil and fry on high heat for 2 – 3 minutes on each side or until browned and starting to get crispy. Remove steaks from skillet and place in large greased baking pan, do not stack the steaks on top of the other. ( I like to line my pan with foil that has been greased, just to save on clean up).  Pour marinara sauce between each steak, avoid pouring sauce on top of steaks. Place in oven and bake for 20 to 25 minutes, until steaks are completely cooked and marinara sauce is bubbling. Place mozzarella slices on top of steaks completely covering each steak. Bake another 5 minutes until cheese is melted. Remove from oven and serve. After plating you can add the grated parmesan if you prefer.

Soft Pretzel Appetizers

IMG_1616I’ve tried different dough’s with these pretzels and this is the closest I’ve come to the real pretzel taste. This dough is almost the same as the honey sweet roll recipe, but the other watered down flour dough pretzel recipes that I found just didn’t taste good. So I tweaked my own recipes until I found one that worked. I hope you enjoy them!

Gluten Free Soft Pretzel Appetizers

1 ¾   Cups Gluten Free Tom Sawyer/Betty Crocker GF Flour Mix (see GF flour mixes)

¼ Teaspoon Salt

¼   Teaspoon Baking Soda

1 Tablespoon Gluten Free Double Action Baking Powder

½  Cup Pure Egg Whites

¼  Cup Gluten Free Canola Oil

¼  Cup Pure Butter Milk

¼  Cup Pure Honey

Yeast Mixture:

1/3  Cup Pure Brown Sugar

¾  Cup warm tap water ( not too warm, it will kill the yeast)

1 Tablespoon Dry Active Yeast

In large mixing bowl whisk together flour, salt, baking soda, and baking powder. Then add egg whites, oil, butter milk, and honey. Mix the yeast mixture in separate bowl and add to flour mixture, folding together until blended. (note: there is no need to let yeast stand ) Then pour dough into food processor or mixer and mix just until dough is smooth. Cover and place dough in fridge until it is cold and workable.

When ready to make pretzels Preheat oven to 410*F.

8 Cups Water

½ Cup Baking Soda

2 beaten egg whites

1 Tablespoon sea salt

Roll dough out onto floured service ( using GF Flour), to about ½ to ¾ inch thick. Cut dough into strips and cut again into 1 to 1 ½ inch squares.  In medium sauce pan boil water and baking soda. Place 5-6 squares of dough at a time into the boiling soda water for about 30 seconds. Dip little pillows out of soda water with slotted spoon or strainer and place onto baking sheet covered in parchment paper. When baking sheet is full, brush with egg whites and place in oven to bake for 15 to 20 minutes or until completely browned. Remove from oven and sprinkle with sea salt. Depending on the size you make the squares, this recipe will make 3- 3 ½ dozen pretzels.  Serve with dipping sauce below or any gluten free dip you prefer.

Gluten Free Ranch Dip

4 Teaspoons Dry Ranch Seasoning Mix (See Recipe)

1 Cup Plain Greek Yogurt

1 Teaspoon White Vinegar

2 Teaspoons Sugar

1 Teaspoon Salt

1 Teaspoon GF Lea and Perrins Worcestershire Sauce

½ Teaspoon Kikkomans GF Soy Sauce

OPTIONAL: Fry 6-8 slices of bacon, cool, drain and chop, then add to dip!

Whisk together, cover and place in fridge until ready to use.

A Simple One Skillet Meal

IMG_1542

Gluten Free Taco Skillet

1 pound lean Ground Beef

½ Cup Gluten Free Salsa

1 Tablespoon McCormick’s Gluten Free Taco Seasoning

Taco Crust

¾ Cup Gluten Free Bisquick mix (Betty Crocker)

¼ Cup Gluten Free Corn Meal

1 Egg

1 Cup water

2 Tablespoons Softened Butter

½ Cup Additive Free grated Cheddar Cheese

Crumble and brown ground beef in a 10 inch cast iron skillet. Add salsa and taco seasoning, letting it cook on medium heat for about 10 minutes or until all meat is cooked and no longer pink. Remove from heat until batter for crust is mixed.

Preheat oven to 375*F.

In medium size mixing bowl, whisk together Bisquick and corn meal. Beat egg and water together and pour in flour mixture, adding softened butter and mix well. Fold in cheese and pour batter over beef mixture using the same skillet. Smoothing out batter evenly over beef. Place skillet in oven and bake for 20- 25 minutes or until crust is golden brown.  Remove and serve warm. Enjoy!

Real Gluten Free Ginger Bread

IMG_1600

Gluten Free Ginger Bread

3 ½ Cups Tom Sawyer GF/Betty Crocker GF rice flour Blend ( see Flour blends)

2 Teaspoons GF Double Action Baking Powder ( Clabber Girl)

½ Teaspoon Baking Soda

½ Teaspoon Salt

1 Teaspoon Additive Free Ground Cinnamon

¼ Teaspoon Additive Free Ground Nutmeg

1 Cup Sugar

4 Large Eggs

1 Tablespoon Peeled and Freshly Grated Ginger Root

2/3 Cup Water

1   Stick melted Salted Butter

½  Cup GF Oil

1 Cup Pure Additive Free Honey

In large mixing bowl whisk together, flour, baking powder, baking soda, salt, cinnamon, nutmeg and sugar. In another bowl beat the eggs and add the freshly grated ginger and whisk together. Add water, melted butter, oil and honey, to the eggs and ginger. Stir all liquids together and pour into flour and spice mixture. Beat with mixer just until well blended. Don’t over mix, it will make the bread rubbery. Let batter set in fridge for about 20 minutes.

Preheat oven to 325*F.

When ready to bake, pour batter into four small greased and floured ( with GF Flour) 3 ½ x 5 ½ inch loaf pans, or two large 9×4 inch loaf pans. Fill pans to about ½ inch from top of pan. I like to swirl the batter on top, so that it will split and look more like artisan bread. Or you can smooth out the dough if you prefer. Remember to place a 9×13 inch pan half full of water on bottom rack of oven. Evenly space loaf pans on top rack, over water and bake for 40 minutes. Remove water and bake loaves for another 20 – 25 minutes, or until tooth pick inserted into center loaf comes out clean. Remove pans from oven and cover with foil. Serve warm with butter. Or give to friends for Christmas!