
I realize this is a regional dish, but this is such a treat, everyone needs to know what we, here in Oklahoma enjoy all the time. We grew up with these, you can find them sold everywhere. We even have Indian Taco dinners to raise money for church groups, ball teams or just about anytime we can find an excuse to have them! But now we can have them Gluten Free!
Gluten Free Indian Tacos
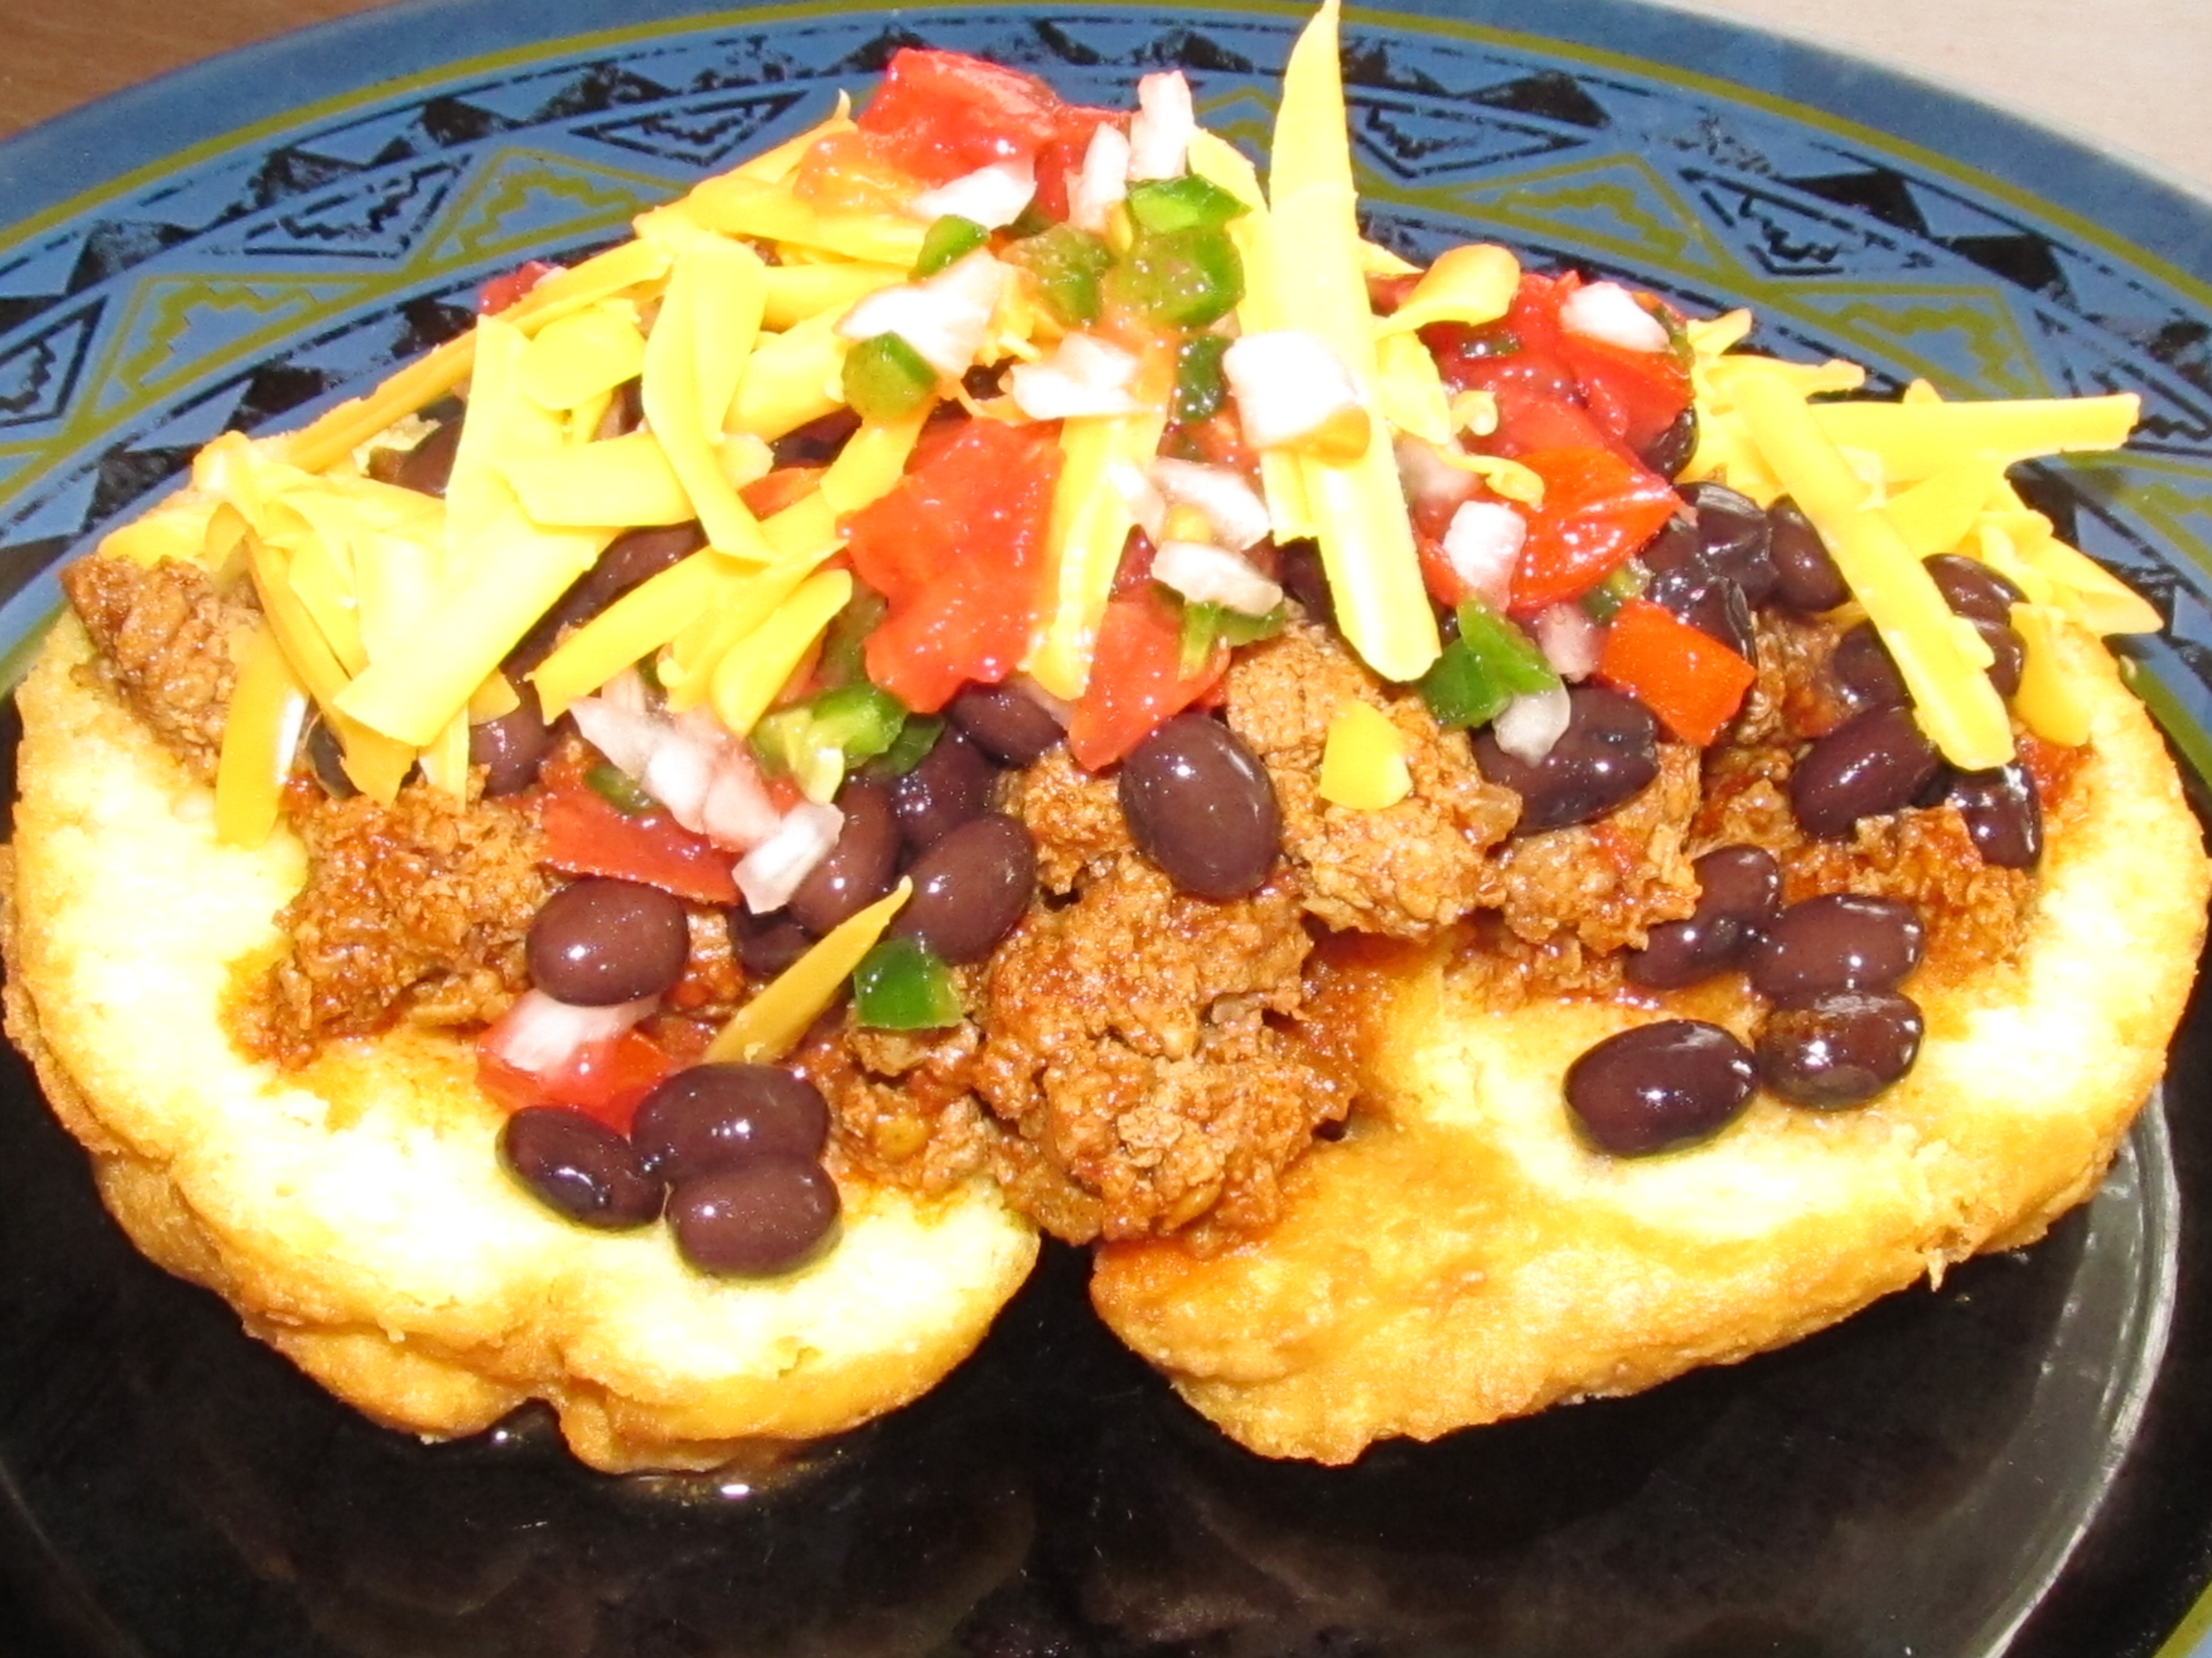
GF Indian Fry Bread (recipe below)
GF Chili ( make my own fresh chili)
Gluten Free Beans( I used Bushes Black Beans)
Fresh Pico Da Gallo
Freshly Grated Cheddar Cheese ( as much as you want, there are no rules with an Indian Taco!)
After making your fry bread and chili, split open the bread and start assembling your taco. I start with chili, then beans and pico. Top with cheese or whatever you like on your taco. Remember there are no rules with Indian Tacos!
Variations: You can add GF Salsa, brown beans, onions alone or peppers alone, whatever you like on your taco!
Gluten Free Fry Bread
Please note: Different GF Flours will take more or less liquid. So add liquid slowly until you get a cookie dough consistency, while mixing. Dough will get thicker as it absorbs the liquids.
1 1/2 Cups Betty Crocker GF Rice Flour ( I usually use Tom Sawyer GF and Betty Crocker GF mixed) (This is not GF Bisquick)
1/8 Teaspoon Xanthan Gum ( if you use a GF flour with xanthan Gum already added then omit this)
1/2 Teaspoon GF Baking Powder
1/2 Teaspoon Salt
1/2 Teaspoon Baking Soda
1/3 Cup GF Oil
1/3 Cup Milk
3 Eggs Beaten
In mixing bowl whisk together flour, xanthan gum, baking powder, salt, and baking soda. Then add oil, milk, and beaten eggs. Mix until smooth. Let set for 15 – 20 minutes or refrigerate overnight. When ready to fry, cover bottom of skillet with oil, or if you want to deep fry add more oil. I like to turn the heat up on high just until the oil sizzles when adding a bit of dough, then turn down to medium high. Oil your hands and dip out a ball of dough about 2-3 inches around. Pat out dough until it is about the size of the palm of your hand. Gently turn it over into the skillet. ( Be careful you can get burned easily doing this.) Fry about 1-2 (if you make them thick, then fry 3-4 minutes per side) minutes per side or until browned on both sides. Remove from skillet and drain on paper towels. Repeat until dough is gone. As soon as bread is cool enough, place in zip lock bags and refrigerate until ready to use. You can heat in microwave or toast when ready to eat. I can get about 10 -12 flat breads, unless you make them really thick then I only get 4 or 5, from this.
