 I have been invited to visit with anyone interested in learning about going Gluten Free and have a book signing, September 17, at Freeland Brown Pharmacy. At the above location from 1-3 pm. If you are in the Tulsa area please come by and visit. I would love to see you!
Author: Janet Monk
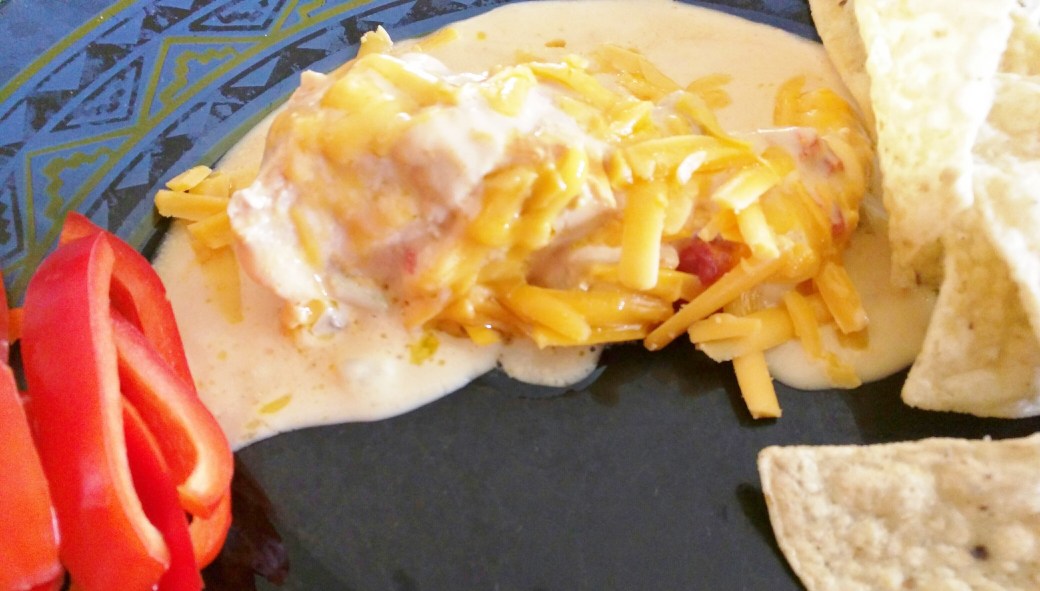
Cheesy Chicken Enchilada Bake
Cheesy Chicken Enchilada Bake
6 Cooked Chicken Strips ( You can shred them or leave whole)
1- 18.5oz. Can Progresso Gluten Free Chicken Cheese Enchilada Flavor Soup
(Optional) 1/4 to 1 Teaspoon Ground Cayenne Pepper (depending on how much heat your family likes)
1 Cup Freshly Shredded Cheddar Cheese
Heat oven to 400* F.
Grease a 9 -10 inch baking pan. Spread cooked chicken strips in bottom of pan, sprinkle with pepper and pour soup over chicken and bake for 18-20 minutes. Or until soup is hot and bubbling. Remove from oven and top with grated cheese. Serve with your favorite rice and beans or chips. Enjoy!
Variations: Add Hot peppers and onions for a kick, or cooked quinoa, to make it a casserole.
Happy Labor Day

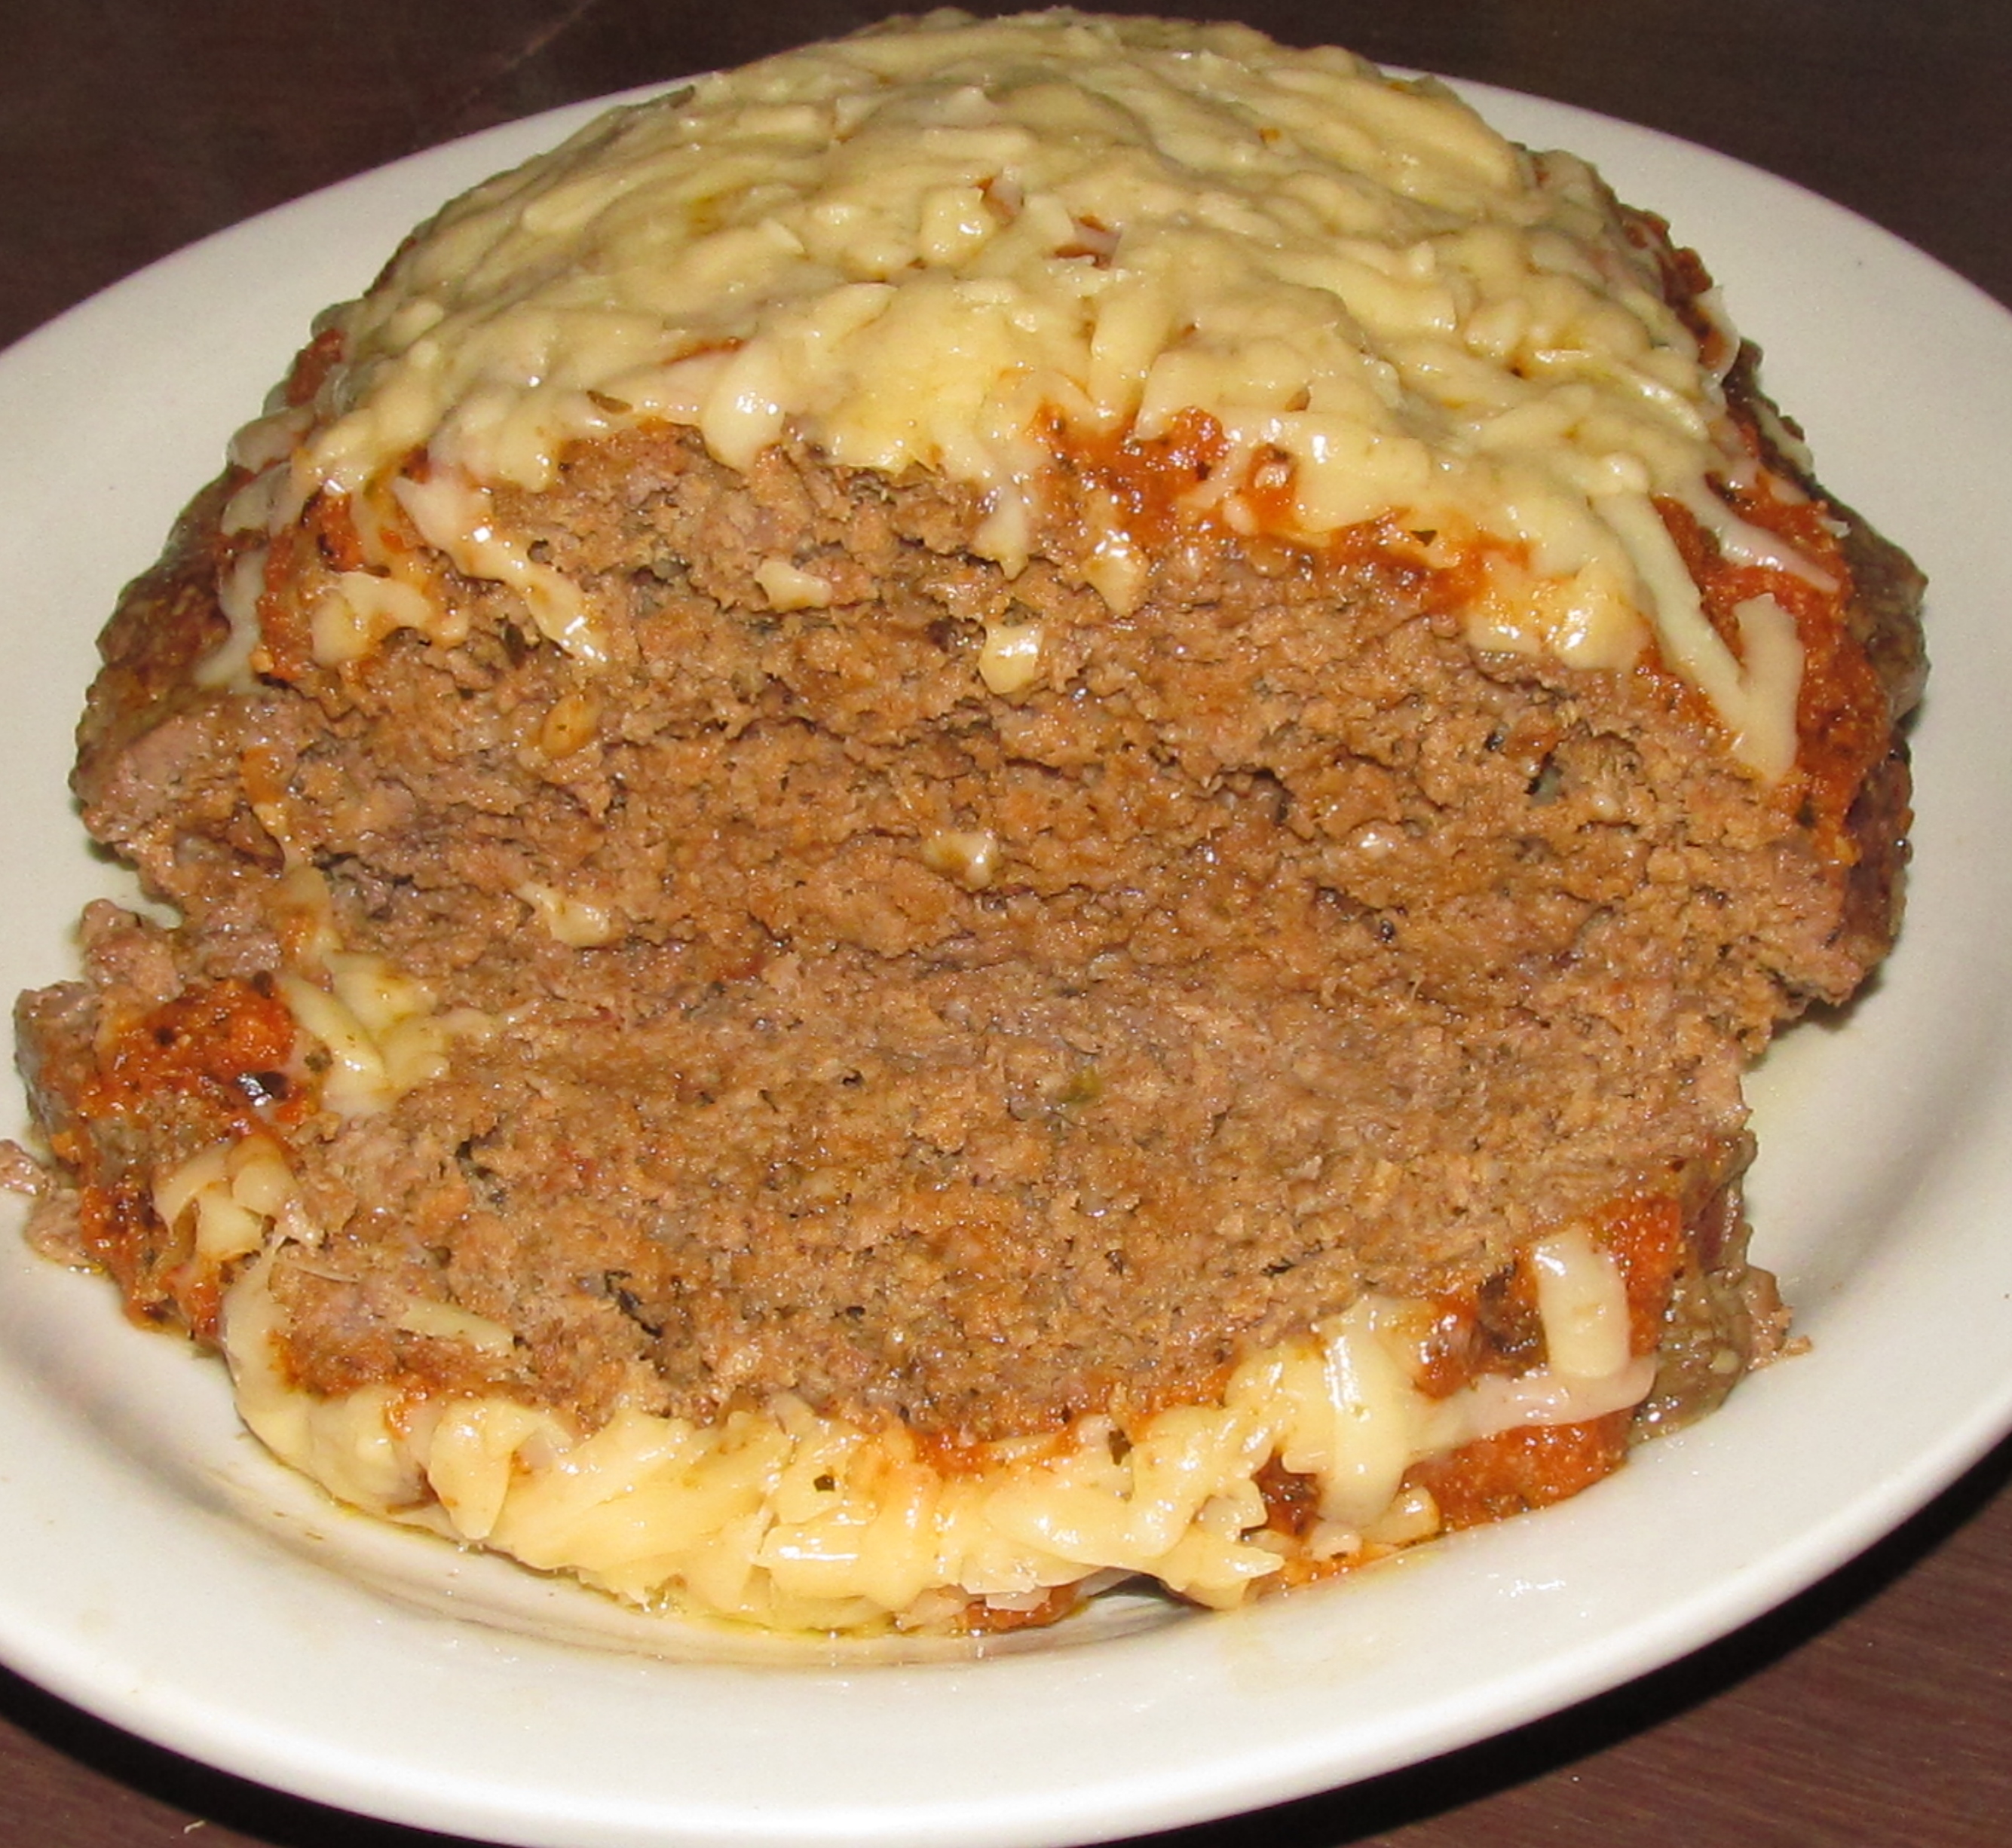
Slow Cooker Italian Meat Loaf
Slow Cooker Italian Meat Loaf
Slow Cooker Italian Meat Loaf
2 Pounds Lean Ground Beef
1 1/2 Cups Gluten Free Spaghetti Sauce (reserve ½ cup for topping)
3/4 Cup Gluten Free Bread Crumbs
1- 5oz. package additive free Parmesan Cheese grated (reserve ½ cup for topping)
2 Eggs beaten
1/2 Cup Chopped Onion (optional)
Line slow cooker with foil letting it come up the sides and coat with oil. Thoroughly mix all ingredients in a large bowl, until meat and other ingredients are well mixed, forming a ball. Place the ball of meat in the slow cooker, cover with lid, and set on low for 6-8 hours or high to cook for 4-6 hours.( Don’t fold the foil around the meat). The last 15 minutes of cooking time top with remaining spaghetti sauce and cheese. To serve lift meat loaf out of slow cooker holding edges of foil. Then slide spatula under loaf and transfer to platter. Enjoy!
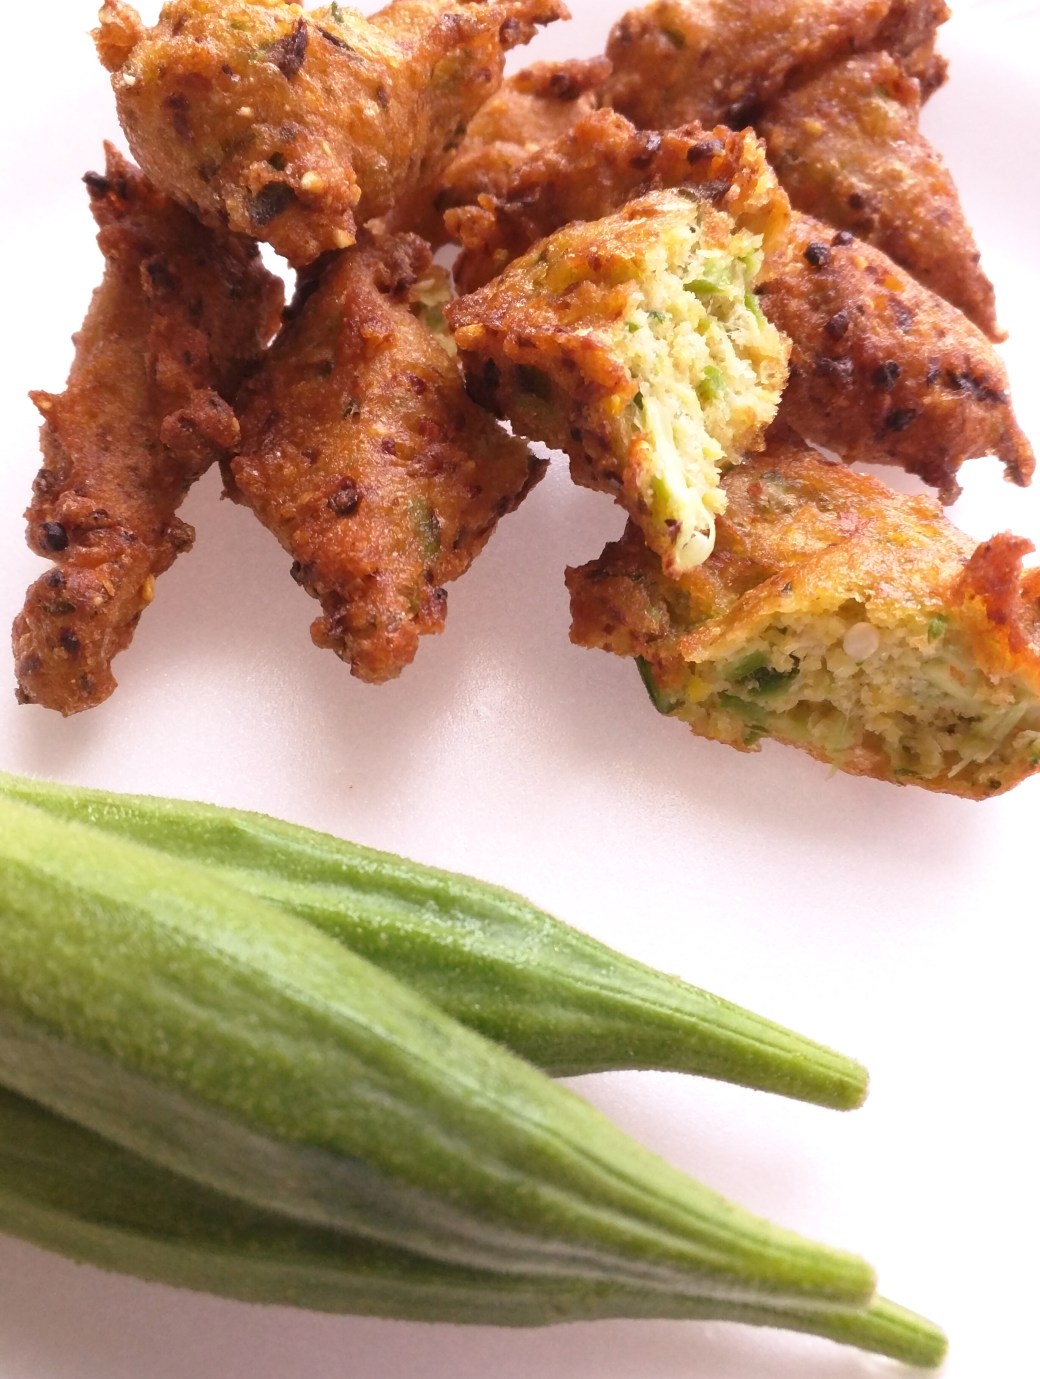
Okra Fritters
Okra Fritters
2 Cups Okra, stemmed and cut in half (about 20 pods of 3-4 inch okra)
1 Cup Gluten Free Cornmeal
2 Eggs
1/4 Cup Milk (If you need an exchange use water or milk substitute)
1 ½ Teaspoons Salt
Enough oil to deep fry fritters.
Wash, stem and cut okra in half. Pour in food processor with the cutter blade inserted. Pulse 4-5 times until okra is chopped but not pureed. Add cornmeal, eggs, milk and salt. Blend just until mixed into dough. Heat oil on high until hot enough to fry. Reduce heat to medium, then drop fritter dough into hot oil and fry until golden brown. ( about 2-3 minutes) Be sure to turn each fritter when brown on bottom side. Also make sure fritter patty is only about 1/2 inch thick. The fritters will not cook well in the center if they are too thick. When done remove from oil and drain to paper towels. Enjoy
Variations: Add garlic powder, or chopped onions for a different taste.
Okra fritters are also great for dipping!
Brazilian Sweet Cornmeal Cake Bolo de Fuba


@rio2016 In honor of the 2016 Rio Olympics
Brazilian Sweet Corn Meal Cake, Bolo de Fubá
1 Stick of Salted Butter Softened (or ½ Cup Butter Substitute)
1/2 Cup Oil
1/2 Cup Milk
1 Cup plain Greek Yogurt (or sour cream)
3 Large Eggs
2 Cups Gluten Free Corn Flour (finely ground cornmeal, I used Bob’s Red Mill)
1 Cup Gluten Free Flour with xanthan gum already added (I used Better Batter )
2 Cups white granulated Sugar
2 Tablespoons Gluten Free Baking Powder
1/2 Cup Powdered Sugar (confectioners’ sugar) For decoration
Preheat oven to 350*F.
Place all ingredients (except powdered sugar) into food processor or blender. Blend on high until completely mixed. Stop processor and scrape down sides as needed. When well mixed pour batter into a buttered or grease a non-stick Bundt pan. Place pan in oven and bake for 45 minutes or until a toothpick inserted into cake comes back clean. Remove from oven and let cake cool for at least 10 minutes. Before removing cake from pan slide a plastic knife or small spatula around edges to loosen cake. Then invert cake over cake plate. Cake should slide out clean. Dust with powdered sugar and serve with Fresh Berries and Cream! Yum!!
Thin Crust Sausage Pepper Calzone

Thin Crust Sausage Pepper Calzone
1 Pound Gluten Free Pork Sausage
1 Large Bell Pepper cut into cubes ( or you can add Hot peppers if you prefer )
1 Teaspoon Dried Oregano
1 Teaspoon Dried Basil
1 Teaspoon additive free Garlic Powder
1 Cup (8 oz.) Gluten Free Pizza Sauce
1 Cup Freshly Grated Mozzarella
1 Cup Freshly Grated Parmesan
I use my pie crust recipe for this only double. Here is the link – Jan’s Gluten Free Pie Crust https://www.facebook.com/jansglutenfreerecipes/photos/a.1671137049774256.1073741828.1671129923108302/1677945315760096/?type=3&theater
I make the dough for my crust several hours ahead of time and refrigerate it, because the dough must be very cold to get a thin crust. You can even cook the meat ahead of time and refrigerate it also until you are ready to assemble the calzone.
Brown meat, bell pepper and all spices. Remove from heat and let cool. Roll out your refrigerated dough onto a large baking sheet lined with parchment paper. My finished calzone was 13 x12 inches. So double this amount into an oblong shape. Make sure your dough stays cold. You need to pop it into the fridge or freezer to cool it off again. ( note don’t work it with your hands, it will warm up the dough and make it difficult to work with)
Preheat oven to 400*F.
When dough is rolled out to the size you want. Only on one end of the dough, gently spoon cooked and cooled meat mixture out evenly, leaving at least one inch space from the outer edge. Do not press meat into the dough. Then pour pizza sauce over meat. Sprinkle both cheeses over meat and sauce. Now you are ready to gently loosen dough from the opposite end and lift parchment paper up and fold over calzone filling. Even out any uneven edges by cutting them off and laying aside. Then press edges of dough together. I then go back and fold over the outer ½ inch edge of the crust and press that together, just to make a better seal. Your calzone should resemble a half circle or half-moon shape. If you have had any holes come into the top crust, just patch it with the extra dough that you cut off earlier.
When calzone is completely sealed place baking sheet into hot oven and bake for 20 – 25 minutes or until top crust is golden brown.
Remove let cool for about 10 minutes then cut and serve. Enjoy!
Drying Herbs

Drying Herbs
This is a long post, but I’ve had several people ask me how I preserve my Herbs. So here goes! One of the ways I put them up for winter and to give away to family and friends is to dry them. I have also frozen certain kinds of Herbs, but that’s for another post.
I start by picking my Herbs in the morning before it gets too warm. Usually by 10:00 am. Here in Oklahoma it starts getting warm really fast, and you want to start out with a fresh product. I bring a large bowl (it’s about 2 gallons) half full of ice water out to my Herb garden. I start picking out which stems I want to cut, by checking to make sure the leaves are not wilted and I also snip off any leaves that have bad places in them or have been eaten by insects. I cut the stem just above a leaf nod (that is where 2 or more, leaves are intersected together on the stem). And about 1 – 3 inches from the ground (depending on how big the plant is) for example Oregano is much taller than Thyme, so I leave about 2-3 inches of stem still on the plant to the ground. For smaller plants like Thyme, I snip off the stem about an inch above the ground. For Sage, Basil, Parsley, Mint, Dill and Rosemary, I cut closer out toward the top of the plant again just above a leaf nod, using only about 4-5 inches of the leaves and stems. This lets the plant continue to branch from that leaf nod and doesn’t stress your plant. If you cut below a leaf nod it leaves a bare stem sticking out from the plant that will die back and possibly let disease get into the dead stem and move on down into your plant.
As I cut the herbs that I want to dry I place them directly into the cold water. For drying I always keep the leaves attached to the stem. If you don’t, you will drive yourself crazy trying to pick up those tiny leaves off of your drying rack and end up wasting most of it.
The reason I use Ice Water, is to wash the stems and leaves, and kill any bugs that might be on the Herbs. Some people use vinegar to soak their Herbs in, (the vinegar is supposed to break down any pesticide residue on the Herbs) but since I don’t use any pesticides on my plants at all, so there is absolutely no need for me to use anything but water to wash them. Because there is nothing on them except maybe a little dust and a few bugs. Also another reason I don’t like to use anything stronger than water, I think the acid in the vinegar starts to break down the tender leaves and changes the taste and flavor of the Herbs.
Then when I’ve picked as much as I want, I then take the bowl into the house and put more Ice and Water on top of the Herbs, completely covering them. I then anchor them down in the water with an inverted saucer or small plate. I let them soak in the Ice Water for at least 30 minutes. I then Line an area on my counter with a towel or paper towels. I use both, placing a clean kitchen towel on the bottom, then lay a couple of layers of paper towels on top of the towel to soak up any remaining water. Then take the bowl of Herbs and Ice Water to the sink and pull each of the stems out of the water one at a time and inspect it again for any bugs or bad places, like a dark spot or wilt. (Herbs have very few bugs, or at least mine don’t, bugs don’t like Herbs very well). Removing any undesirable leaves and discarding them. Shake out any excess water into the sink and lay the stems and leaves onto the paper towels to dry. Spreading them out as much as possible. See Photo below.
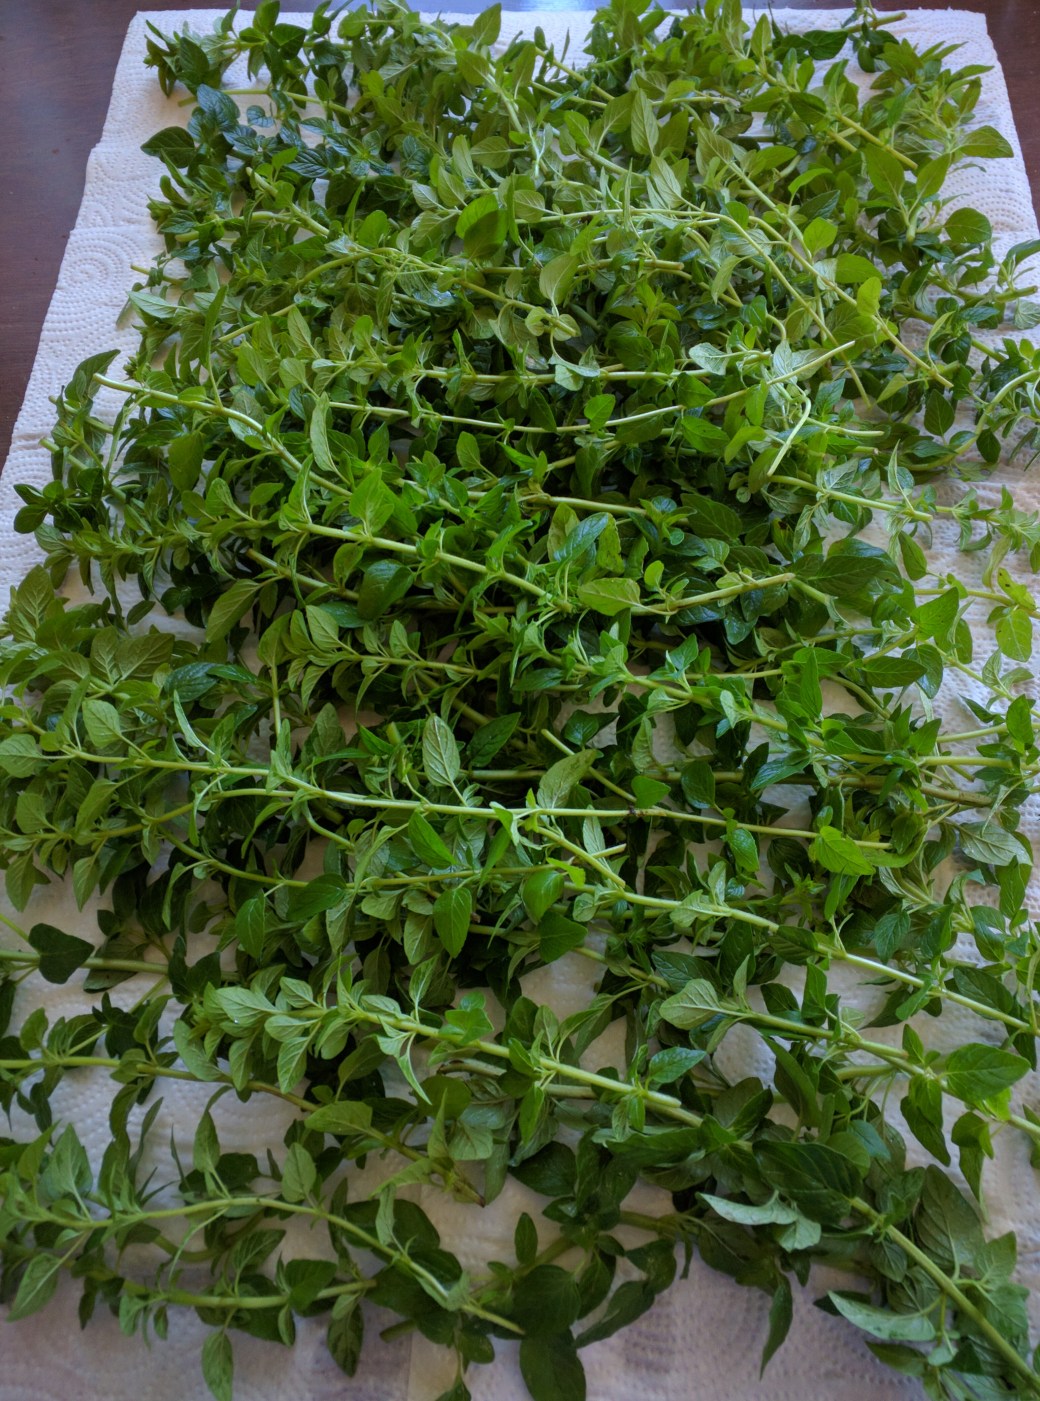
When all of the water is drained off, after about 30- 45 minutes. (the more moisture that is on the Herbs the longer it’s going to take to dry them.) You can then start loading your Herbs onto the drying racks.
I use a dehydrator. Simply because it takes so much longer in the oven, and I don’t like to heat up my house with an open oven door. Plus it ties up my oven for several hours. My dehydrator has 5 trays or racks, which I load with my Herbs, spreading them out as much as possible. After I get them loaded I stack each tray on top of the other and place the lid on top. My dehydrator lid has a lever that you can open or close, I always leave mine fully open, the Herbs dry much faster that way. Then turn it on (My dehydrator only has one setting, off or on, it’s very simple). Depending on how thick your leaves are or how full you fill each rack, with all 5 trays fully packed, mine will take 8 – 10 hours to fully dry the Herbs. I always check the trays after about 2 hours, starting with the bottom tray or rack, I will rotate it to the top. And continue to check them throughout the day. The bottom rack will always dry out first, so in order to keep them drying evenly I continue to rotate them until all racks are completely dry. If I get busy and the bottom rack gets completely dry, I just remove it and set it aside until they are all done and all the leaves are dry and crispy. If you have any leaves that feel soft or rubbery, they are not done.
When all the Herbs are dry turn off the dehydrator and remove the lid and start with the top rack first. Start taking out the stems one at a time. Handle them gently, so that you don’t lose the leaves as you transfer them to a bowl. Remove each dried leaf from the stem and place it into a clean dry bowl.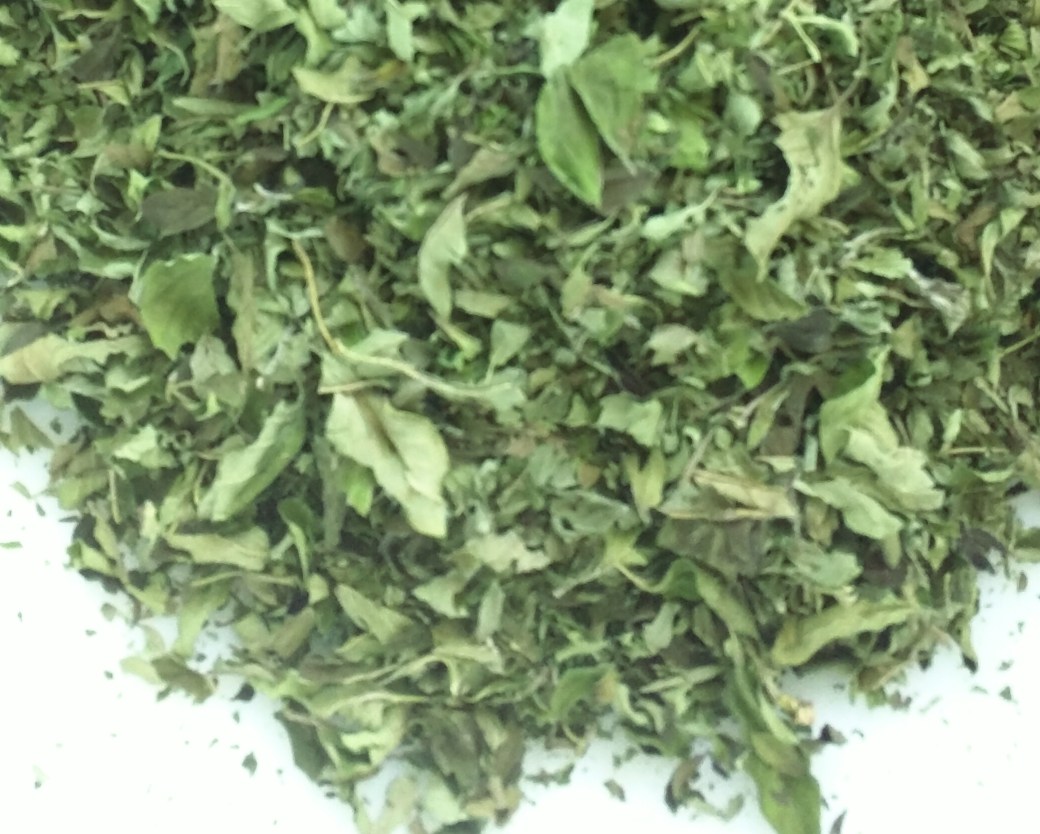

( Make sure your hands, bowl, jars and all utensils are sterile and DRY.) Discard stems and continue this process until you have emptied all the racks and all the leaves and stems are separated. I use my hands to crumble or rub the dry leaves and make sure there are no small stems hiding in the pile of dried Herbs. (be careful, those dried stems can become very sharp) Then I use my sterile tongs to fill the clean dry jars with dried Herbs. Label each jar and either place them in the freezer or store in a cool dark pantry until you are ready to use them. I like to check my jars once in a while just to make sure there is no discoloration or mold. The experts recommend using them within 6 months to a year. So far in all the years I’ve been drying them, I’ve never had any to go bad. Even though we live in such a humid climate.
Besides using my Herbs to cook with, I love to share them as gifts to family and friends. I hope you give my methods a try. It is time consuming, but well worth the effort. The flavors of drying your own Herbs are so much better than the little store bought bottles that have been sitting on shelves for no telling how long.
Note: All machines are different, so depending on the Herbs you are drying, and how many trays or racks you have in the machine, will determine the drying time. For example if you only fill 2 drying racks and you are drying Dill Weed, it could only take a 2-3 hours. So check your machine often.
Just a little history of how I got started with Herbs:
Both of my Grandmothers were unstoppable gardeners, but my Mom’s Mother was the one that had an Herb garden just outside of her kitchen door and all along the path to the garden, beside the garden fence. Where she had a huge bed of Garlic right in the corner of the garden. My sister, cousins and I grew up helping my Grandmother in the garden and helping her tie those Herbs and hang them to dry. She had a building (actually their old house that had all of the rafters in the ceiling exposed) that she used just for drying Herbs and storing treasures. (and Grandpa’s home grown tobacco) Grandma always had several balls of string that she had saved from everything. She would snip the lengths of string off and have them ready and laid out on the table to tie onto the ends of the stems once she prepared the Herbs for drying. She would bundle several Herb stems together and wrap one end of the string around one bundle, then wrap the other end of the string around another bundle. Grandma had a backward wrap that she used, to get that string just tight enough so that when the stems started to dry they wouldn’t slip out. Some Herbs she would put into paper bags to hang and dry just in case the leaves fell of the stems, the bag would catch them. Some of them she left open to dry in the air. We would then take all of the Herb bundles tied with string out to the old house and she would take one bundle and throw it over a rafter so that they would hang there in the air until they were dry. I remember those bundles gently blowing back and forth hanging from those ceiling rafters.
The old house was absolutely one of my favorite places at my Grandparents. It was well shaded with huge trees in their yard and it always seemed to have a breeze blowing through it. The smells inside that old house were so wonderful, to this day when I think about walking into the rooms it makes my mouth water.
I hope you have enjoyed my little piece of Herb history and preparation.
Sage Burgers
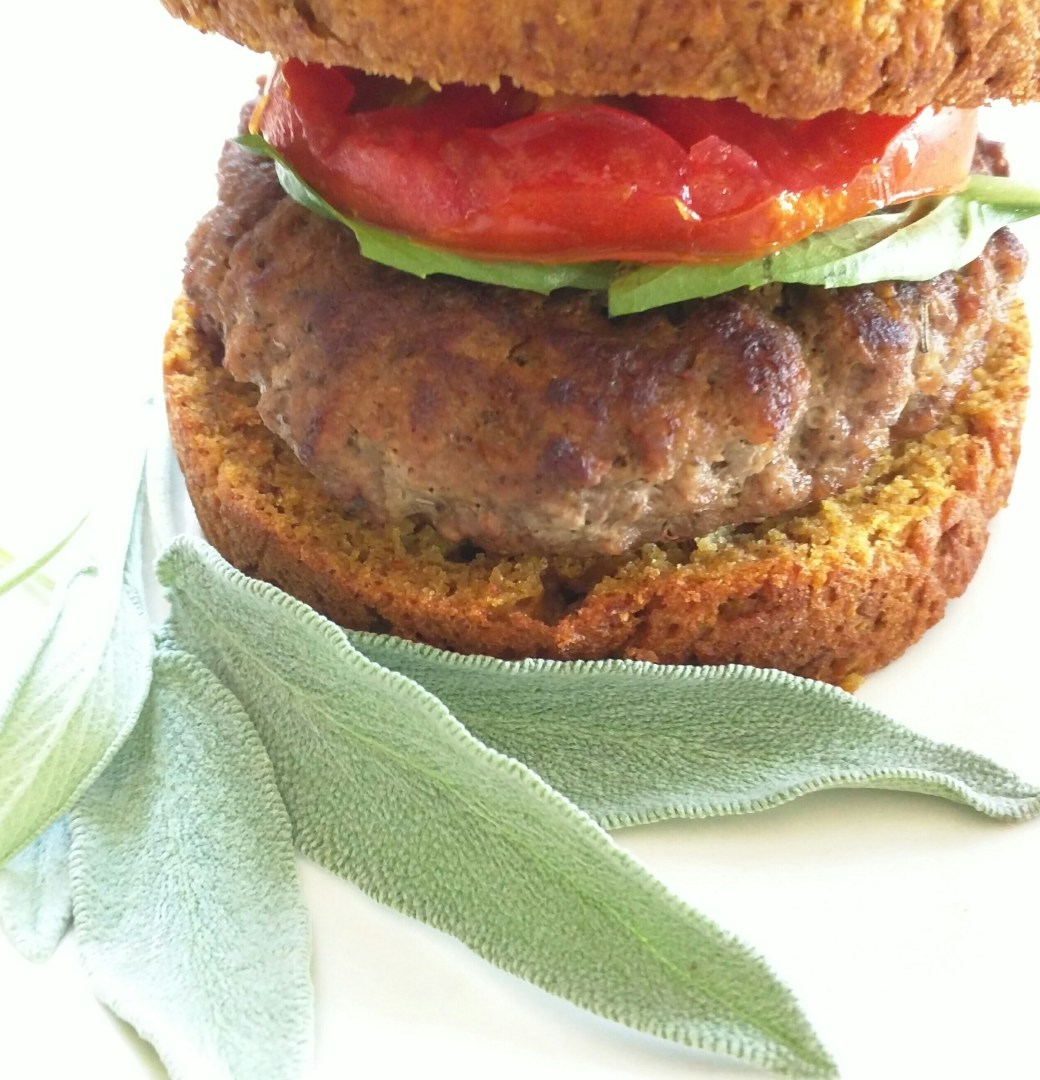
Sage Burgers
1 pound of lean Ground Beef
1 Tablespoon Rubbed or Ground Dry Sage Leaves (plus 2 teaspoons reserved)
1 Tablespoon Gluten Free Lea & Perrins Worchester sauce
1 Teaspoon MSG Free Season Salt
In medium size bowl mix ground beef, 1 tablespoon of the sage, Worchester sauce, and season salt. Blend all seasonings well with beef and pat out patties to desired size. I can usually get 5 burgers from one pound of ground beef.
Preheat Grill to 350* to 375*F.
Place each patty on grill, cover with lid and cook for 5-8 minutes. Raise lid and turn patties, then sprinkle each burger with remaining sage. Cook burgers for another 8-10 minutes, depending on how thick you make your burgers. Check the center of burgers to make sure there is no pink left in meat. When done serve with Gluten Free buns and any toppings you desire.
Eating Out Gluten Free

Eating Out Gluten Free
With everyone on summer vacations, I thought this would be a helpful post. I know there are apps that will help in finding Gluten Free restaurants, but it has been my experience that only a few of them are listed on the apps.
Recently I have had several people tell me, since they have started eating Gluten Free, they can no longer go out to eat. Well you can, you just have to do your homework. I have even had some Bakeries and Restaurants message me and tell me they are using some of my recipes! So you never know when you go out to eat you may see some of my Gluten Free recipes on your menu.
Here are a few tips.
ALWAYS, tell your waiter that you need the Allergy, or Gluten Free menu, and if you are Celiac tell them it is medically necessary that you eat Gluten Free. Don’t be afraid to ask questions. Such as do you have a dedicated fryer for fries, or are they fried in the same oil as all of the other breaded items, like chicken or onion rings? Ask if they toast the Gluten Bread in the same toaster or grill that wheat bread is toasted on. Always ask!
With the help of other sites and friends we have compiled a list of Gluten Free places to eat in several states. Please be aware, things can change. Chefs come and go, as do knowledgeable waiters and waitresses. Always ask questions, and if you don’t feel safe, don’t stay and eat. I am in no way endorsing any of these restaurants. As you well know if you have Celiac Disease or food allergies it is always a risk when you go out to eat. Please Feel Free to comment and add your favorite and SAFE Gluten Free places to eat in the comments below. Please remember, just because a chain restaurant in one city has a very good reputation for serving SAFE gluten free options, others may not. Always ask questions and make sure!
EATING OUT GLUTEN FREE BY STATE
ARKANSAS:
Angus Jack- Springdale, Arkansas
Callahan’s Steak House- Siloam Springs, Arkansas ( It’s better if you call ahead for this restaurant)
COLORADO:
Austin’s- Fort Colon’s, Co.
MARYLAND:
Alexander’s Tavern- Fells Point, Baltimore
MASSACHUSETTS:
Wagamama’s- Boston, Ma
MICHIGAN:
[V] = Dedicated Vegan
Dedicated GF
Wow (Okemos),1754 Central Park Dr. Meridian Charter Township, MI 48864
Live Gluten Free Bakery & Café 1062 E. Sternberg Rd.,Norton Shores, MI 49441 Just Off US 31 exit 109B
Moo Cluck Moo (Canton/Dearborn)42126 Ford Rd. Canton, MI (734) 844-0000 (behind Panera Bread) 8606 N. Telegraph Rd.,Dearborn Heights, MI (313) 562-9999(carry out only) (one block south of Joy rd.)**Be aware this is no longer a dedicated Gluten Free facility**
Little Mustard Seed Café & Shoppe, 51111 Washington Street,New Baltimore, MI, United States, 586-716-9255
Renee’s Gourmet Pizzeria (Troy/Southfield) 1937 W. Maple Road, Troy, MI 48084 248-280-7800, 29705 Northwestern Hwy. Southfield, MI 48034 (carry out and delivery only) 248-208-6000
Rumi’s Passion Gluten Free Bakery 41120 5 Mile Road, Plymouth, MI 48170, 734-335-7145
No More Belly Aching Bakery, 10049 Grand River Ave #100, Brighton, MI 48116 (810) 225-9773
[V] Try It Raw Inc. 213 E Maple Rd.Birmingham, MI 48009 (248)-593-6991
Celiac Specialties, 1928 Star-Batt Dr. Rochester Hills, MI 48309 (248)-860-0680
Ethel’s Edibles, Gluten Free Baking Company 22314 Harper Ave. St Clair Shores, MI 48080 (586)-552-5110
Heavenly Cakeballs 3522 S Lapeer Rd. Metamora, MI 48455 (248)-431-0740
Missouri :
Fuddruckers: Branson, Mo. ( has GF buns)
NEBRASKA:
Heidi Payton-Holstein Nebraska Great Plains Celiac group – Gluten Free
Published by Heidi Payton-Holstein · April 14 ·
Here is a list of Restaurants in Sidney Nebraska, that have gluten free menu options.
Buffalo Point Steakhouse & Grill—Yes they have a GF Menu, Yes they have a GF prep Area, chance of CC is extremely low
Perkins Restaurant & Bakery—–Yes they have a GF Menu, Yes they have a GF prep Area, chance of CC is extremely low
Applebees—–Yes they have a GF Menu, Yes they have a GF prep Area, chance of CC is extremely low
Sam and Louies Pizza—-Yes they have a GF Menu, Yes they have a GF prep Area——–The Cross Contamination is high with gluten based flour floating in the air.
Hillside Bar & Grill—-Offer ONLY a Chief Salad, but can not guarantee that all ingredients used (meats) used would be gluten free..
Sonic—–Yes they have GF options, Yes they have a GF prep Area, could not guarantee a a low CC chance.
Arbys—– Yes they have GF options, Yes they have a GF prep Area, could not guarantee a a low CC chance.
Chilli’s and Sam & Louie’s – Scottsbluff and Gering, NE.
NEW JERSEY:
Bill’s Bar and Burger – Atlantic City, NJ.
NORTH CAROLINA:
Shagger Jacks- Oak Island
Five Guys – Oak Island ( and all over the East Coast) (be aware of possible cross contamination)
Bob’s Dogs- Oak Island
My Way Tavern – Holly Springs
OKLAHOMA
The Chuck Wagon Café- Sycamore Springs Ranch 12754 South 442 Road, Locust Grove, Ok.74352 (918) 598-3310,Steaks and Baked potatoes! (Beware of the fries they are not fried in dedicated Fryer) Just tell your waitress what you can have and they will work with you.
Denny’s- Pryor, Oklahoma
Los Cocos – Salina, Oklahoma
Rowlands Quick Shop – Locust Grove, Oklahoma ( Baked Chicken)
Applebee’s – Muskogee, Ok
Lone Star Steak House- Broken Arrow, Ok ( Currently Closed, Sept. 2017)
Red Robin Gourmet Burgers-Broken Arrow, or Tulsa, Ok
(The Photo was taken at Red Robin in Broken Arrow, and yes that is a GF bun)
Red Lobster- 51 Street, Tulsa, Ok
Lyn, just added Hideaway- Broken Arrow, Ok
Hideaway Pizza- Edmond, Ok
Five Guys- also Broken Arrow( be aware of possible cross contamination)
Los Cabos- Jenks or Broken Arrow, Ok
Scholtzskys has a gluten free bun
Incredible Pizza – Tulsa, OK (gluten free pizza if you request it)
Domino’s – Durant, Ok
Roma’s Italian Restaurant- Durant, Ok
SOUTH CAROLINA
McAllister’s Deli
TEXAS:
Cheesecake Factory- Frisco, Tx
PF Chang’s – Allen, Tx
McAllister’s Deli- Sherman, Tx
Jason’s Deli- Allen and Dallas, Tx.
Happy 4th of July

First Anniversary of Jan’s Gluten Free Cook Book

Jan’s Gluten Free Cook Book Give Away!
To celebrate the first anniversary of my cook book I’m going to have another give away. From now through July 9th 2016, the person with the most votes wins a Jan’s Gluten Free Cook Book and some *BONUS RECIPES* that I have never published or posted.
To vote you must have your friends and family LIKE my Face Book recipe page (Jan’s Gluten free Recipes, click the link below) and comment on the post for the give away, or the note about the giveaway, who they are voting for. If they do not comment” who they are voting for” I cannot count your vote. If you already LIKE my page and are voting for yourself, comment so I will know. The person with the most votes wins! Please share and pass this along! I would love to give away another Cook Book!

https://www.facebook.com/jansglutenfreerecipes?ref=aymt_homepage_panel
Rosemary Dill Cucumber Salad
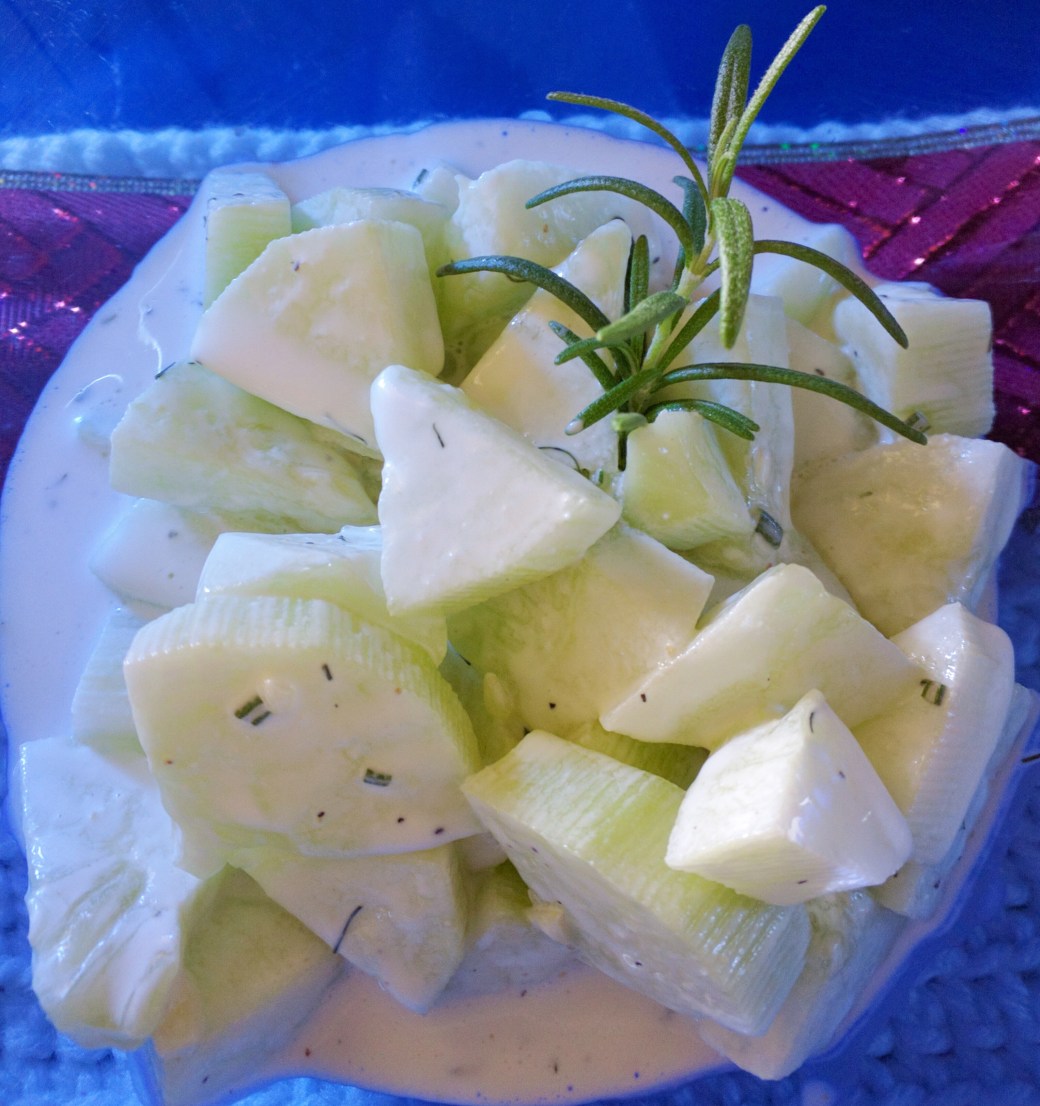
Rosemary Dill Cucumber Salad
5 Cups washed peeled and sliced Cucumbers ( about 5-6 Large Cucumbers)
Dressing:
1/8 Cup of Milk
1/2 Cup of Gluten Free Mayonnaise ( I use Hellmann’s original)
1/4 Cup plain Greek Yogurt
2 Tablespoons Lemon Juice
1/2 Teaspoon Freshly Chopped Rosemary Leaves
1/2 Teaspoon Dried Dill Weed
1/2 Teaspoon Salt
1/8 Teaspoon ground Black Pepper
In large mixing bowl (or serving bowl) add all ingredients for dressing and whisk together. Add peeled and sliced cucumbers and fold together. Refrigerate for at least 30 minutes before serving. You can also mix the dressing and refrigerate the night before and it tastes even better. Enjoy!!
Chicken and Fruit Salad
Gluten Free Chicken and Fruit Salad
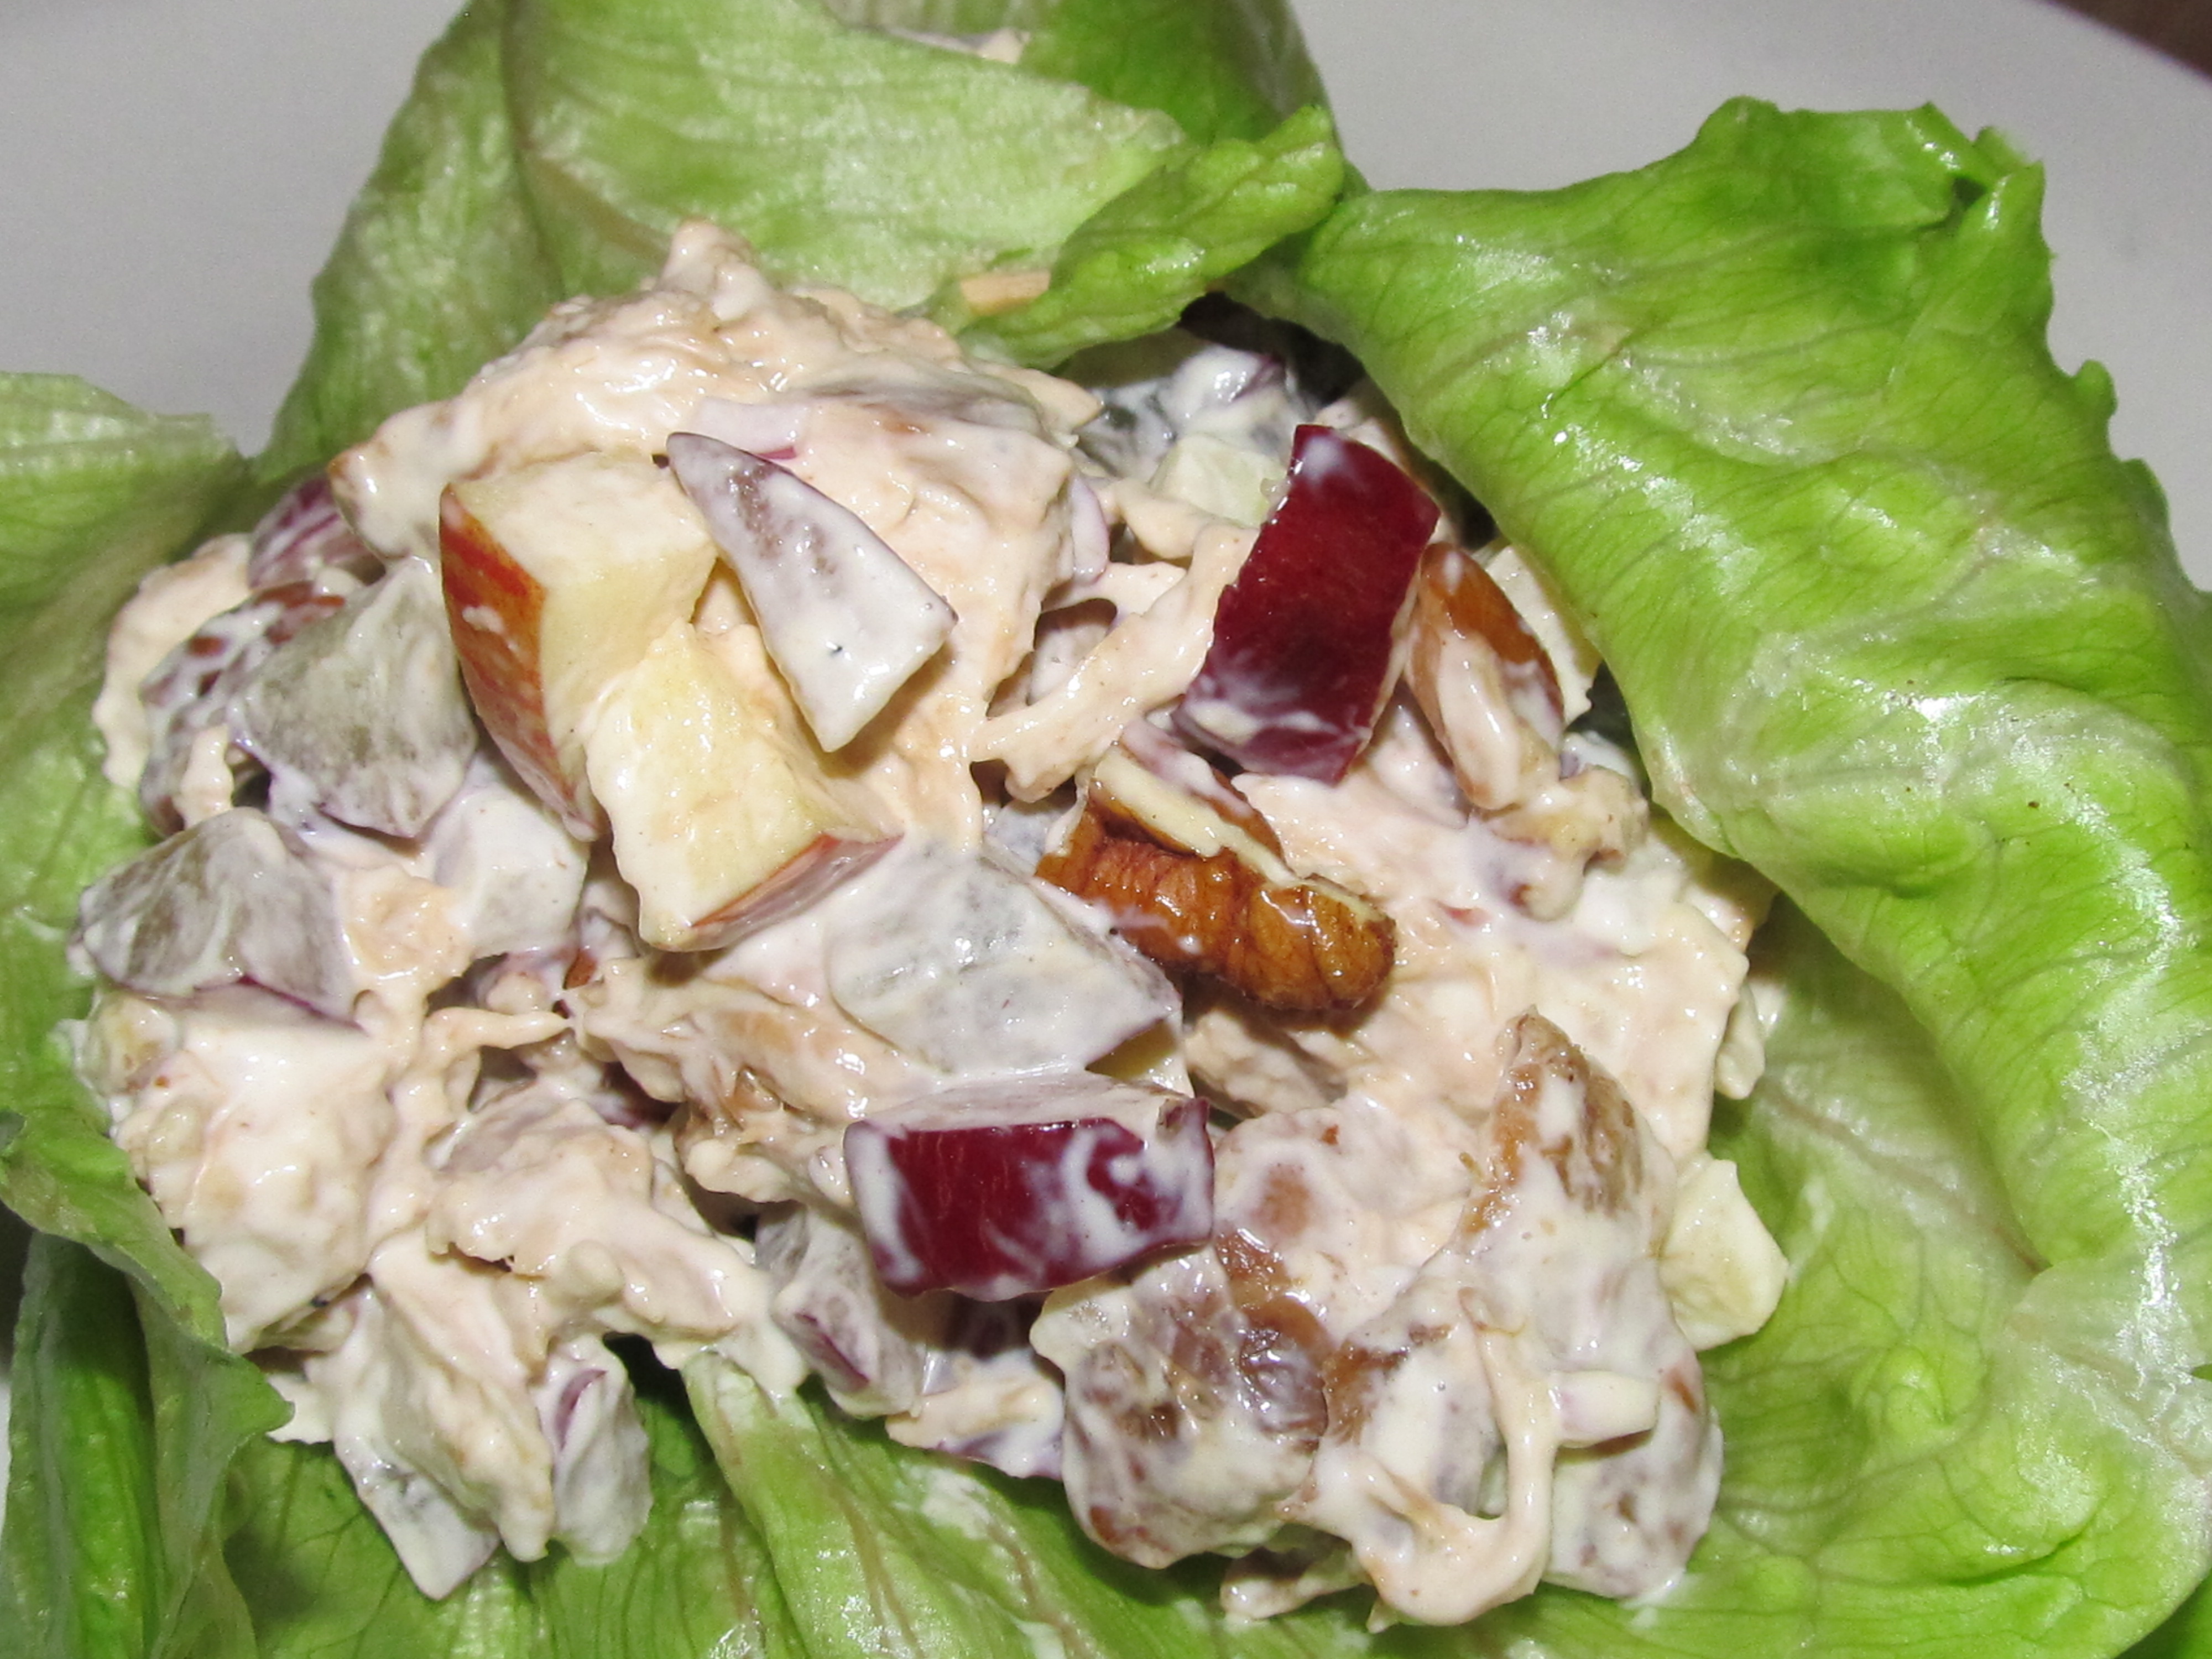
Chicken & Fruit Salad
(or you can use Turkey)
2 ½ Cups cooked and cubed chicken ( about 2 large cooked chicken breast)
1/3 Cup finely chopped red onion
1 Small apple, about 1 to 1 ¼ cups chopped apple with the peeling
1 to 1 ¼ Cups quartered and sliced seedless grapes
2/3 Cup chopped pecans
2/3 Cup Gluten Free mayonnaise ( I use Hellmans Real mayo)
In medium bowl add cooked and cubed chicken ( or turkey). Wash and cut up fruit and onion adding this to chicken, along with pecans. Then pour in mayo and mix well. Serve in lettuce wrap or on your favorite Gluten Free bread for a great tasting sandwich. Enjoy!
Pork and Kale Crockpot
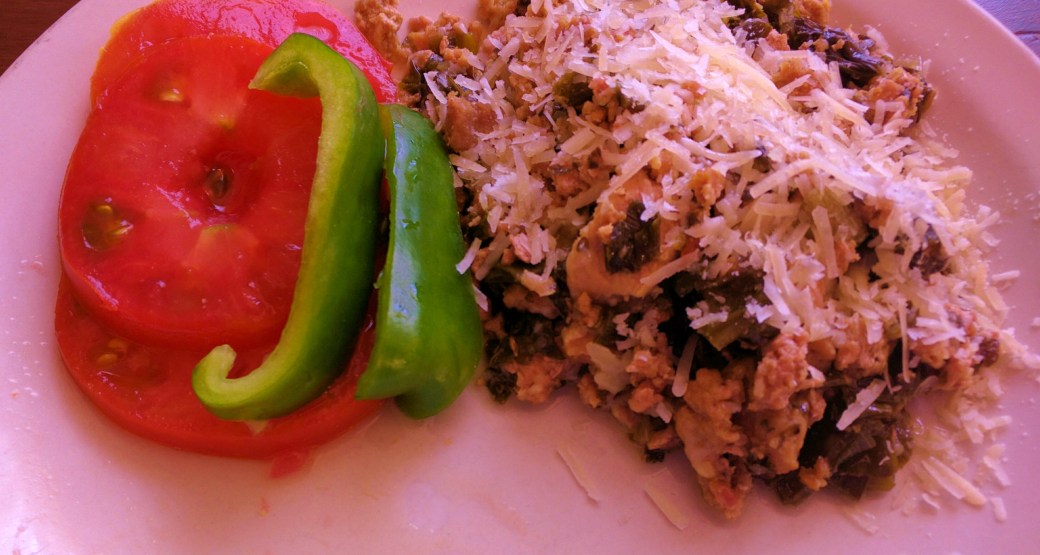
Pork and Kale Crockpot
1 Pound ground Pork
2 Large Cloves garlic minced (about ½ Tablespoon each)
1 Onion chopped (about 2 Cups, I used garden onions)
1/2 Tablespoon dried Fennel Seed
1 Tablespoon chopped Fresh Oregano (1/2 Tablespoon if using dry)
1/2 Cup chopped fresh Parsley
8 oz. Gluten Free Chopped Ham
2 cups chopped Kale (packed)
1 Cup Water
1 Teaspoon Salt
1 Cup freshly Grated GF Parmesan Cheese ( more if you want)
In large skillet, on medium heat brown pork, adding garlic, fennel, oregano, and parsley. Stir and cook pork until there is no pink left. Then stir in ham and cook until both meats are brown. Turn off heat to skillet and let set. To crockpot add Kale, water and salt. Turn on heat to 4-6 hours on high or 6- 8 hours on low. Pour meat mixture on top of kale, cover with lid and let mixture cook. When ready to serve top with cheese. Enjoy!
Variations: You can make this a complete meal by adding more veggies such as potatoes or carrots. Just double the amount of herbs, potatoes will absorb the herb flavors very fast.
Fresh Veggie Pizza
Gluten Free Fresh Veggie Pizza with Cream Cheese Filling
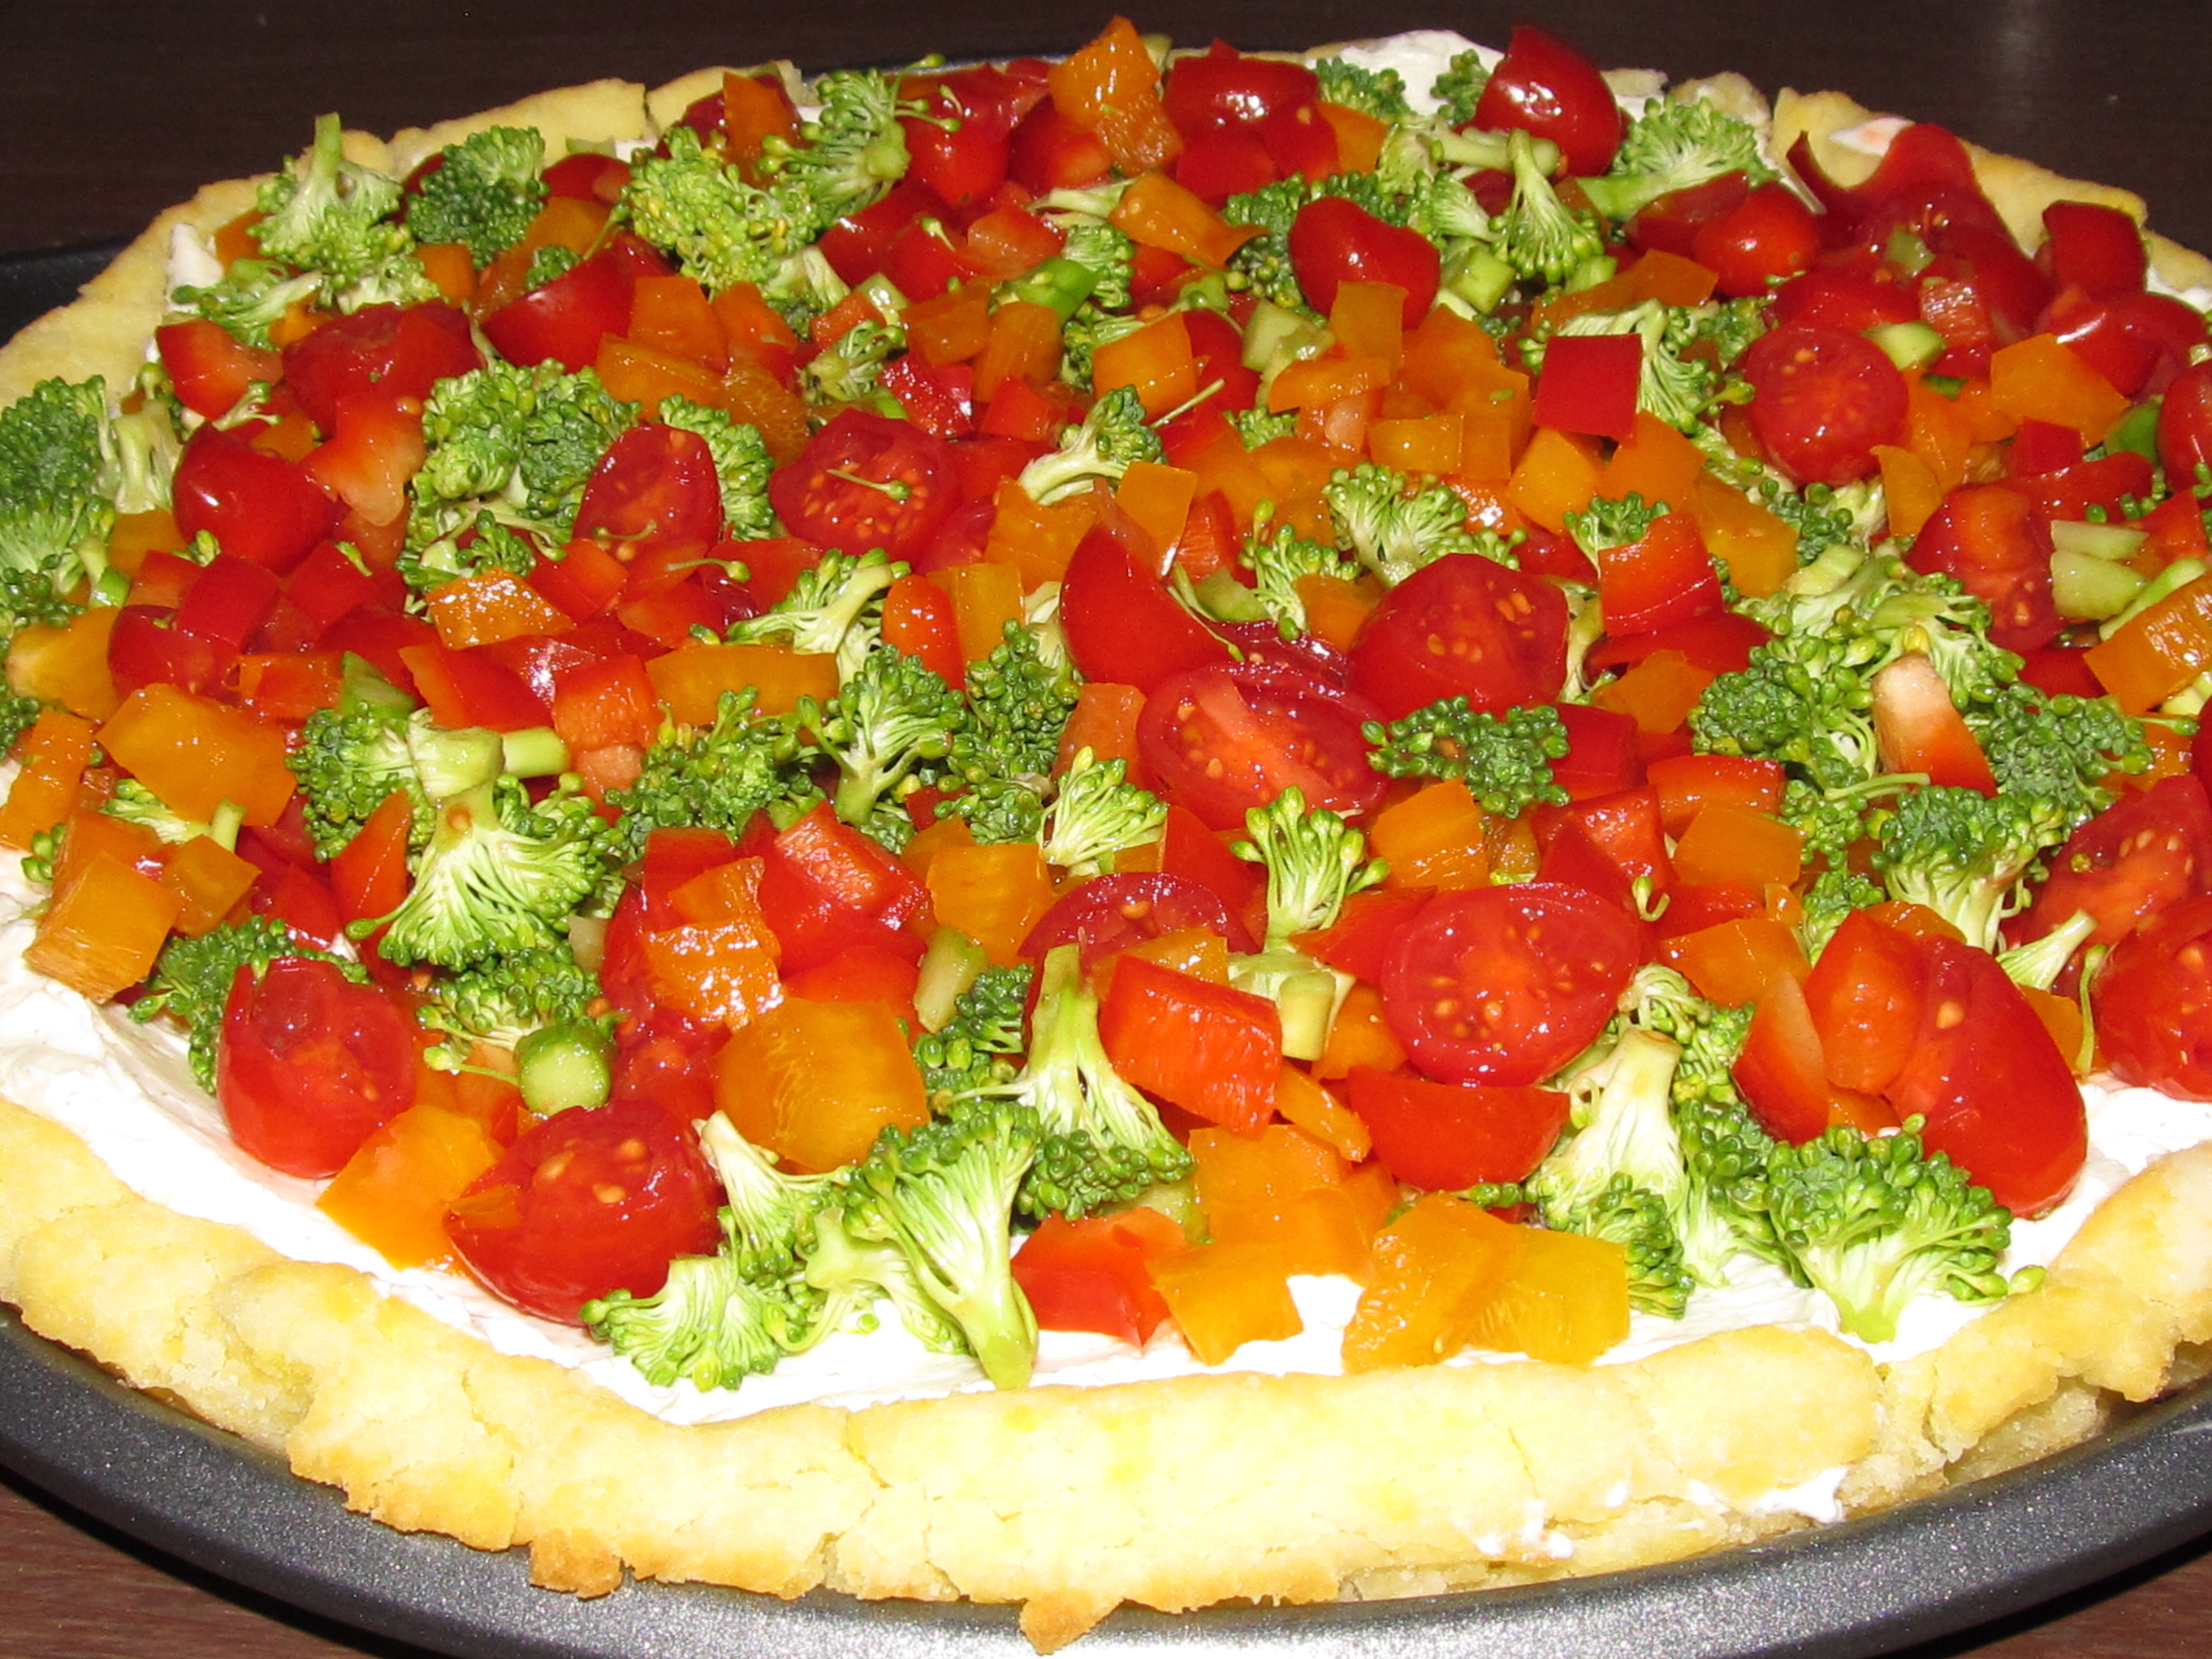
Gluten Free Veggie Pizza
Pizza Crust:
2 Cups Gluten Free Bisquick Mix
2 Eggs
2/3 Cup Milk
2/3 Cup GF Oil
Preheat oven to 325*F.
In medium size mixing bowl, whisk eggs and milk, add oil, and fold in Bisquick mix. Mix well and set dough in refrigerator for at least 30 minutes. The Bisquick is a little gritty, so I like to let it set to absorb the liquids as long as possible. When ready to bake, grease a 12 inch pizza stone or nonstick round baking pan. Pour dough onto pan and spread dough with your hands until completely covering pan and forming a raised crust around the edges. Bake for 25 to 30 minutes or until crust is lightly browned. Let crust cool and cover with filling below.
Filling:
2 – 8oz. packages additive free cream cheese ( I use Philadelphia)
1 Heaping Tablespoon of Gluten Free Mayonnaise ( I use Hellmann’s)
1 Heaping Tablespoon Gluten Free Dry Ranch Mix( see recipe in Vegetables and Dressings)
1 Large head of Broccoli chopped (just florets do not use large stalks)
1 Sweet Red Bell Pepper, washed, seeded and cubed into small pieces
1 Sweet Orange or yellow Bell Pepper, washed, seeded and cubed also
1 medium tomato cubed or about 1 ½ cups of cherry tomatoes sliced in half
In food processor blend cream cheese, mayonnaise, and dry ranch dressing mix, until smooth and creamy. Spread cheese mixture onto cooled crust, then cover with chopped vegetables. Slice into small pizza slices and serve. ( Note: add any vegetables you like, or you can even add chopped avocado, or if you want to turn this into a meat pizza, then add some chopped GF ham. )

Chicken Broccoli Bacon Casserole
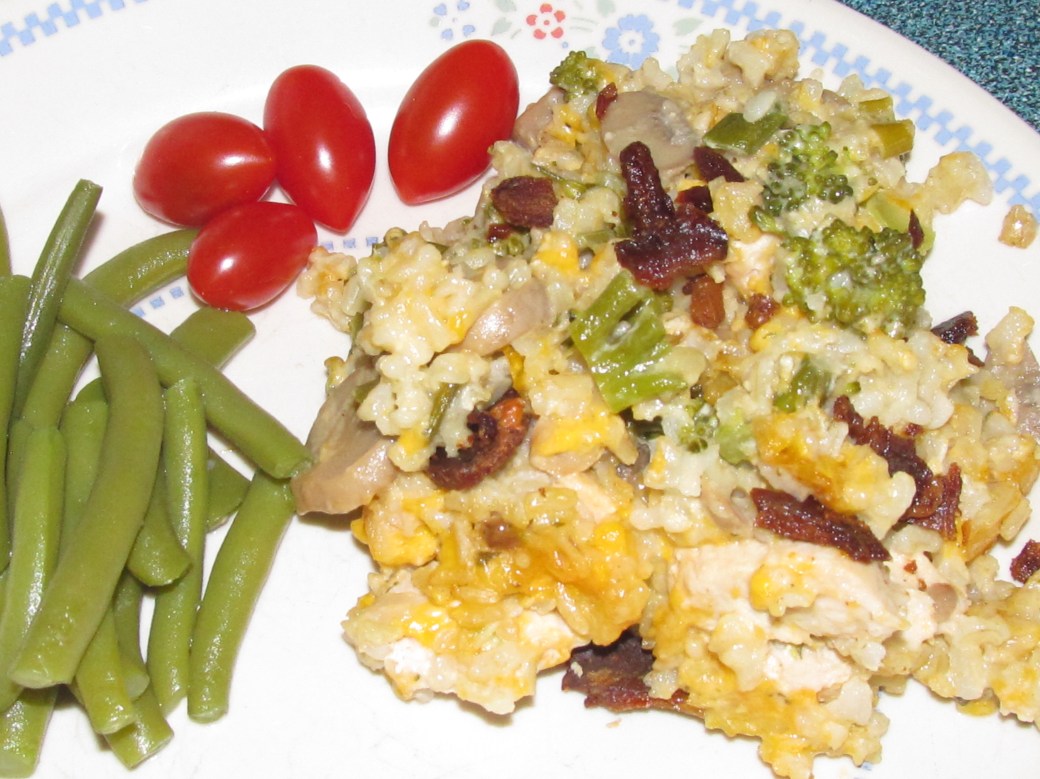
Chicken Broccoli Bacon Casserole
2 Large Uncooked Chicken breast cut into 1 inch cubes( about 2 ½ Cups)
2 Cups chopped Broccoli
2 Cups additive free freshly grated Cheddar Cheese
1 – 18 oz. Can Gluten Free Cream of Mushroom soup ( I used Progresso)
1 – 6oz. jar of additive free sliced Mushrooms
1 – 14.5 oz. can of 100% Chicken Broth ( I used Swanson)
1 Teaspoon Salt
1 large green Garden onion chopped
2 Cups Brown Minute Rice
8 – 10 slices of cooked Bacon, chopped or crumbled (reserve about ¼ cup for garnish)
Preheat oven to 375* F.
In large mixing bowl add all ingredients. Mix and pour into a 9×13 inch baking pan, spreading out evenly. Bake for 35 to 40 minutes or until bubbling and starting to brown on top. Chicken should be cooked through. Top with remaining bacon and serve.
Basil Kale Garden Dip
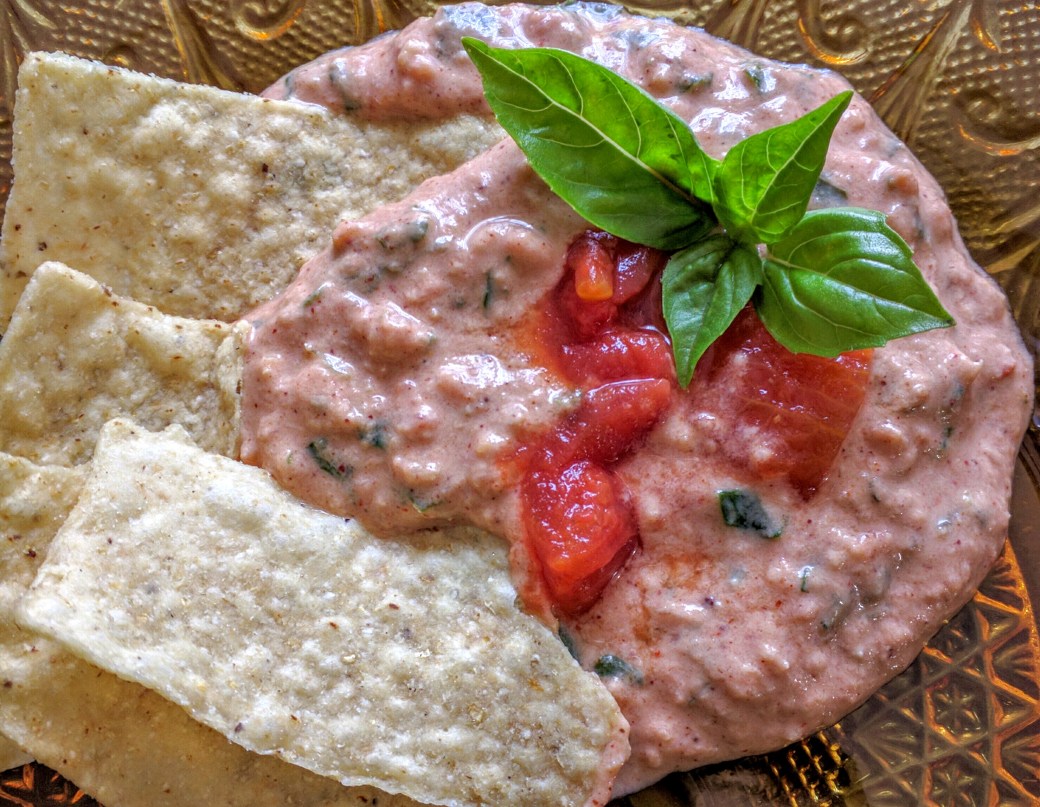
Basil Kale Garden Dip
2 Cups chopped fresh Basil
2 Cups chopped fresh Kale
6-7 large Cloves of minced Garlic
2 Large Tomatoes Chopped
1 Large Bell Pepper Chopped
Optional 1 Jalapeño Chopped
8 oz. (1 Cup) Plain Greek Yogurt
1 Teaspoon Salt ( or season to taste)
In food processor pulse the Basil, kale and garlic until only small pieces are left. Then add remaining ingredients. Blend until tomatoes and pepper are also in small pieces. Cover and refrigerate for about an hour, or over night before serving. The flavors of the vegetables and herbs will blend together better the longer it sets. Serve with chips or use a dip for chicken or meatballs.
Variations: You can also add onions, or 1 Tablespoon of Chili powder. Also pepper flakes.
Wilted Salad with Hot Garlic Ginger Dressing


Wilted Lettuce Salad with Hot Garlic Ginger Dressing
4 Cups washed and torn Leaf Lettuce
1 Cup washed and torn Baby Kale Leaves
1-2 Chopped Green Onions
Optional- 1 Cup chopped cooked Chicken or Turkey
1/4 Cup light Olive Oil
2-3 Slices Gluten Free Bacon
2 Tablespoons minced Garlic
1 Tablespoon Freshly Grated Ginger ( have garlic and ginger already minced and grated before you start to fry bacon).
In medium size bowl assemble lettuce, kale, onions, chicken, and toss. Plate individual salads onto heat proof bowls or plates. Using a cast iron skillet, heat oil on high and fry bacon until crisp. Remove bacon when done and drain on paper towel. Leaving heat turned up on medium high add garlic and ginger. Fry until garlic sizzles just starts to turn brown, this only takes a few seconds. Immediately remove from heat and pour over plated salads. Lettuce should pop and sizzle so that it will wilt. Crumble bacon over salads, season to taste with salt and or pepper and serve.
Variations: Instead of cooked chicken, you can use cooked and thinly sliced steak.
You may also want to add some chopped hot peppers, or top with grated cheese or boiled eggs.
Some people also like to add a bit of balsamic or white vinegar after pouring oil over salad.
Happy Mother’s Day

My Celiac Story
My Celiac Story
I wasn’t positively diagnosed for Celiac Disease until after I was 50 years old, but I started a Gluten Free diet several years before I was ever tested.
My Mom was diagnosed when she was almost 70, and when our Dr. described some of the symptoms, well it was a given. I already had so many problems at a very early age I knew I had it too. So we decided I needed to be on a Gluten Free diet too, and later I did test positive for Celiac Disease.
My symptoms started very young. I was always a very picky eater, along with Anemia, vomiting, Acid Reflux, itching, unexplained rashes, stomach cramps and constipation. My immune system was a mess, I would catch anything that came along. I also had trouble taking vaccinations, I usually came down with what they were vaccinating me for.
The Dr.s were constantly giving me Iron shots, vitamins and Iron pills, etc. I was small for my age. ( Which was always extremely annoying for me!!!) I really wanted to be big enough and strong enough to do all of the exciting things that were always going through my head!
I had trouble focusing at times. Other times everything just clicked and I could keep it together. I made very good grades in school, but it didn’t come easy for me. Most of the time I was a calm level headed, very quiet kid. Other times I just couldn’t remember things, but because of that, I did learn some skills that I still use today. I drove my sister nuts with notes and lists, (that I taped all over our room,) to myself reminding me of things I needed to do, because I couldn’t remember. Sometimes I would cry, get mad and for really no reason at all. I was either a ball of energy or so tired I could fall asleep without notice. (That’s the times that usually got me more Iron shots)
The times that I had all that energy, I had no fear! I’m not saying I was a holy terror, but I sure could think of things to get into. That usually got me and my sister in trouble. At 4 and 5 years old I would climb all the way to the top of trees, until the limbs would be so thin they started to break. It still didn’t scare me. I even swan dived out of the top of one of those trees, with a rope in my teeth, I still have the missing teeth to proof it. That is only one incident! Believe me there were many many more!
You may be wondering, what this has to do with Celiac Disease? I now know it has a lot to do with it. Food sensitivities can cause all kinds of problems in kids. Including extreme behaviors like I had. I did learn self-control though. I was a preacher’s kid, and doing flips in church was frowned up on.(I didn’t do it, I just thought about it.) So I learned to control my extreme behaviors. (Most of the time.) When I would get the Heebie-Geebies, the name I gave to my episodes when I could hardly hold myself down, I developed a skill in order to cope. I still have that habit today, and it annoys the life out of my husband! If I have to sit still for very long, I bounce my knee, to the point that sometimes if anyone is sitting beside me they could be bounced out of the chair. I don’t realize when I do it, until someone punches me, or I start getting annoying looks from people around me.
I never had the extreme diarrhea that a lot of people with Celiac Disease have. I had constipation, and horrible Acid Reflux!!! I don’t ever remember a time that I didn’t have it. Then as I got older, and more damage was done my joints started to swell and I would have such over the top joint pain that it started to slow this wild child down. The Dr.s finally diagnosed me with Juvenile Rheumatoid Arthritis. This was probably a blessing in disguise though. The young Dr. that diagnosed the JRA put me on a diet that excluded most of the Gluten I was eating. I was never a bread eater, but I did love blue cheese and a lot of other inflammatory foods. He didn’t call it a Gluten Free diet, I don’t know if they even knew what that was, but it did help. Along with some very strong medications. Of course I was still getting Gluten in other things, and the word Gluten was never mentioned. The damage to my body was already done though. As I got older, I developed menstrual problems, ( and eventually infertility) and Thyroid Disease. Among other problems, all of which are related to the damage caused by undiagnosed Celiac Disease.
What I want everyone with kids to take away from my story is, if you have a kid with any of these problems. A picky eater. A kid that can’t control themselves at times, has trouble focusing. May or may not have stomach issues, rashes. Extreme tiredness at times. Please don’t just shrug it off. Please, take them to get them tested for food sensitivities or Celiac Disease. Don’t take them off of Gluten right away until you talk to a good Dr. that knows about Celiac or Gluten Sensitivity. They have to be eating gluten for at least 4-6 weeks for an accurate test.
Please pay attention to those Heebie-Geebies! This is miserable! I know now that it was something that I couldn’t control. I never have them anymore unless I get accidently Glutened, or am exposed to things I’m allergic to, MSG, Flax, codeine and some artificial food colors. I have to carry an Epi pen with me at all times now because the extreme Acid Reflux caused so much damage to my throat, it’s caused Anaphylaxis.
This is the reason I’m telling my story. If your child does have food sensitivities, the damage it is doing to their little bodies can’t be seen. They can’t tell you what is going on. As an adult, I can now recognize the symptoms I had as a kid were caused by Celiac Disease and Food allergies. Please Please, don’t ignore these symptoms in your kids. Children can’t explain why they are acting out, but I’m telling you from experience why I did! Please use my story to help your kids!!!!!
Herbed Asiago Gluten Free Biscuits


My herbs are growing so fast, I am in the garden nearly everyday picking and cooking with them. This is a photo of my parsley and oregano. They both wintered over in abundance!
Herbed Asiago Gluten Free Biscuits
1/4 Cup Butter Melted ( or butter substitute)
2 Teaspoons Freshly chopped Basil Leaves
3 Teaspoons Freshly Chopped Oregano Leaves
1 Tablespoon minced Garlic
1 Cup Gluten Free All-Purpose Flour
1 Tablespoon White Sugar
1 Tablespoon GF Baking Powder
1/2 Teaspoon Baking Soda
2 Cups Freshly Grated (additive free) Asiago Cheese (8 0z. package)
1/3 Cup Sweet Pure Butter Milk
1/2 Cup Egg Whites (I like to whisk the egg whites and butter milk together before adding to dry ingredients)
Melt butter and adding herbs and garlic, let this set to cool while you mix other ingredients. In mixing bowl whisk together all dry ingredients. Then add cheese, butter milk, egg whites, butter, herbs and garlic. Mix well making sure all dry ingredients are incorporated. Let batter set for 10- 15 minutes, or refrigerate if longer. When ready to bake, Preheat oven to 325*F.
Using a triggered ice cream scoop (about ¼ Cup) drop biscuits onto greased non-stick 9 inch pan. Bake for 30- 35 minutes or until biscuits are browned around the edges. I can get about 10 biscuits out of this recipe. As soon as you remove pan from oven butter top of biscuits and serve. Enjoy!!!
Please note: Dough should be just a bit thicker than cake batter. It will not run, but is very light and fluffy. You cannot roll this dough out and cut for biscuits.
Cowboy Beans


Spring is a very busy time of year for us. Planting, working cattle, preparing for hay season, etc. So if I have used up all of my freezer meals, that I grab in a pinch, this is my go to quick meal. Cowboy Beans! I think my sister is the one that came up with this one years ago. We love it, hope you do too!
Cowboy Beans
1 Pound Lean Ground Beef
1/2 Teaspoon (MSG free Season Salt)
1- 28oz. Can of Bush’s Best Original Baked Beans
In medium sized skillet, on medium high heat, brown ground beef and season with salt. When meat is well cooked with no red remaining, add beans and stir. When mixture is bubbling and cooked through, remove from heat and serve. Enjoy!
Variations: Instead of all ground beef add 1/2 pound of sausage. You may want to add chopped hot peppers and minced garlic. Use your imagination!
Old Fashioned Gluten Free Oatmeal Cookies
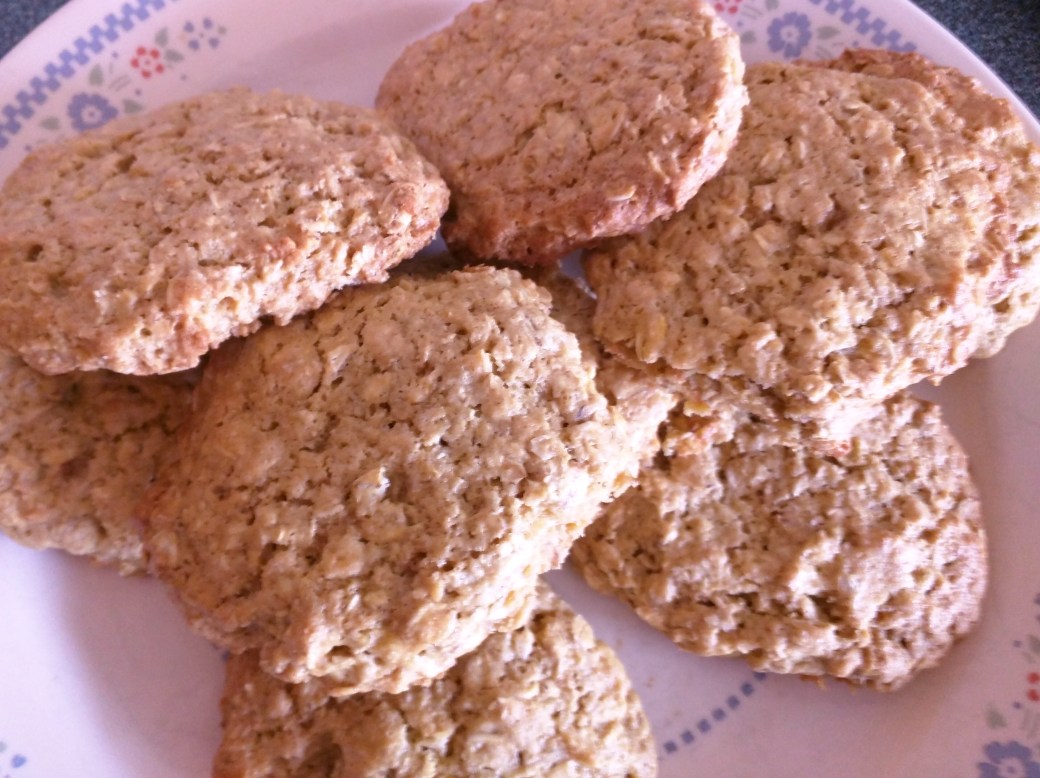
Old Fashioned Gluten Free Oatmeal Cookies
2 1/2 Cups Gluten Free Rolled Oats
1/2 Cup Packed Dark Brown Sugar
1/2 Cup White Sugar
1 Cup All-Purpose Gluten Free Flour ( I used Better Batter)
1/2 Teaspoon Baking Soda
1/2 Teaspoon Baking Powder
2 Large Eggs (Beaten)
4oz. Cream Cheese softened
1/4 Cup Salted Butter softened (1/2 Stick)
1 Tablespoon Pure Vanilla
Preheat oven to 350*F.
In large mixing bowl add all dry ingredients and whisk together. Then cut in eggs, cheese, butter and vanilla. Mix together until well blended. Spoon onto greased cookie sheet, and flatten out to about ¼ inch thick. ( I wet my fingers to do this.) Bake for 16 to 18 minutes. We like ours just until they are crispy around the edges. Enjoy!!!
Pork Steak and Wild Mushrooms
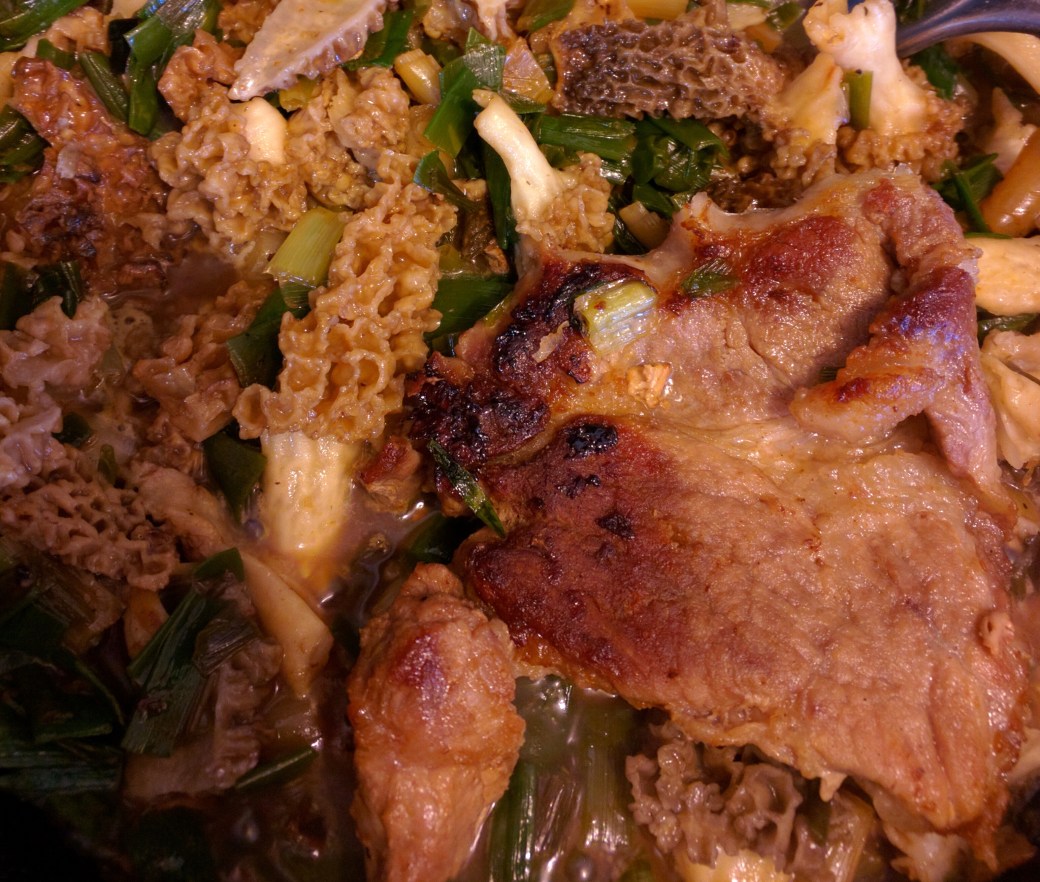
I know in many parts of the country Morels are coming up and ready to pick. Here in Oklahoma, these mushrooms are a delicacy we enjoy for a little while then they are gone!
Pork Steak and Wild Mushrooms
2 Large Pork Steaks
5-6 Cups Chopped Green Onions
3 Cups Sliced Morel Mushrooms ( about a dozen medium mushrooms)
1/2 Teaspoon MSG free Season Salt
1/2 Teaspoon Regular Salt
1/4 Cup Water
In large cast iron skillet brown pork steaks for about 5- 6 minutes on medium high heat with the lid on. Bring heat up on high, remove lid and turn steaks and sprinkle seasoning salt over steaks, add 1 ½ cups of onions. Brown steaks for another couple of minutes then turn steaks again letting onions fall beneath steaks to brown in the meat drippings. Reduce heat to medium high again and put lid back on, letting onions and steaks cook another couple of minutes or until steaks and onions are browned, tender and completely cooked through. (Cooking time will vary, depending on how thick your steaks are.) Turn off heat, remove steaks leaving most of the onions and drippings in skillet. Add 1/4 cup water to drippings and pour in remaining chopped onions (about 4 ½ cups). Turn heat back on to medium high, cover with lid and let onions sweat for about 5 minutes or until the whites are fork tender. Remove lid raise heat to high, add sliced mushrooms, sprinkle with salt and sauté for another 5-6 minutes. Gently turning with spatula 2 -3 times making sure all mushrooms are heated through. To Serve pour onions and mushrooms on platter and top with pork steaks. Enjoy!!
Note: Weather you pick your own mushrooms or buy them, always soak wild mushrooms in cold salt water for 2-3 hours to kill any bugs. I always rinse mine twice, after soaking just to make sure, before cooking.
Ham Salad Sandwich
Gluten Free Ham Salad Sandwich
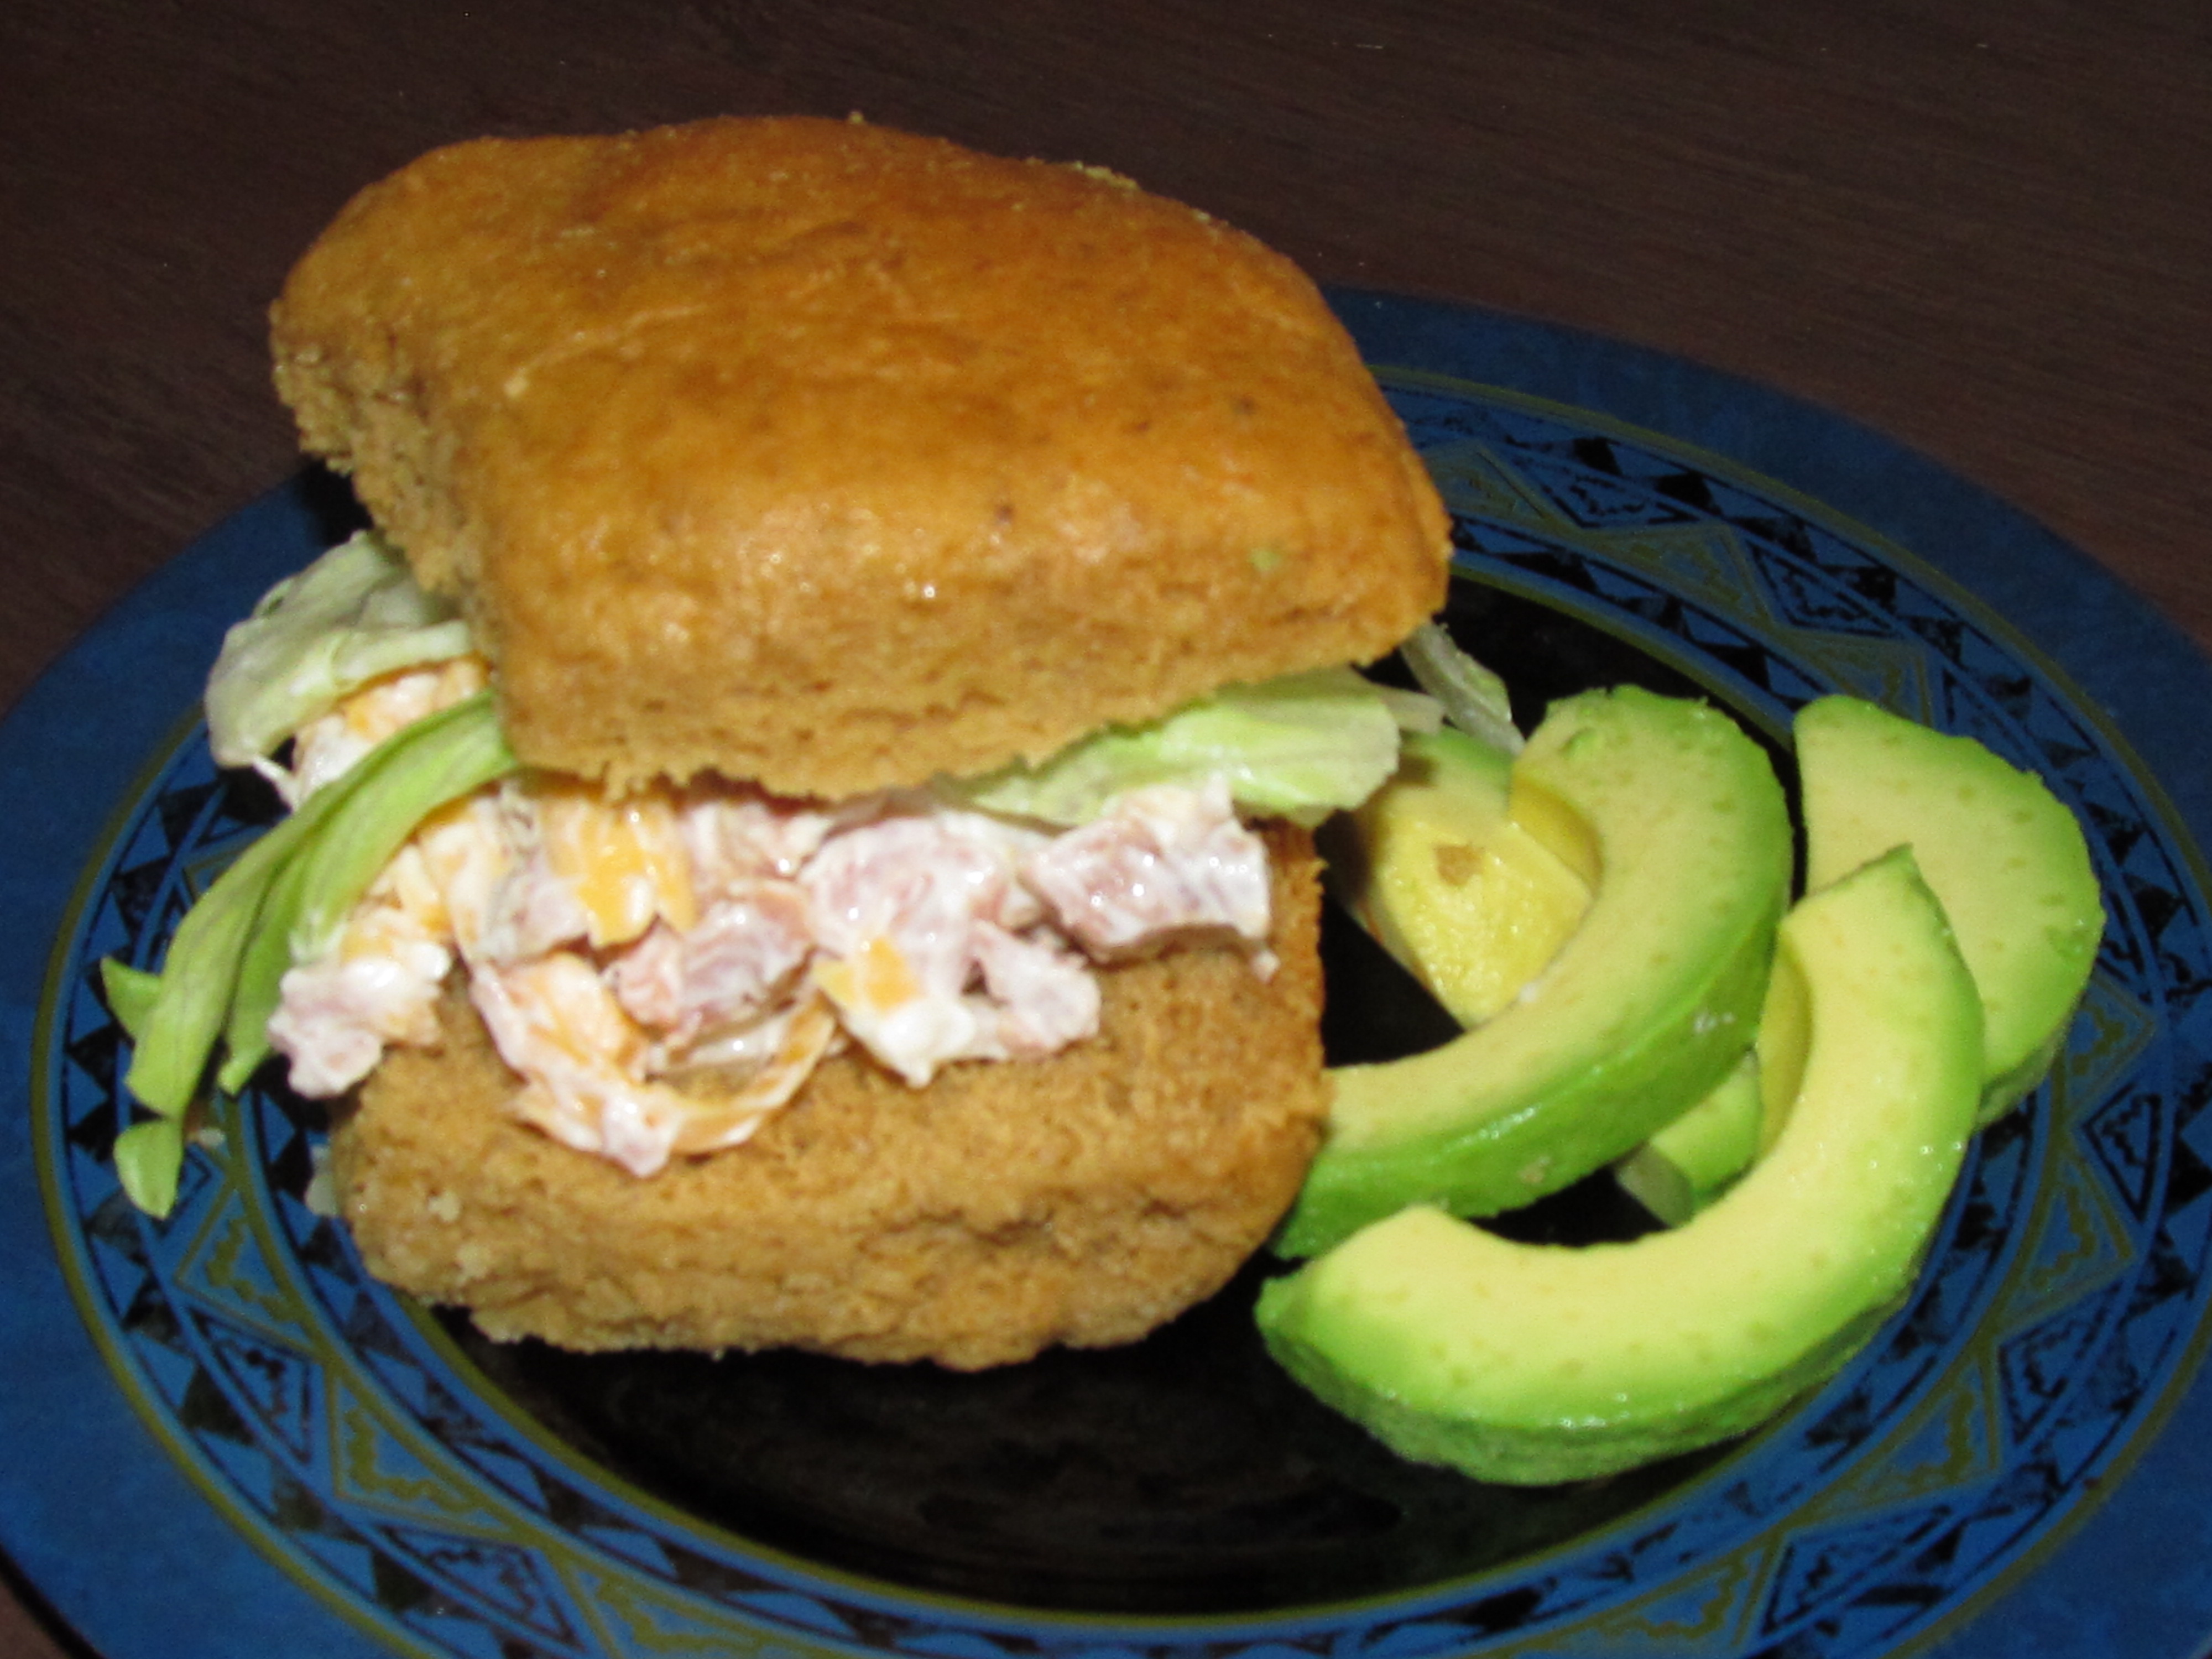
Ham Salad (Left overs?)
2 Cups chopped Cooked Ham
1 Cup freshly shredded additive free Cheese
1/2 Cup diced Onion
1 diced boiled Egg (optional)
3/4 Cup GF Mayo ( I used Hellmans GF)
Mix all ingredients and serve on lettuce wrap or GF bun.
This is my go to recipe for ham salad, yall just be creative add what ever appeals to you. You notice in the picture that the avocado is on the side. That’s because my husband doesn’t like it in the salad, so I add my avocado later!
Wishing Everyone A Blessed Easter Weekend

Teriyaki Carrots
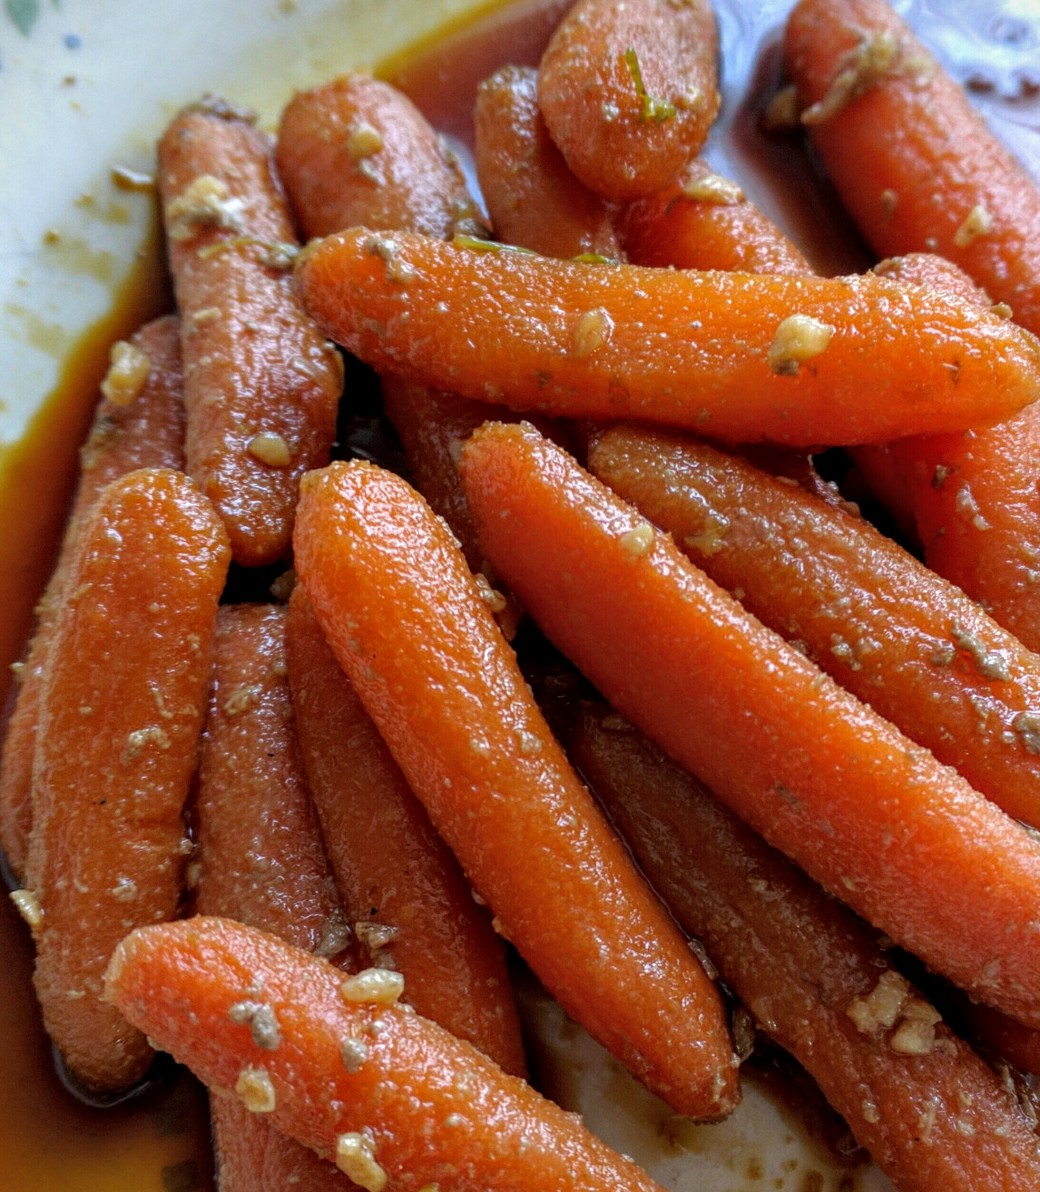
Teriyaki Carrots
2- 12 oz. Bags of sweet baby Carrots ( I use Green Giant real baby carrots)
1 – 10oz. Bottle of Gluten Free Teriyaki sauce ( I use Kikkoman)
2 Tablespoons minced Garlic (if you like garlic add more)
1 Teaspoon GF, MSG Free Season Salt
Preheat oven to 375* F.
Wash and rinse Carrots then spread them out in a 9×13 inch baking pan. ( I prefer to use glass or stone ware) Pour teriyaki sauce over carrots, making sure all carrots are submerged in sauce. Spread garlic over carrots then sprinkle with season salt. Bake for 30-35 minutes or until carrots are fork tender. Serve warm and enjoy!
Variations: I have also made this on top of the stove in a cast iron skillet as a stir fry. Adding thinly sliced beef or chicken and other vegetables.
Note: If you use the larger size carrots, baking or cooking time will be longer.
Jan’s Molasses Rolls
April 8, 2015March 18, 2016 / Edit
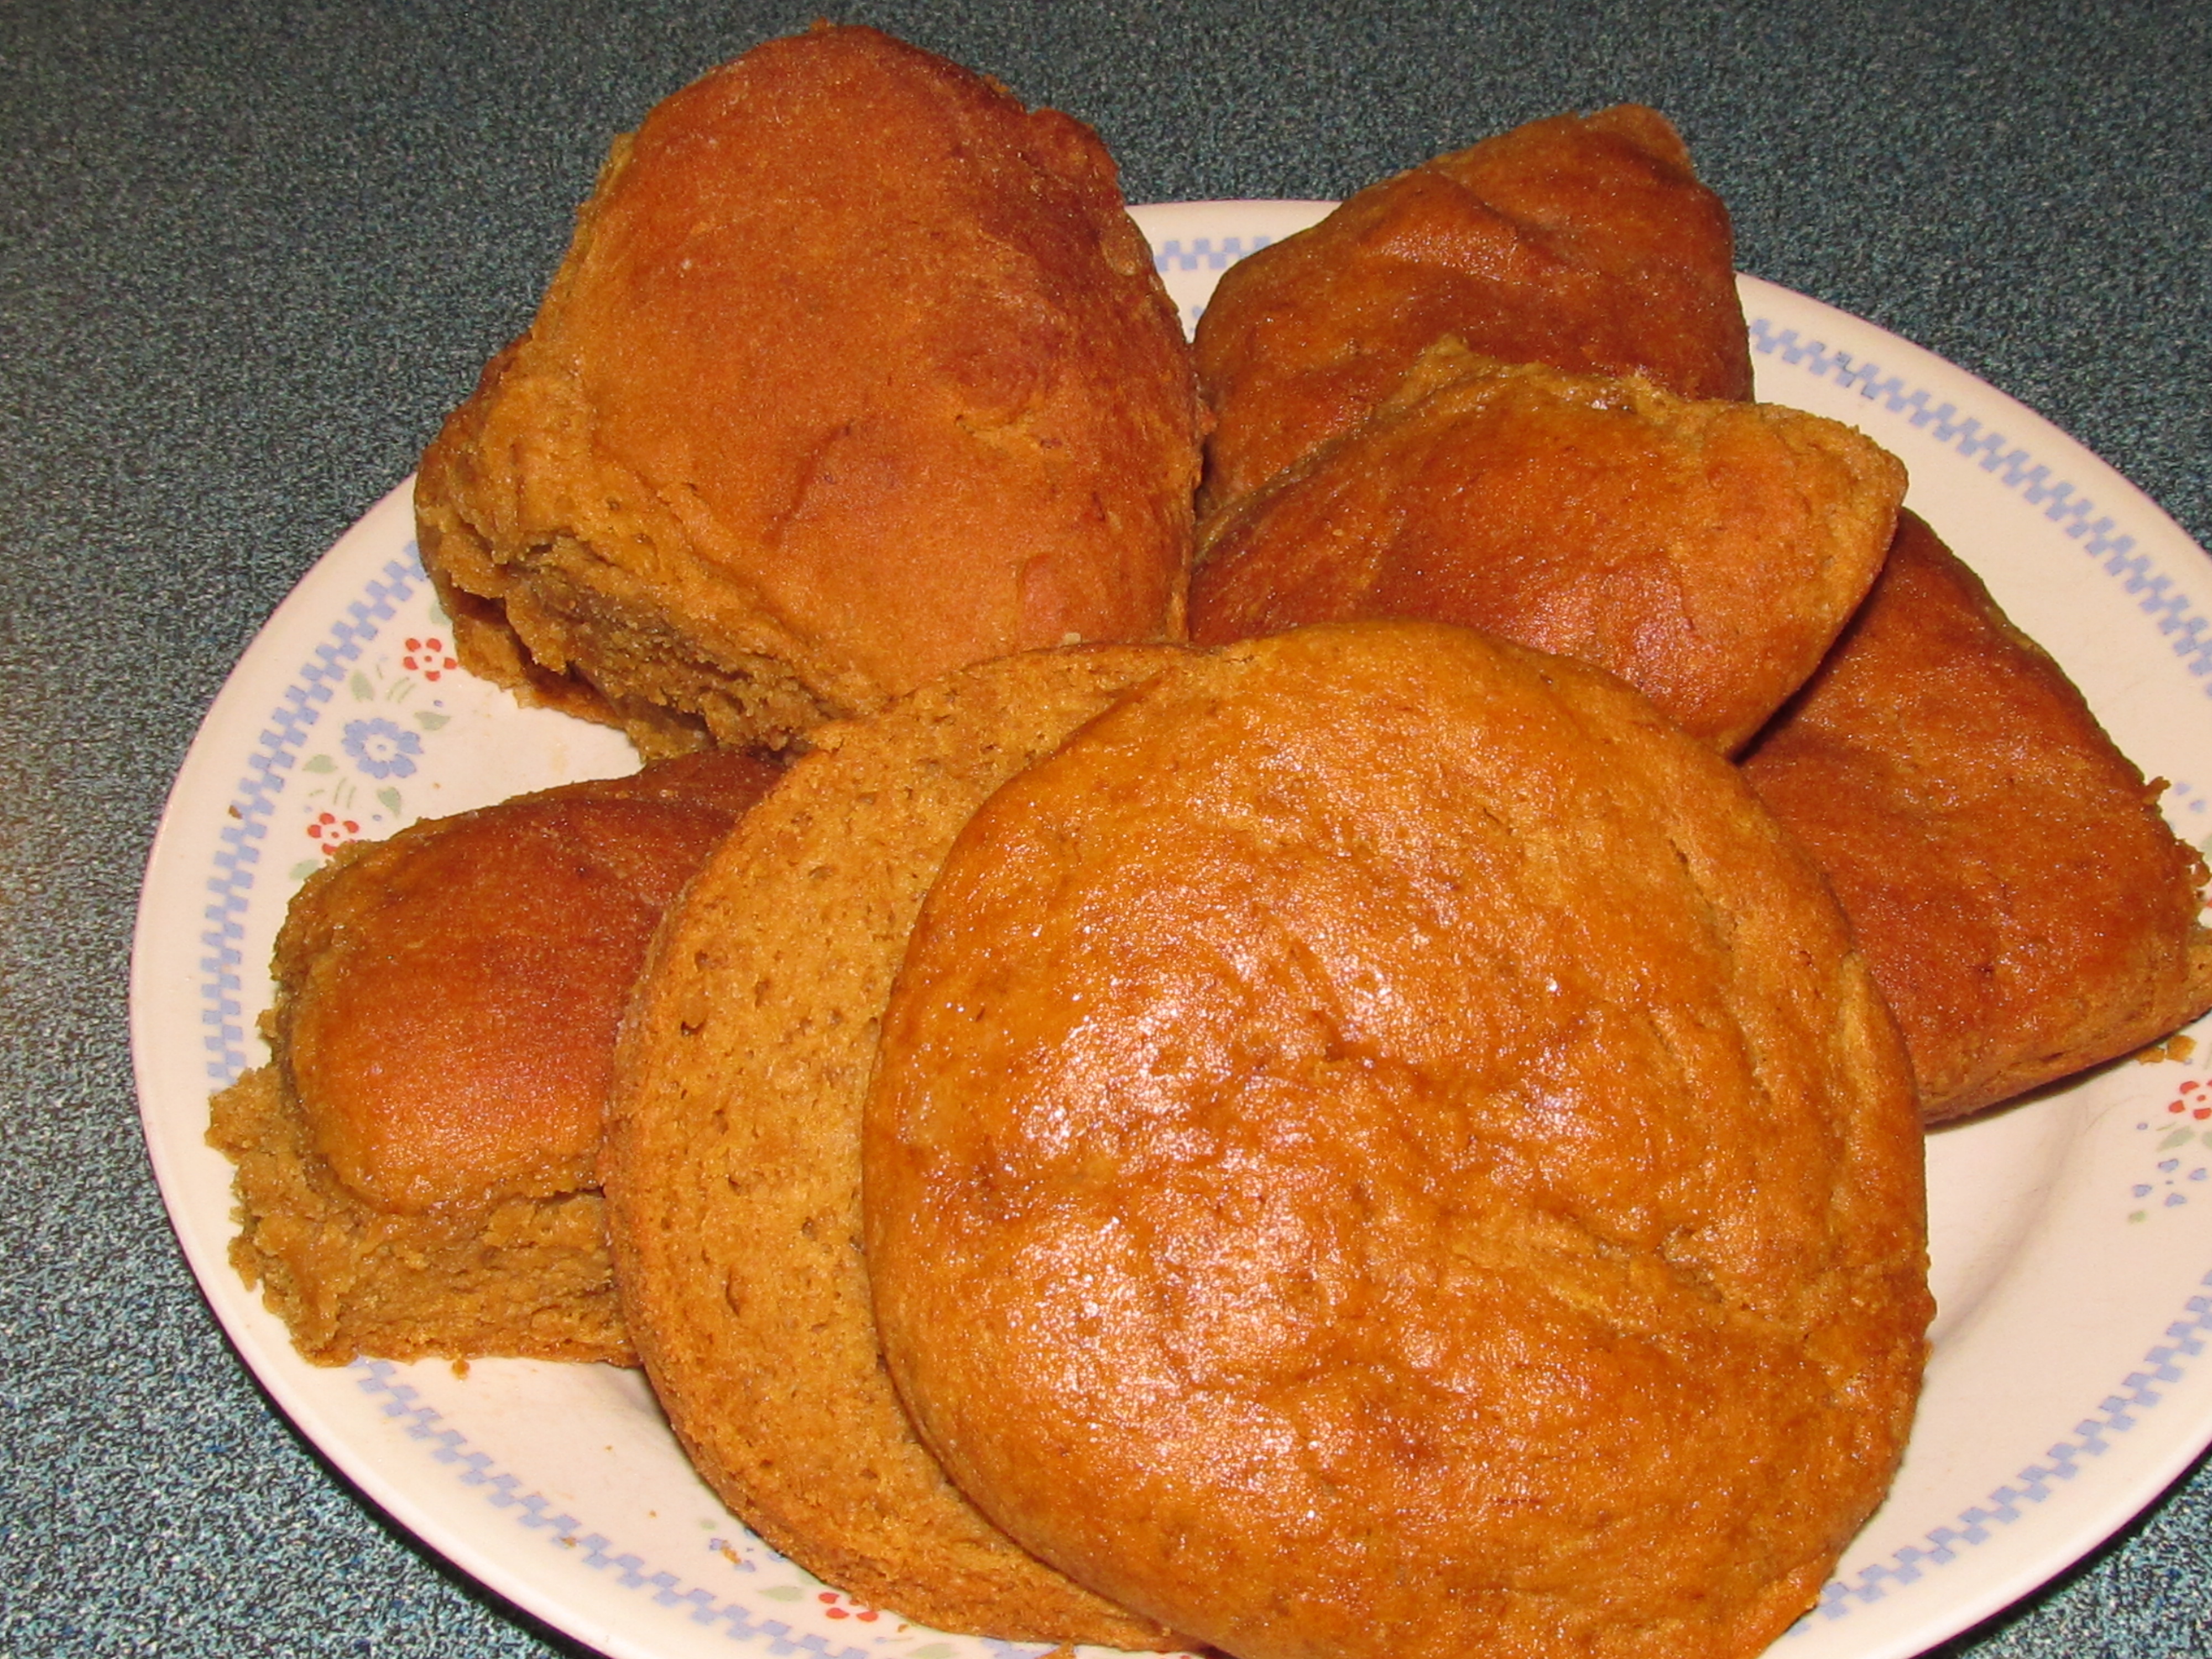
Jan’s Molasses Rolls
Yeast Mixture:
2 Teaspoons Dark Brown Sugar
1/4 Cup pure Sweet Butter Milk (room temperature)
1/4 Cup luke warm water
2 Tablespoons Dry Active Yeast
Remaining ingredients:
3 ½ Cups good quality Gluten Free all purpose flour
Note: If you use another flour that does not have xanthan gum, then you must add it. Using GF Better Crocker flour alone also needs ¼ teaspoon xanthan gum added.
½ Teaspoon Salt
½ Teaspoon Baking Soda
2 Tablespoons Gluten Free Baking Powder
1 Cup Pure Egg Whites (or about 5 whole eggs)
1 Stick of Salted Butter (melted)
1 Banana (mashed)
½ Cup Pure Molasses ( I use Grandma’s brand, it is un-sulfurized)
Mix yeast in medium glass mixing bowl by adding sugar, butter milk, & water. Stir to dissolve sugar. Add yeast and mix with plastic whisk. Set aside and let it foam about 15 minutes while you make the dough.
In large mixing bowl, whisk together flour, salt, baking powder and baking soda. In food processer, blend together eggs, butter, banana, and molasses until smooth. Slowly add flour mixture and blend until there are no lumps. Then add yeast mixture and blend again for 25- 30 seconds or until all is mixed. Do not over mix. It can make rolls rubbery.
If you want to roll out dough to make cut out type rolls, place dough back into bowl that you mixed the flour in, cover and place in refrigerator until cold. Or you can even leave it in fridge overnight.
To make large rolls, oil your hands with olive oil and dip out dough ( about the size of a tennis ball) and pat dough into a ball. Place each ball into a greased 9×13 inch baking pan. Brush dough with melted butter and set in a warm place to rise for about 20 minutes. Preheat oven to 325* Add a baking pan filled half way with water to bottom rack of oven. This will keep rolls moist while baking.
When ready to bake, place pan on middle baking rack and bake for 30 – 35 minutes for large rolls. For smaller cut out rolls bake 25- 30 minutes or until rolls are set in the center. Insert toothpick in center roll, if it comes back clean, they are done. (about half way through baking time, slide pan of water over to the side, so bottom of rolls will brown)
Remove from oven and butter again while warm. Lightly cover rolls with foil that you have pierced with a fork, ( so rolls do not sweat) until you are ready to serve.
These freeze very well! If you make ahead and freeze, make sure you pull them apart before freezing. Then to thaw, just place in the microwave and heat individual rolls for 25- 30 seconds. If you heat more than one at a time, it will take longer.