Fresh Southwest Salad

Fresh Southwest Salad

Fresh Southwest Salad

2 Cups Fresh Garden Leaf Lettuce ( I used a garden mix of baby leaf lettuce, lacey leaf, and baby romaine lettuce)

1/2 Cup canned Black Beans ( rinsed and drained)

1/2 Cup canned Sweet Corn (Drained)

Gluten Free Corn Chips

Gluten Free Salsa

Optional 1/2 Cup chopped Tomatoes

Optional 1/2 Cup chopped Ham

In large salad bowl, add washed and rinsed lettuce, pulling apart and tearing leaves into bite size pieces. Add rinsed and drained black beans and corn. If you want you can add the tomatoes and ham. Top with GF corn chips and drizzle with salsa.  Enjoy!!

High Fiber Brownies

HighFiber Brownies

High Fiber Gluten Free Brownies

1/4 Cup Coconut Flour

1/2 Cup Almond Flour

1/2 Cup Dark Brown Sugar (packed)

1/2 Teaspoon Gluten Free Baking Powder

1/2 Teaspoon Xanthan Gum

1 Tablespoon Psyllium Husk Powder

4 1/2 Tablespoons Pure Cocoa Powder ( I use Hershey’s)

1/2 Cup Creamy Peanut Butter ( I use the low sugar natural peanut butter)

1 Tablespoon pure Vanilla

3 Large Eggs beaten

1/2 Cup, Pure Honey or Blue Agave Nectar ( I use C&H Organic)

1- 11.5 oz. package Gluten Free Milk Chocolate Chips ( you may want to use Sugar Free/Dairy Free)

Preheat oven to 350*

In large mixing bowl whisk all dry ingredients together, then add peanut butter, vanilla, beaten eggs, and agave nectar.  Using electric mixer, beat all ingredients together until batter is smooth. (Note: this batter is really thick) Then fold in chocolate chips and pour batter into a greased 9-10 inch glass baking pan or I use my thick deep pie plate for these. Bake for 30- 35 minutes or until set in center.  When done remove from oven and let brownies cool.  Enjoy!

(Remember these are High Fiber!)

Upside Down Pizza Casserole

upside-down-pizza

Upside Down Pizza Casserole

1 pound Lean Ground Beef

1 Teaspoon Dry Basil Leaves

1/2  Teaspoon Dry Oregano leaves

1/2 Teaspoon Garlic Powder

1- 24oz. Jar of your Favorite Gluten Free Pizza Sauce ( I used Rinaldi)

1- 6oz. wedge of Parmesan Cheese Freshly grated (reserve ¼ Cup for Crust)

Crust:

2/3 Cup Gluten Free Bisquick Baking Mix

2 Teaspoons White Granulated Sugar

1/3 Cup Buttermilk

1 Large Egg Beaten

1/4 Cup grated Parmesan Cheese

In medium bowl add all ingredients for crust,( except cheese) and whisk together until smooth. Fold in Cheese and let set until you are ready to spread over beef mixture.

Preheat oven to 400*

In 10 inch cast iron skillet, brown ground beef adding spices just before beef is fully cooked. ( it should only take about 10 minutes to brown beef on medium high heat). Remove from heat and add pizza sauce, spreading over meat. Do not stir into beef. Then sprinkle grated cheese over sauce, then top all of this with crust batter, spreading to outer edges. Place skillet in oven and bake for 20 -25 minutes or until crust is baked through and browned on top. Remove from oven and serve warm! Enjoy!

Jan’s Banana Chia Muffins

IMG_2102

Jan’s Banana Chia Muffins

Yeast Mixture

1/4 Cup room temperature Sweet Buttermilk

1/4 Cup luke warm water (be sure it isn’t over 110*)

1/4 Cup packed Pure Brown Sugar

1 Teaspoon Dry Active Yeast

Batter:

1 3/4 Cups Gluten Free All-Purpose Flour ( I used Better Batter )

1 1/2 Teaspoons GF baking powder

1/2Teaspoon Baking Soda

3/4 Cups Pure White granulated Sugar

2 Large Eggs beaten

1/2 Stick softened Butter (or ¼ cup GF oil)

2 Large Bananas or 3 small sliced and mashed

1/8 Cup Chia ground Seeds (Soaked in 1/8 cup warm water for at least 20 minutes)

1/2 Cup chopped Pecans (optional)

In glass container make the yeast mixture first. Add room temperature buttermilk, warm water, brown sugar, and yeast. Whisk together and set yeast mixture aside while you make batter. ( I like to set mine by the stove or in a warm place)

Preheat oven to 325*F.

In large mixing bowl whisk together flour, baking powder, baking soda, salt, and white sugar.  Using mixer on high, blend together flour mixture with beaten eggs, butter, and mashed bananas, and soaked chia seeds.  Add yeast mixture to batter and mix until completely blended don’t over mix. Let batter set for about 15 -20 minutes, then dip batter (about ¼ cup each ) into a greased nonstick muffin pan or cupcake liners. I like to use a triggered ice cream scoop. Bake for 25-26 minutes or until a tooth pick inserted in center cup comes back clean. When done remove from oven and let cool. This will make about 18 cupcake size muffins.  Enjoy!

Pineapple Coconut Banana Smoothie

pineapplebananacoconut-smoothie

Pineapple Coconut Banana Smoothie

3 Slices Pineapple ( canned or fresh)

1 Banana Peeled and chunked

1/2 Cup Coconut Juice (I use Bai Coconut)

1/2 Cup plain Greek Yogurt

1 Tablespoon ground Chia Seed

Place all ingredients into smoothie maker or blender. Blend until smooth and completely mixed. Pour into glass and enjoy!!

Cinnamon Roll Marble Bread


CinnamonRoll Marble Bread2.jpg

Cinnamon Roll Marble Bread

1/2 Cup GF Canola Oil

1 1/4 Cups Plain Greek Yogurt

5 Large Eggs Beaten (or 1 Cup Egg Whites)

1/2 Cup Sprite ( Or any Gluten Free Lemon Lime Carbonated Beverage)

2 1/2 Cups All-Purpose Gluten Free Flour (with xanthan gum already added, I used Better Batter)

2 Tablespoons Gluten Free Baking Powder ( I used Clabber Girl)

1 Cup Granulated Sugar

1 1/2 Tablespoons Active Dry Yeast

1 Teaspoon Baking Soda

Filling :

1/2 Cup Melted Butter ( or 1 Stick)

1/2 Cup Granulated Sugar

2 Tablespoons additive free Ground Cinnamon

Mix together to dissolve Sugar

Glaze:

 2 Cups Powdered Sugar

1/4 Cup water

Whisk together until smooth

Make sure the paddles are in place in your bread machine pan. Pour oil in first, ( just a little bread machine tip: Pour the oil on top of the paddles, that just helps the bread turn loose at the end of the baking cycle.) then add Yogurt. I like to add yogurt one spoon full at a time, spreading it out so that it will mix evenly. In separate bowl whisk together all dry ingredients for bread, including yeast.  Then pour this flour mixture on top of oil and yogurt. Finish adding the liquid ingredients, the beaten eggs and sprite on top of flour mixture. Place the bread pan into machine and set for light crust on Gluten Free Cycle. Make the filling while bread is kneading so that butter will cool slightly. When the knead cycle is done, use a spoon to separate and make deep indentions into the dough then spoon cinnamon filling into indentions. I make 3 lines of indentions for the filling all the way down the length of the loaf. Close lid and let the bake cycle begin. When done remove pan from bread machine and let cool at least 20 minutes before removing bread from pan. When cool drizzle with glaze and serve! Enjoy!

If you don’t have a Gluten Free cycle on your machine, then set it to knead for 15 minutes, rise for 30 and bake for 1 hour.  Remember to add your filling between the rise and bake cycle.

If you bake this in the oven, bake at 350* for 1 hour.  This is a large loaf, my pan is a large 9X5 inch. If you have the short loaf pans, then you must add a foil or parchment paper collar around the top of your pan so that it doesn’t run over into your oven.

Jan’s Gluten Free Pecan Pie

img_1519

Happy National Pie Day!

Jan’s Gluten Free Pecan Pie

1/2 Cup packed Brown Sugar

3 Tablespoons All purpose Gluten Free Flour

1/2 Teaspoon Salt

3 Large Eggs

3Tablespoons Softened Butter ( or butter substitute)

1 Cup Corn Syrup ( you can use light or dark)

1 Teaspoon Vanilla

2 Cups Pecan Halves ( I like to reserve 1 cup to decorate the top)

1- 9 inch unbaked Gluten Free Pie shell

Preheat oven to 350*

In small bowl whisk together sugar, GF flour, and salt. In separate large bowl, beat eggs, butter, and corn syrup together, adding in flour mixture and vanilla. Fold in 1 Cup pecans, then pour mixture into pie shell. Arrange the remaining pecans in a circular pattern around pie. Cover outer edge of pie crust with a pie shield or foil to keep crust from over browning.  Place in oven and bake 45 minutes. Remove pie shield the last 10 minutes of baking time. Remove from oven and let cool before serving.

Glazed Pork Chops with Fruit and Vegetables

glazed-porkchops-and-veggies

Glazed Pork Chops with fruit and Vegetables

1 Large Apple

2 Bell Peppers

1 Medium Onion

2 Cups Frozen Sliced Squash

14 oz. Frozen Ore Ida Steak Fries ( half of a 28oz. bag)

1 1/2 Teaspoon MSG Free Season Salt

4 – 6 Tablespoons Gluten Free Apple Jelly (I used Homemade)

4 – 6 Bone in Pork Chops

Preheat oven to 375*

Wash and Slice apple, peppers, and onions fairly thin, about ¼ inch thick. Spread them evenly over the bottom of a greased deep dish large baking pan (at least 9×13, bigger is better). Add frozen squash and fries, sprinkle evenly with season salt then place pork chops on top of vegies and fruit. Spread 1 tablespoon of jelly over each pork chop. Place in oven and bake for 40 – 50 minutes or until pork chops are cooked through and vegetables are fork tender.


Lasagna Soup

IMG_1789

Gluten Free Lasagna Soup

1 Large Onion Chopped (mine was about 3 1/2Cups after chopping)

5- 6 Large Cloves of Garlic minced

1 Pound Lean Ground Beef

2- 14 oz. Cans of 100% Chicken Broth

4 Cups Additive Free Tomato Sauce ( you can use Peeled and Chopped tomatoes)

1/2 Teaspoon salt

1/2 of a 10 oz. Box of Gluten Free Lasagna Noodles (I used Café’ Brand no boil)

2 Teaspoons additive free Dry Oregano

2 Teaspoons additive free Dry Sweet Basil

1/4 Cup additive free Plain Greek Yogurt

½ Cup additive free Fresh Parmesan Cheese crumbled

In medium size skillet brown ground beef. When there is almost no pink left in meat, add chopped onion and garlic. If you are making this on the stove top then, cook another 5-10 minutes while covered, stirring and turning over meat and onions, until onions are soft and translucent. In large stock pot, or Crockpot add browned meat and onion mixture, along with chicken broth, tomato sauce, and salt. Bring to a boil, stirring occasionally. Break up noodles and add to pot, along with spices.(** If you are making this in a Crockpot or slow cooker, set on low for 6-8 hours and do not add noodles, yogurt and cheese until the last 15 minutes of cooking time.**)  On stove top cook on a slow boil continuing to stir for about 10 minutes. Then stir in yogurt, and cheese. Simmer another 10-15 minutes, when noodles are soft it is ready to serve. Serve with Gluten Free garlic bread! YUM, Enjoy!!

Pizza Party Biscuits

pzza-party-biscuits

Pizza  Party Biscuits

3 Tablespoons Softened Butter  ( or butter substitute)

2/3 Cup Gluten Free Pizza Sauce

2 Large Eggs Beaten

1 Cup Finely Chopped GF Ham

2 Teaspoons Dried Basil Leaves

2 Teaspoons Dried Oregano Leaves

2 Tablespoons minced Garlic

2 Cups Freshly Grated (additive free) Mozzarella Cheese

1 Cup Gluten Free All-Purpose Flour ( I used Better Batter with xanthan gum already added)

1 Tablespoon GF Baking Powder

1/2 Teaspoon Baking Soda

1 Cup finely grated (additive free) Parmesan Cheese (for topping)

Preheat oven to 350*

In large mixing bowl add butter, pizza sauce, eggs, ham, herbs and garlic. Mix until well blended. Then fold in Mozzarella cheese until incorporated. In separate bowl, whisk together flour, baking powder, and baking soda. Slowly add to liquid ingredients until there is no sign of dry ingredients left. Set aside and grease or butter muffin tins. Using a triggered ice cream scoop ( about ¼ cup) spoon into each muffin tin.

Bake for 25 -30 minutes or until biscuits are browned. I can get about 12 biscuits out of this recipe.  When you remove pan from oven top each biscuit with parmesan cheese and serve.  These are great served with Marinara sauce for dipping! YUM!! Enjoy!


Melting Witches

Melting Witches.jpg

I’m finally back in the kitchen after shoulder surgery, so I had to make something fun!

Melting Witches

1 Box Pillsbury Gluten Free Sugar Cookie Mix

2 Peeled Ripe Avocadoes

2 Tablespoons Water

1 Large Egg

Hats and Brooms

Reese’s Peanut Butter Cups

Hershey’s Classic Kisses

Gluten Free Candy Corns

Gluten Free Pretzel Sticks

Preheat oven to 350* F.

In large mixing bowl mash avocadoes, add water and egg. Blend until smooth. Add Sugar cookie mix and blend into wet ingredients. When mixed spoon about 1 ½ inch balls of cookie dough onto greased cookie sheet. With wet fingers press out dough to look like little puddles. I like to indent on 2 or 3 sides to make it look more like puddles. Bake for 15 – 18 minutes. While cookies are baking unwrap candy to have it ready to place on warm cookies.

When cookies are done, remove from oven and start placing inverted peanut butter cups onto cookies. Then add Kisses by pushing down onto center of peanut butter cup. The cup will melt some , so don’t push down too hard. Then add candy corn and pretzel to form the broom. Let cool for 10 – 15 minutes before removing to cooling rack. Let Cookies fully cool before serving.

Enjoy!

Note: only use regular packages of candy that states Gluten Free on the back. Do not use the seasonal bags. The company says they are not Gluten Free.


Jan’s Gluten Free Banana Bread

Jan’s Gluten Free Banana Bread

IMG_1805

Jan’s Gluten Free Banana Bread

3  1/4 Cups Gluten Free Rice Flour ( I use Tom Sawyer/Betty Crocker GF Rice flours mixed ½ and ½. Tom Sawyer flour already has xanthan gum added, if you use a flour that does not, then you must add it. )

1 Tablespoon GF baking powder

1/4 Teaspoon Baking Soda

1/4 Teaspoon Salt

1  1/2 Cups Pure White granulated Sugar

3 Large Eggs beaten

1 Stick softened Butter

3 Large Bananas or 4 small sliced and mashed (about 1 ¼ cups when mashed)

1 Cup chopped Pecans (optional)

Yeast Mixture

1/2 Cup room temperature Sweet Buttermilk

1/2 Cup luke warm water (be sure it isn’t over 110*)

1/2 Cup packed Pure Brown Sugar

1 1/2 Teaspoons Dry Active Yeast

In large mixing bowl whisk together flour, baking powder, baking soda, salt, and white sugar.  Using mixer on high, blend together, flour mixture, beaten eggs, butter, and mashed bananas. Cover and let set for about 15 minutes, while you prepare yeast mixture.

In glass container, add room temperature buttermilk, warm water, brown sugar, and yeast. Whisk together and set yeast mixture by the stove to keep it warm, for about 5 – 10 minutes. It will rise and start to bubble.

When ready to bake, preheat oven to 325*F. Add yeast mixture to batter and mix until completely blended don’t over mix. Pour batter into a greased and floured (with GF flour)  5×9 ½ inch loaf pan. If you have smaller pans make 2 loaves. Bake for 65 to 70 minutes or until bread is set in the middle and a toothpick inserted in center comes back clean. When done remove from oven and let cool before removing from pan. Enjoy!

Pumpkin Spice Pancakes

Pumpkin Pancakes.jpg

Pumpkin Spice Pancakes   #TheFlavorsofFall

1 Cup Gluten Free All-Purpose Flour ( I used Better Batter)

1 Tablespoon Sugar

1 Teaspoon Baking Powder

1 Teaspoon Ground Cinnamon (make sure all of your spices are pure and additive free)

1/2 Teaspoon Ground Nutmeg

1/2 Teaspoon Ground Cloves

1 Cup Pumpkin Puree (I used Libby’s 100% pure Pumpkin)

1 Egg (beaten)

1  1/2 Cups Water

In large mixing bowl whisk together all dry ingredients. Then add pumpkin, egg and water. Mix until all ingredients are blended into a smooth batter. Heat oil on high in a 9- 10 inch skillet until hot. Reduce heat to medium high and pour about 1/4 cup batter into pan, spreading out until it makes about 5-6 inch round pancake. Fry pancake until it starts to get crispy around the edges and air bubbles form on top. Flip and fry on the other side for 1- 1 1/2 minutes or until crispy on the bottom. Remove and serve with Agave Nectar or Gluten Free syrup.

This will make 8-10, 5-6 inch pancakes.

Apple Cinnamon Muffins & Doughnuts

Apple Cinnamon Muffins and Doughnuts

IMG_1971

I love the flavors of Fall, and Apple Cinnamon fits right in!

Apple Cinnamon Muffins or Doughnuts

1  3/4 Cups All Purpose G F flour, with xanthan gum already added ( I used Tom Sawyer, Betty Crocker GF flour, Better Batter also works well in this recipe)

2 Teaspoons additive free ground Cinnamon

1/2 Tablespoon Baking Powder

1/4 Teaspoon Baking Soda

1 Teaspoon Active Dry Yeast

1 Cup Packed Pure Brown Sugar

2 Eggs beaten

1/2 Stick softened Butter (or ¼ cup gf oil)

1 Cup additive & sugar free Applesauce

1/2 Cup pure sweet Buttermilk

(optional 1 Cup chopped pecans)

In large mixing bowl whisk together flour, cinnamon, baking powder, baking soda, yeast, and brown sugar. Add eggs, butter, applesauce, and buttermilk. Mix on high just until smooth. Don’t over mix. Let batter rest for about 15- 20 minutes. Then fold in pecans. Preheat oven to 325*F. Using a ¼ cup ice cream scoop fill each muffin cup with batter. If you don’t use the muffin papers then you must grease and flour your muffin pan. If you are making doughnuts, grease a non-stick doughnut pan and fill each doughnut place with batter almost to the top. Bake muffins for 28- 30 minutes and doughnuts for 25 minutes. This recipe will make a dozen small cupcake size muffins and 6 doughnuts.

Glaze:

2 Cups additive free Powdered Sugar

1  1/2 Teaspoon additive free ground Cinnamon

1/3 Cup warm tap water

Whisk until smooth and dip or brush muffins and doughnuts with glaze. Enjoy for breakfast or treat!

Gluten Free Event

fb_img_1473643741346 
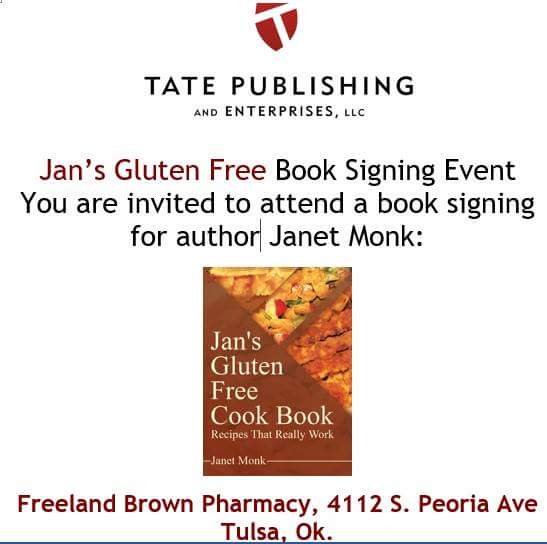
I have been invited to visit with anyone interested in learning about going Gluten Free and have a book signing, September 17, at Freeland Brown Pharmacy. At the above location from 1-3 pm. If you are in the Tulsa area please come by and visit. I would love to see you!

Cheesy Chicken Enchilada Bake

CheesyChicken Enchilada.jpg

Cheesy Chicken Enchilada Bake

6 Cooked Chicken Strips ( You can shred them or leave whole)

1- 18.5oz. Can Progresso Gluten Free Chicken Cheese Enchilada Flavor Soup

(Optional) 1/4 to 1 Teaspoon Ground Cayenne Pepper (depending on how much heat your family likes)

1 Cup Freshly Shredded Cheddar Cheese

Heat oven to 400* F.

Grease a 9 -10 inch baking pan. Spread cooked chicken strips in bottom of pan, sprinkle with pepper and pour soup over chicken and bake for 18-20 minutes. Or until soup is hot and bubbling. Remove from oven and top with grated cheese. Serve with your favorite rice and beans or chips. Enjoy!

Variations: Add Hot peppers and onions for a kick, or cooked quinoa, to make it a casserole.

Slow Cooker Italian Meat Loaf

Slow Cooker Italian Meat Loaf

IMG_1813

Slow Cooker Italian Meat Loaf

2 Pounds Lean Ground Beef

1 1/2 Cups Gluten Free Spaghetti Sauce (reserve ½ cup for topping)

3/4 Cup Gluten Free Bread Crumbs

1- 5oz. package additive free Parmesan Cheese grated (reserve ½ cup for topping)

2 Eggs beaten

1/2 Cup Chopped Onion (optional)

Line slow cooker with foil letting it come up the sides and coat with oil. Thoroughly mix all ingredients in a large bowl, until meat and other ingredients are well mixed, forming a ball. Place the ball of meat in the slow cooker, cover with lid, and set on low for 6-8 hours or high to cook for 4-6 hours.( Don’t fold the foil around the meat). The last 15 minutes of cooking time top with remaining spaghetti sauce and cheese. To serve lift meat loaf out of slow cooker holding edges of foil. Then slide spatula under loaf and transfer to platter. Enjoy!

Okra Fritters

Okra Fritters

Okra Fritters

2 Cups Okra, stemmed and cut in half (about 20 pods of 3-4 inch okra)

1 Cup Gluten Free Cornmeal

2 Eggs

1/4 Cup Milk (If you need an exchange use water or milk substitute)

1 ½ Teaspoons Salt

Enough oil to deep fry fritters.

Wash, stem and cut okra in half. Pour in food processor with the cutter blade inserted. Pulse 4-5 times until okra is chopped but not pureed. Add cornmeal, eggs, milk and salt. Blend just until mixed into dough. Heat oil on high until hot enough to fry. Reduce heat to medium, then drop fritter dough into hot oil and fry until golden brown. ( about 2-3 minutes) Be sure to turn each fritter when brown on bottom side. Also make sure fritter patty is only about 1/2 inch thick. The fritters will not cook well in the center if they are too thick. When done remove from oil and drain to paper towels. Enjoy

Variations: Add garlic powder, or chopped onions for a different taste.

Okra fritters are also great for dipping!

Brazilian Sweet Cornmeal Cake Bolo de Fuba

USOlympics16BrazilianCornMealCake

@rio2016 In honor of the 2016 Rio Olympics

Brazilian Sweet Corn Meal Cake, Bolo de Fubá

1 Stick of Salted Butter Softened (or ½ Cup Butter Substitute)

1/2 Cup Oil

1/2 Cup Milk

1 Cup plain Greek Yogurt (or sour cream)

3 Large Eggs

2 Cups Gluten Free Corn Flour (finely ground cornmeal, I used Bob’s Red Mill)

1 Cup Gluten Free Flour with xanthan gum already added (I used Better Batter )

2 Cups white granulated Sugar

2 Tablespoons Gluten Free Baking Powder

1/2 Cup Powdered Sugar (confectioners’ sugar) For decoration

Preheat oven to 350*F.

Place all ingredients (except powdered sugar)  into food processor or blender. Blend on high until completely mixed. Stop processor and scrape down sides as needed. When well mixed pour batter into a buttered or grease a non-stick Bundt pan. Place pan in oven and bake for 45 minutes or until a toothpick inserted into cake comes back clean. Remove from oven and let cake cool for at least 10 minutes. Before removing cake from pan slide a plastic knife or small spatula around edges to loosen cake. Then invert cake over cake plate. Cake should slide out clean. Dust with powdered sugar and  serve with Fresh Berries and Cream! Yum!!

Thin Crust Sausage Pepper Calzone

Calzone.jpg

Thin Crust Sausage Pepper Calzone

1 Pound Gluten Free Pork Sausage

1 Large Bell Pepper cut into cubes  ( or you can add Hot peppers if you prefer )

1 Teaspoon Dried Oregano

1 Teaspoon Dried Basil

1 Teaspoon additive free Garlic Powder

1 Cup (8 oz.) Gluten Free Pizza Sauce

1 Cup Freshly Grated Mozzarella

1 Cup Freshly Grated Parmesan

I use my pie crust recipe for this only double. Here is the link – Jan’s Gluten Free Pie Crust https://www.facebook.com/jansglutenfreerecipes/photos/a.1671137049774256.1073741828.1671129923108302/1677945315760096/?type=3&theater

I make the dough for my crust several hours ahead of time and refrigerate it, because the dough must be very cold to get a thin crust. You can even cook the meat ahead of time and refrigerate it also until you are ready to assemble the calzone.

Brown meat, bell pepper and all spices. Remove from heat and let cool. Roll out your refrigerated dough onto a large baking sheet lined with parchment paper. My finished calzone was 13 x12 inches. So double this amount into an oblong shape. Make sure your dough stays cold. You need to pop it into the fridge or freezer to cool it off again. ( note don’t work it with your hands, it will warm up the dough and make it difficult to work with)

Preheat oven to 400*F.

When dough is rolled out to the size you want. Only on one end of the dough, gently spoon cooked and cooled meat mixture out evenly, leaving at least one inch space from the outer edge. Do not press meat into the dough. Then pour pizza sauce over meat. Sprinkle both cheeses over meat and sauce. Now you are ready to gently loosen dough from the opposite end and lift parchment paper up and fold over calzone filling. Even out any uneven edges by cutting them off and laying aside. Then press edges of dough together. I then go back and fold over the outer  ½ inch edge of the crust and press that together, just to make a better seal. Your calzone should resemble a half circle or half-moon shape. If you have had any holes come into the top crust, just patch it with the extra dough that you cut off earlier.

When calzone is completely sealed place baking sheet into hot oven and bake for 20 – 25 minutes or until top crust is golden brown.

Remove let cool for about 10 minutes then cut and serve. Enjoy!

Drying Herbs

Oregano

Drying Herbs
This is a long post, but I’ve had several people ask me how I preserve my Herbs. So here goes! One of the ways I put them up for winter and to give away to family and friends is to dry them. I have also frozen certain kinds of Herbs, but that’s for another post.
I start by picking my Herbs in the morning before it gets too warm. Usually by 10:00 am. Here in Oklahoma it starts getting warm really fast, and you want to start out with a fresh product. I bring a large bowl (it’s about 2 gallons) half full of ice water out to my Herb garden. I start picking out which stems I want to cut, by checking to make sure the leaves are not wilted and I also snip off any leaves that have bad places in them or have been eaten by insects. I cut the stem just above a leaf nod (that is where 2 or more, leaves are intersected together on the stem). And about 1 – 3 inches from the ground (depending on how big the plant is) for example Oregano is much taller than Thyme, so I leave about 2-3 inches of stem still on the plant to the ground. For smaller plants like Thyme, I snip off the stem about an inch above the ground. For Sage, Basil, Parsley, Mint, Dill and Rosemary, I cut closer out toward the top of the plant again just above a leaf nod, using only about 4-5 inches of the leaves and stems. This lets the plant continue to branch from that leaf nod and doesn’t stress your plant. If you cut below a leaf nod it leaves a bare stem sticking out from the plant that will die back and possibly let disease get into the dead stem and move on down into your plant.

As I cut the herbs that I want to dry I place them directly into the cold water. For drying I always keep the leaves attached to the stem. If you don’t, you will drive yourself crazy trying to pick up those tiny leaves off of your drying rack and end up wasting most of it.

The reason I use Ice Water, is to wash the stems and leaves, and kill any bugs that might be on the Herbs. Some people use vinegar to soak their Herbs in, (the vinegar is supposed to break down any pesticide residue on the Herbs) but since I don’t use any pesticides on my plants at all, so there is absolutely no need for me to use anything but water to wash them. Because there is nothing on them except maybe a little dust and a few bugs. Also another reason I don’t like to use anything stronger than water, I think the acid in the vinegar starts to break down the tender leaves and changes the taste and flavor of the Herbs.

Then when I’ve picked as much as I want, I then take the bowl into the house and put more Ice and Water on top of the Herbs, completely covering them. I then anchor them down in the water with an inverted saucer or small plate. I let them soak in the Ice Water for at least 30 minutes. I then Line an area on my counter with a towel or paper towels. I use both, placing a clean kitchen towel on the bottom, then lay a couple of layers of paper towels on top of the towel to soak up any remaining water. Then take the bowl of Herbs and Ice Water to the sink and pull each of the stems out of the water one at a time and inspect it again for any bugs or bad places, like a dark spot or wilt. (Herbs have very few bugs, or at least mine don’t, bugs don’t like Herbs very well). Removing any undesirable leaves and discarding them. Shake out any excess water into the sink and lay the stems and leaves onto the paper towels to dry. Spreading them out as much as possible. See Photo below.

Drying Pick Oregano.jpg

When all of the water is drained off, after about 30- 45 minutes. (the more moisture that is on the Herbs the longer it’s going to take to dry them.) You can then start loading your Herbs onto the drying racks.Drying racks of oregano.jpg

I use a dehydrator. Simply because it takes so much longer in the oven, and I don’t like to heat up my house with an open oven door. Plus it ties up my oven for several hours. My dehydrator has 5 trays or racks, which I load with my Herbs, spreading them out as much as possible. After I get them loaded I stack each tray on top of the other and place the lid on top. My dehydrator lid has a lever that you can open or close, I always leave mine fully open, the Herbs dry much faster that way. Then turn it on (My dehydrator only has one setting, off or on, it’s very simple). Depending on how thick your leaves are or how full you fill each rack, with all 5 trays fully packed, mine will take 8 – 10 hours to fully dry the Herbs. I always check the trays after about 2 hours, starting with the bottom tray or rack, I will rotate it to the top. And continue to check them throughout the day. The bottom rack will always dry out first, so in order to keep them drying evenly I continue to rotate them until all racks are completely dry. If I get busy and the bottom rack gets completely dry, I just remove it and set it aside until they are all done and all the leaves are dry and crispy. If you have any leaves that feel soft or rubbery, they are not done.
When all the Herbs are dry turn off the dehydrator and remove the lid and start with the top rack first. Start taking out the stems one at a time. Handle them gently, so that you don’t lose the leaves as you transfer them to a bowl. Remove each dried leaf from the stem and place it into a clean dry bowl.Dried OreganoDried Sage

( Make sure your hands, bowl, jars and all utensils are sterile and DRY.) Discard stems and continue this process until you have emptied all the racks and all the leaves and stems are separated. I use my hands to crumble or rub the dry leaves and make sure there are no small stems hiding in the pile of dried Herbs. (be careful, those dried stems can become very sharp) Then I use my sterile tongs to fill the clean dry jars with dried Herbs. Label each jar and either place them in the freezer or store in a cool dark pantry until you are ready to use them. I like to check my jars once in a while just to make sure there is no discoloration or mold. The experts recommend using them within 6 months to a year. So far in all the years I’ve been drying them, I’ve never had any to go bad. Even though we live in such a humid climate.
Besides using my Herbs to cook with, I love to share them as gifts to family and friends. I hope you give my methods a try. It is time consuming, but well worth the effort. The flavors of drying your own Herbs are so much better than the little store bought bottles that have been sitting on shelves for no telling how long.

Note: All machines are different, so depending on the Herbs you are drying, and how many trays or racks you have in the machine, will determine the drying time. For example if you only fill 2 drying racks and you are drying Dill Weed, it could only take a 2-3 hours. So check your machine often.
Just a little history of how I got started with Herbs:
Both of my Grandmothers were unstoppable gardeners, but my Mom’s Mother was the one that had an Herb garden just outside of her kitchen door and all along the path to the garden, beside the garden fence. Where she had a huge bed of Garlic right in the corner of the garden. My sister, cousins and I grew up helping my Grandmother in the garden and helping her tie those Herbs and hang them to dry. She had a building (actually their old house that had all of the rafters in the ceiling exposed) that she used just for drying Herbs and storing treasures. (and Grandpa’s home grown tobacco) Grandma always had several balls of string that she had saved from everything. She would snip the lengths of string off and have them ready and laid out on the table to tie onto the ends of the stems once she prepared the Herbs for drying. She would bundle several Herb stems together and wrap one end of the string around one bundle, then wrap the other end of the string around another bundle. Grandma had a backward wrap that she used, to get that string just tight enough so that when the stems started to dry they wouldn’t slip out. Some Herbs she would put into paper bags to hang and dry just in case the leaves fell of the stems, the bag would catch them. Some of them she left open to dry in the air. We would then take all of the Herb bundles tied with string out to the old house and she would take one bundle and throw it over a rafter so that they would hang there in the air until they were dry. I remember those bundles gently blowing back and forth hanging from those ceiling rafters.
The old house was absolutely one of my favorite places at my Grandparents. It was well shaded with huge trees in their yard and it always seemed to have a breeze blowing through it. The smells inside that old house were so wonderful, to this day when I think about walking into the rooms it makes my mouth water.
I hope you have enjoyed my little piece of Herb history and preparation.

Sage Burgers

SageBurger.jpg

Sage Burgers

1 pound of lean Ground Beef

1 Tablespoon Rubbed or Ground Dry Sage Leaves (plus 2 teaspoons reserved)

1 Tablespoon Gluten Free Lea & Perrins Worchester sauce

1 Teaspoon MSG Free Season Salt

In medium size bowl mix ground beef, 1 tablespoon of the sage, Worchester sauce, and season salt. Blend all seasonings well with beef and pat out patties to desired size. I can usually get 5 burgers from one pound of ground beef.

Preheat Grill to 350* to 375*F.

Place each patty on grill, cover with lid and cook for 5-8 minutes. Raise lid and turn patties, then sprinkle each burger with remaining sage. Cook burgers for another 8-10 minutes, depending on how thick you make your burgers. Check the center of burgers to make sure there is no pink left in meat. When done serve with Gluten Free buns and any toppings you desire.

Eating Out Gluten Free

RedRobinGFBurger

Eating Out Gluten Free

With everyone on summer vacations, I thought this would be a helpful post. I know there are apps that will help in finding Gluten Free restaurants, but it has been my experience that only a few of them are listed on the apps.
Recently I have had several people tell me, since they have started eating Gluten Free, they can no longer go out to eat. Well you can, you just have to do your homework. I have even had some Bakeries and Restaurants message me and tell me they are using some of my recipes!  So you never know when you go out to eat you may see some of my Gluten Free recipes on your menu.

Here are a few tips.
ALWAYS, tell your waiter that you need the Allergy, or Gluten Free menu, and if you are Celiac tell them it is medically necessary that you eat Gluten Free. Don’t be afraid to ask questions. Such as do you have a dedicated fryer for fries, or are they fried in the same oil as all of the other breaded items, like chicken or onion rings? Ask if they toast the Gluten Bread in the same toaster or grill that wheat bread is toasted on. Always ask!

With the help of other sites and friends we have compiled a list of Gluten Free places to eat in several states. Please be aware, things can change. Chefs come and go, as do knowledgeable waiters and waitresses. Always ask questions, and if you don’t feel safe, don’t stay and eat. I am in no way endorsing any of these restaurants. As you well know if you have Celiac Disease or food allergies it is always a risk when you go out to eat. Please Feel Free to comment and add your favorite and SAFE Gluten Free places to eat in the comments below. Please remember, just because a chain restaurant in one city has a very good reputation for serving SAFE gluten free options, others may not. Always ask questions and make sure!

EATING OUT GLUTEN FREE BY STATE

ARKANSAS:

Angus Jack- Springdale, Arkansas
Callahan’s Steak House- Siloam Springs, Arkansas ( It’s better if you call ahead for this restaurant)

COLORADO:

Austin’s- Fort Colon’s, Co.

MARYLAND:

Alexander’s Tavern- Fells Point, Baltimore

MASSACHUSETTS:

Wagamama’s- Boston, Ma

MICHIGAN:

[V] = Dedicated Vegan
Dedicated GF
Wow (Okemos),1754 Central Park Dr. Meridian Charter Township, MI 48864
Live Gluten Free Bakery & Café 1062 E. Sternberg Rd.,Norton Shores, MI 49441 Just Off US 31 exit 109B
Moo Cluck Moo (Canton/Dearborn)42126 Ford Rd. Canton, MI (734) 844-0000 (behind Panera Bread) 8606 N. Telegraph Rd.,Dearborn Heights, MI (313) 562-9999(carry out only) (one block south of Joy rd.)**Be aware this is no longer a dedicated Gluten Free facility**
Little Mustard Seed Café & Shoppe, 51111 Washington Street,New Baltimore, MI, United States, 586-716-9255
Renee’s Gourmet Pizzeria (Troy/Southfield) 1937 W. Maple Road, Troy, MI 48084 248-280-7800, 29705 Northwestern Hwy. Southfield, MI 48034 (carry out and delivery only) 248-208-6000
Rumi’s Passion Gluten Free Bakery 41120 5 Mile Road, Plymouth, MI 48170, 734-335-7145
No More Belly Aching Bakery, 10049 Grand River Ave #100, Brighton, MI 48116 (810) 225-9773
[V] Try It Raw Inc. 213 E Maple Rd.Birmingham, MI 48009 (248)-593-6991
Celiac Specialties, 1928 Star-Batt Dr. Rochester Hills, MI 48309 (248)-860-0680
Ethel’s Edibles, Gluten Free Baking Company 22314 Harper Ave. St Clair Shores, MI 48080 (586)-552-5110
Heavenly Cakeballs 3522 S Lapeer Rd. Metamora, MI 48455 (248)-431-0740

Missouri :

Fuddruckers: Branson, Mo. ( has GF buns)

NEBRASKA:

Heidi Payton-Holstein Nebraska Great Plains Celiac group – Gluten Free
Published by Heidi Payton-Holstein · April 14 ·
Here is a list of Restaurants in Sidney Nebraska, that have gluten free menu options.
Buffalo Point Steakhouse & Grill—Yes they have a GF Menu, Yes they have a GF prep Area, chance of CC is extremely low
Perkins Restaurant & Bakery—–Yes they have a GF Menu, Yes they have a GF prep Area, chance of CC is extremely low
Applebees—–Yes they have a GF Menu, Yes they have a GF prep Area, chance of CC is extremely low
Sam and Louies Pizza—-Yes they have a GF Menu, Yes they have a GF prep Area——–The Cross Contamination is high with gluten based flour floating in the air.
Hillside Bar & Grill—-Offer ONLY a Chief Salad, but can not guarantee that all ingredients used (meats) used would be gluten free..
Sonic—–Yes they have GF options, Yes they have a GF prep Area, could not guarantee a a low CC chance.
Arbys—– Yes they have GF options, Yes they have a GF prep Area, could not guarantee a a low CC chance.
Chilli’s and Sam & Louie’s – Scottsbluff and Gering, NE.

NEW JERSEY:

Bill’s Bar and Burger – Atlantic City, NJ.

NORTH CAROLINA:

Shagger Jacks- Oak Island
Five Guys – Oak Island ( and all over the East Coast) (be aware of possible cross contamination)
Bob’s Dogs- Oak Island
My Way Tavern – Holly Springs

OKLAHOMA

The Chuck Wagon Café- Sycamore Springs Ranch 12754 South 442 Road, Locust Grove, Ok.74352 (918) 598-3310,Steaks and Baked potatoes!  (Beware of the fries they are not fried in dedicated Fryer) Just tell your waitress what you can have and they will work with you.
Denny’s- Pryor, Oklahoma
Los Cocos – Salina, Oklahoma
Rowlands Quick Shop – Locust Grove, Oklahoma ( Baked Chicken)
Applebee’s – Muskogee, Ok
Lone Star Steak House- Broken Arrow, Ok ( Currently Closed, Sept. 2017)
Red Robin Gourmet Burgers-Broken Arrow, or Tulsa, Ok
(The Photo was taken at Red Robin in Broken Arrow, and yes that is a GF bun)
Red Lobster-  51 Street, Tulsa, Ok
Lyn, just added Hideaway- Broken Arrow, Ok
Hideaway Pizza- Edmond, Ok
Five Guys- also Broken Arrow( be aware of possible cross contamination)
Los Cabos- Jenks or Broken Arrow, Ok
Scholtzskys has a gluten free bun
Incredible Pizza – Tulsa, OK (gluten free pizza if you request it)
Domino’s – Durant, Ok
Roma’s Italian Restaurant- Durant, Ok

SOUTH CAROLINA

McAllister’s Deli

TEXAS:

Cheesecake Factory- Frisco, Tx
PF Chang’s – Allen, Tx
McAllister’s Deli- Sherman, Tx
Jason’s Deli- Allen and Dallas, Tx.

First Anniversary of Jan’s Gluten Free Cook Book

Cookbookpicforfair (2)

Jan’s Gluten Free Cook Book Give Away!

To celebrate the first anniversary of my cook book I’m going to have another give away. From now through July 9th 2016, the person with the most votes wins a Jan’s Gluten Free Cook Book and some *BONUS RECIPES* that I have never published or posted.
To vote you must have your friends and family LIKE my Face Book recipe page (Jan’s Gluten free Recipes, click the link below) and comment on the post for the give away, or the note about the giveaway, who they are voting for. If they do not comment” who they are voting for” I cannot count your vote. If you already LIKE my page and are voting for yourself, comment so I will know. The person with the most votes wins! Please share and pass this along! I would love to give away another Cook Book!

JansGlutenFreeFB

https://www.facebook.com/jansglutenfreerecipes?ref=aymt_homepage_panel

Rosemary Dill Cucumber Salad

CucumberSalad.jpg

Rosemary Dill Cucumber Salad

5 Cups washed peeled and sliced Cucumbers ( about 5-6 Large Cucumbers)

Dressing:

1/8 Cup of Milk

1/2 Cup of Gluten Free Mayonnaise ( I use Hellmann’s original)

1/4 Cup plain Greek Yogurt

2 Tablespoons Lemon Juice

1/2 Teaspoon Freshly Chopped Rosemary Leaves

1/2 Teaspoon Dried Dill Weed

1/2 Teaspoon Salt

1/8 Teaspoon ground Black Pepper

In large mixing bowl (or serving bowl) add all ingredients for dressing and whisk together. Add peeled and sliced cucumbers and fold together. Refrigerate for at least 30 minutes before serving. You can also mix the dressing and refrigerate the night before and it tastes even better. Enjoy!!


Chicken and Fruit Salad

Gluten Free Chicken and Fruit Salad

IMG_1533

Chicken & Fruit Salad

(or you can use Turkey)

2 ½ Cups cooked and cubed chicken ( about 2 large cooked chicken breast)

1/3 Cup finely chopped red onion

1 Small apple, about 1 to 1 ¼ cups chopped apple with the peeling

1 to 1 ¼ Cups quartered and sliced seedless grapes

2/3 Cup chopped pecans

2/3 Cup Gluten Free mayonnaise ( I use Hellmans Real mayo)

In medium bowl add cooked and cubed chicken ( or turkey). Wash and cut up fruit and onion adding this to chicken, along with pecans. Then pour in mayo and mix well. Serve in lettuce wrap or on your favorite Gluten Free bread for a great tasting sandwich. Enjoy!

Pork and Kale Crockpot

IMG_20160606_154916.jpg

Pork and Kale Crockpot

1 Pound ground Pork

2 Large Cloves garlic minced (about ½ Tablespoon each)

1 Onion chopped (about 2 Cups, I used garden onions)

1/2 Tablespoon dried Fennel Seed

1 Tablespoon chopped Fresh Oregano (1/2 Tablespoon if using dry)

1/2 Cup chopped fresh Parsley

8 oz. Gluten Free Chopped Ham

2 cups chopped Kale (packed)

1 Cup Water

1 Teaspoon Salt

1 Cup freshly Grated GF Parmesan Cheese ( more if you want)

In large skillet, on medium heat brown pork, adding garlic, fennel, oregano, and parsley. Stir and cook pork until there is no pink left. Then stir in ham and cook until both meats are brown. Turn off heat to skillet and let set. To crockpot add Kale, water and salt. Turn on heat to 4-6 hours on high or 6- 8 hours on low. Pour meat mixture on top of kale, cover with lid and let mixture cook. When ready to serve top with cheese. Enjoy!

Variations: You can make this a complete meal by adding more veggies such as potatoes or carrots. Just double the amount of herbs, potatoes will absorb the herb flavors very fast.

Fresh Veggie Pizza

Gluten Free Fresh Veggie Pizza with Cream Cheese Filling

IMG_1640

Gluten Free Veggie Pizza

Pizza Crust:

2 Cups Gluten Free Bisquick Mix

2 Eggs

2/3 Cup Milk

2/3 Cup GF Oil

Preheat oven to 325*F.

In medium size mixing bowl, whisk eggs and milk, add oil, and fold in Bisquick mix. Mix well and set dough in refrigerator for at least 30 minutes. The Bisquick is a little gritty, so I like to let it set to absorb the liquids as long as possible. When ready to bake, grease a 12 inch pizza stone or nonstick round baking pan. Pour dough onto pan and spread dough with your hands until completely covering pan and forming a raised crust around the edges. Bake for 25 to 30 minutes or until crust is lightly browned. Let crust cool and cover with filling below.

Filling:

2 – 8oz. packages additive free cream cheese ( I use Philadelphia)

1 Heaping Tablespoon of Gluten Free Mayonnaise ( I use Hellmann’s)

1 Heaping Tablespoon Gluten Free Dry Ranch Mix( see recipe in Vegetables and Dressings)

1 Large head of Broccoli chopped (just florets do not use large stalks)

1 Sweet Red Bell Pepper, washed, seeded and cubed into small pieces

1 Sweet Orange or yellow Bell Pepper, washed, seeded and cubed also

1 medium tomato cubed or about 1 ½ cups of cherry tomatoes sliced in half

In food processor blend cream cheese, mayonnaise, and dry ranch dressing mix, until smooth and creamy. Spread cheese mixture onto cooled crust, then cover with chopped vegetables. Slice into small pizza slices and serve. ( Note: add any vegetables you like, or you can even add chopped avocado, or if you want to turn this into a meat pizza, then add some chopped GF ham. )