Spring Time Gluten Free Meal

MVIMG_20200326_181321

Just wanted to show you our supper tonight. Wild caught fish, ( Sandbass) Wild Onions and Eggs, and Morel Mushrooms.

Wild Onions and Eggs

1 1/2 Cups cut Onions
2 Tablespoons Oil ( or bacon grease)
1/4 Cup Water
6 Large Eggs
2 Teaspoons Salt

Cut root end off of onions, wash well and drain water. In a medium size mixing bowl cut Onions into 1 inch lengths. Add oil to 8 inch skillet, spreading to cover bottom completely. Spread cut Onions evenly over bottom add water and cover with lid. Place on medium to high heat. When onions start to steam move lid over slightly so that it will let steam escape. Let cook about 8-10 minutes stirring a couple of times and replacing lid each time. When onions are fork tender at the bulb end, break eggs into bowl and beat with fork until yolks are broken and mixed. Remove lid from skillet and pour eggs over onions. Replace lid until eggs start to cook and turn white around the edges. Slide spatula around the edges so that eggs won’t stick. Continue to do this until eggs are cooked through. You may want to turn eggs and onions over to make sure all is well done. Remove from heat when eggs are no longer runny. Enjoy!

Air Fryer Roasted Carrots

AirFryerRoasted Carrots

Air Fryer Roasted Carrots

1 Pound whole Carrots

2 Tablespoons Light Olive Oil

2 Teaspoon Dried Basil (make sure all herbs and spices are Gluten Free)

2 Teaspoons Garlic Powder

1 Teaspoon Dried Oregano

1/2 Teaspoon Salt

4 Tablespoons Butter

Wash, peel and slice carrots in half lengthwise. Lay them flat onto the metal air fryer roasting pan. Drizzle carrots with oil and sprinkle with herps and salt. Place pan into air fryer on middle rack and set temp. at 400* for 20 minutes. Half way through cooking time turn carrots over,  dot with butter and let the carrots roast for the rest of the cooking time, or until fork tender. If carrots need to cook longer return to fryer and cook until done. Remove from fryer and serve. Enjoy!

Quick Beef Stew

Beef Stew.jpg

Quick Beef Stew

1 Pound Ground Beef

1 Large Onion (Chopped)

2 Cups Cooked Potatoes with liquid ( this is the potatoes that you cooked earlier in the week)

1 Tablespoon Garlic Powder

1 Teaspoon Ground Black Pepper

2 Teaspoons Seasoning Salt

2 Teaspoons Regular Salt

1 -28oz. Can of Tomatoes

1 -15 oz. Can of Whole Corn

1 14.5oz. Can Cut Green Beans

1 14.5oz. Can Sliced Carrots

In large stock pot crumble ground beef and chopped onion. Cook on medium high heat stirring and continuing to break apart meat until it is browned. Add all seasoning and continue to stir so that meat doesn’t stick. When all the pink is gone and meat is cooked through, start adding all of the vegetables with the liquid. Turn heat up and cover with lid until stew starts to boil and continue to stir occasionally. Then turn down to medium and let simmer for another 5 minutes. Turn heat off and serve warm. This goes great with the corn bread muffins or corn dodgers you made earlier this week.

Note: Remember to keep leftovers for Shepherd’s Pie. 


Mashed Potatoes

Mashed Potatoes.png

Mashed Potatoes

I usually buy White Russet potatoes, you can use any variety that you like. Russets also cook faster than some varieties like Reds or even Yukon Gold.  I use 1 medium potato per person, but since we are prepping for 3 meals, you will need to use 3 per person. So if you are cooking for 4, then use 12 potatoes.

This recipe is in conjunction with my on going series of Meal Planning and Prep.

INGREDIENTS:

12- 14 Potatoes, (depending on size, a medium potato is about 3 ½ to 4 inches long) If you have small potatoes then use 2.

2 Teaspoons salt ( use 1 teaspoon in water before boiling)

½ Cup Salted Butter or butter substitute ( =1 stick butter)

Wash and peel potatoes, removing any bad spots. Then cut potatoes into about ½ to 1 inch cubes. Place cubes into large sauce pan and cover with water about an inch above the potatoes. Add 1 teaspoon of salt and place pot one burner. Turn burner to high. When potatoes start to boil, set timer for 10 minutes. ( Do not remove pot from heat, cover with lid loosely, stirring occasionally) * After ten minutes, dip out 2 cups of potatoes and cover with liquid. Let them cool and place in refrigerator using an air tight container.* ( You will use these in the Beef Stew, later in the week)

Reset your timer on the rest of the potatoes still in the pot and let them continue to boil for another 10-15 minutes, or until fork tender.  When potatoes are very soft a fork will easily go through the potato, they are done. Remove from heat and drain liquid from potatoes into a heat proof bowl. To the pot add ½ cup butter, and 1 or 2 Teaspoons salt to potatoes, depending on your taste. Then mash the potatoes with potato masher or electric mixer. Butter will melt into hot potatoes as you mash them, remember to taste to see if you need more salt. If the potatoes are a little dry add more liquid as needed, using liquid that you drained from the potatoes. Only add a tablespoon or so at a time mashing until smooth and fluffy! ( Don’t over work the potatoes after mashing, it will cause them to be rubbery.)

Optional: If you prefer before serving you can top them with a little Garlic Powder, Chopped Scallions, Crumbled Bacon, etc. Whatever your family prefers.

Note: Remember to keep any leftover mashed potatoes.  Refrigerate storing them in a plastic sandwich bag. You can use these to make the Shepherd’s Pie.

Jan’s Dill Pickles

Dill Pickles

My Cucumbers are done for the summer, but my pantry is almost full so we are happy!

Jan’s Dill Pickles

45- 50 Cucumbers ( I like Straight 8, for pickling, about 4-5 inches long)

Soak Cucumbers in an Ice water Bath for 30- 40 minutes before packing into jars.   (I use an Ice Chest to do this)

12 Cups Well water ( or non- chlorinated water)

6  1/2 Cups White 5% Vinegar

1 – 6.5oz. Package Kosher Dill Pickle Spice Mix (Make sure it is Kosher, and does not have any gluten ingredients. I use Mrs. Wages or Ball)

3 Teaspoons Alum

1/2  Cup Canning Salt

1 Tablespoon Minced Garlic

3 Teaspoons Dry Dill Weed

Before packing sterilized jars, Then add 2 small Cloves of Garlic to each jar ( I like to use wild garlic)

And 1 Flower stem of fresh Dill Seed ( just as it is going dry) to each jar.

Bring all ingredients ( except the garlic cloves and Dill Seed) to a boil. Pack cucumbers into sterilized wide mouth quart Jars and pour boiling brine over cumbers. With in 1/2 inch to the top of jars. Cover each jar with a sterilized cap and ring. ( be sure to add the garlic cloves and dill seed before sealing) Place filled jars into boiling water canner and process for 10 minutes in boiling water bath.     ( this is per my canning book) This should make 10 – 12 Quarts, depending on how tightly you pack the jars.

When processing time is up, remove from water and let each jar cool and seal. If a jar doesn’t seal, be sure and refrigerate that jar. Before I open a jar of pickles, I like to refrigerate it for about an hour to make sure the pickles get crisp.     

Jan’s Gluten Free Salsa

IMG_20190628_101835

These aren’t the prettiest Tomatoes we have ever raised, but with all of the rain we’ve had, I’m happy just to get them!

Jan’s Salsa (Medium Heat)
(For HOT salsa add 1 or 2 Habanero peppers)

6 – cups chopped onions ( about 3 large onions)
2/3- cups minced garlic (if you use fresh garlic it’s about 18 cloves chopped)
5-6 jalapeno peppers chopped ( use 8- 10 if they are small peppers 1 to 1 1/2 inches long)
( I leave the seeds & veins in, it gives them more heat)
6 chili peppers chopped ( or 2 tspns. Chili powder not chili seasoning)
1 large or 2 small seeded & chopped bell pepper
2 table spoons paprika
2 table spoons salt
2 table spoons garlic powder
2 teaspoons cilantro
1 table spoon white vinegar ( make sure it is not malt vinegar)
1 gallon peeled & chopped tomatoes

In large sauce pan on medium to low heat cook and stir garlic, onions, peppers, vinegar, & spices until onions turn clear. Then add tomatoes, turning up heat & stirring constantly, bringing it all to a boil. Cook at a rolling boil ( stirring continually) for about 20 min. to desired thickness.
(If you would rather have smooth salsa, put onions, garlic, & peppers in blender & blend to liquefy before cooking. Do the same to the tomatoes, before pouring them into sauce pan)
This should make 5 – 6 quarts, process in boiling water bath for 35 min.

Please note: if you live in a higher altitude you must refer to a canning chart for processing times. They will be different than the times I use here in Oklahoma.

Bacon and Cheese Potatoes

Bacon and Cheese Potatoes

Bacon and Cheese Potatoes

3-4 Medium size Potatoes (Baked with the skin on)

3-4 Slices of Bacon (cut in half)

1/2 Teaspoon Garlic Powder

1/4 Teaspoon Season Salt

1/2 Cup of shredded Cheddar Cheese

Slice baked potatoes into rounds with the Peeling still on. Then place potato slices into greased baking pan. ( I used my round copper pan that fits into my Air Fryer) Season with garlic and salt, place bacon slices on top (they cook better if the slices are cut in half). Place pan into Air Fryer ( or oven) cook 15 minutes at 400*. Half way through cooking time, turn bacon so that it will crisp on both sides. When done remove from oven and top with cheese. Enjoy!

Grilled Sweet Potatoes

We are already getting Sweet potatoes from our garden and we love them just about anyway I fix them!

Grilled Sweet Potatoes

4 Large Sweet Potatoes (washed)

3 Tablespoons melted Butter (or butter substitute)
2 Tablespoons Pure Brown Sugar
Optional, 1Teaspoon Cinnamon
Bake potatoes in Microwave just until soft.
Heat grill to 375- 400*.
Oil grates generously.
Slice potatoes completely in half then slice again through the center of the potato, but not through the skin.
In small bowl mix melted butter, brown sugar and cinnamon. ( If you use the cinnamon)
Place potatoes cut side down on grate and close lid for about 35-40 seconds directly over flame. Let potatoes char slightly then turn potatoes over and brush with butter sugar mixture. Let skins char for another 45-50 seconds or if you like them very brown you can let them go longer. When done remove from grill and serve!

Slow Cooker Squash Casserole

Squash Casserole

Squash Casserole

1 pound Ground Turkey or Pork ( browned and crumbled into small pieces, I used pork)

3 Medium Yellow Squash ( 5 Cups grated or chopped in food processor )

1/4 Cup Salted Butter ( or butter substitute)

3 Cups Freshly grated Sharp Cheddar Cheese

2 Large Eggs Beaten

1 Teaspoon additive Free Season Salt

2 Teaspoons Garlic Powder

Optional 2-3 medium Jalapeño Peppers ( deseeded and finely Chopped)

2 Cups Crushed GF Cheddar Crackers for topping ( I used Snyder’s Wholey Cheese)

Line Crockpot with foil or a crockpot liner. Grease inside of liner with butter or oil then when browned meat has cooled mix evenly with your hands all ingredients except GF crackers. Place lid on pot and set on low for 6-8 hours. Before removing from pot add crushed GF Cheddar Crackers on top, spreading evenly. Let casserole rest with lid off for about 10 minutes then serve. Enjoy!

Note: If you bake this casserole in the oven, you will need to parboil the squash before chopping to make casserole. In the crockpot the longer cooking time will let the squash soften and it is not necessary to parboil.


Fried Radishes

Fried Radishes

2 Large bunches of Radishes ( enough to make 2 Cups sliced radishes)

1/4 Cup Oil enough to cover bottom of skillet (optional, add 2 Tablespoons bacon or pork chop drippings)

1 Teaspoon Salt

Wash radishes well, cutting off the greens and the root end, do not peel. Slice to about 1/8 inch thick. Add meat drippings and oil to skillet and heat until sizzling on medium high. Add sliced radishes spreading out evenly in skillet. Season with salt, cover with lid and let fry for about 3 minutes. Then turn radishes and stir spreading out evenly. Let fry covered, another 3-4 minutes until edges are starting to get crisp and centers are soft. Remove from heat and serve. Enjoy!

Green Onion Potato Cakes

PicsArt_03-12-11.19.25

Green Onion Potato Cakes

1 peeled and mashed Avocado

3 small baked Potatoes (About 3 cups chopped with peeling on)

2 Eggs beaten

2-3 chopped Green Onions ( about 1 cup)

2 Tablespoons Gluten Free All-Purpose Flour

1/2 Teaspoon Additive Free Garlic Powder

1 Teaspoon MSG Free Seasoning Salt

Optional 1/2 Cup freshly Grated Cheddar Cheese

Preheat oven to 375*F.

In medium size mixing bowl Mix all ingredients. Then spoon onto a greased baking sheet and bake for 25- 30 minutes or until potato cakes are brown and crispy.

You can also fry these if you prefer

Turkey with Fruit Salad ( or Chicken and Fruit Salad)

IMG_1533

Turkey with Fruit Salad (or Chicken Salad)

This is a great way to use up that left over Turkey!

2 ½ Cups cooked and cubed Turkey (or about 2 large cooked chicken breast)

1/3 Cup finely chopped red onion

1 Small apple, about 1 to 1 ¼ cups chopped apple with the peeling

1 to 1 ¼ Cups quartered and sliced seedless grapes

2/3 Cup chopped pecans

2/3 Cup Gluten Free mayonnaise ( I use Hellman’s Real mayo)

In medium bowl add cooked and cubed Turkey ( or chicken). Wash and cut up fruit and onion adding this to meat, along with pecans. Then pour in mayo and mix well. Serve in lettuce wrap or on your favorite Gluten Free bread for a great tasting sandwich. Enjoy!

No Crust Garden Quiche

Garden Quiche

No Crust Garden Quiche

8 Eggs

1/2 Cup Milk

1/2 Cup Gluten Free all-purpose flour

1 medium yellow Squash, peeled seeded and chopped (about 2 cups)

1 Bell Pepper, seeded and chopped

1-2 Jalapenos’ seeded and finely chopped

1 medium Tomato, chopped

1 medium Sweet Onion, chopped

4-5 Minced Cloves of Garlic

1 Teaspoon Salt

2 cups Grated Cheddar Cheese

6-8 Slices Cooked Bacon, crumbled

Preheat oven to 350*F

In medium bowl break eggs, add milk and whisk together. Sprinkle in flour and whisk together until smooth. In another large bowl, add all chopped veggies. ( I like to chop all of my vegetables ahead of time and store them in the fridge until I’m ready to use them, they will last 2-3 days.) When you are ready to make the quiche sprinkle salt over veggies and stir in, fold in grated cheese and bacon. Then pour egg mixture over veggie mixture and fold together. When completely mixed pour into a greased deep dish pie plate. Bake for 35- 40 minutes or until set in the center. Serve warm. Enjoy!

Another do ahead tip: Fry extra bacon a day or two before you get ready to make your quiche.


Deli Style Broccoli Salad

DeliBroccoli Salad

Deli Style Broccoli Salad

2 Small heads of fresh Broccoli about 4 Cups of Florets

1/2 Cup Golden Raisins

1/2 Cup Roasted and Salted Sunflower Seeds

1 Large Shallot or Green Garden Onion Chopped

Optional: 1 cup shredded carrots

Dressing:

1/2 Cup Crushed Pineapple with juice

1/2 Cup Gluten Free Mayonnaise

2 Tablespoons Stevia or Sugar

In medium size mixing bowl, cut up broccoli florets to bite size pieces. Add raisins, sunflower seeds, and onion. In small bowl mix pineapple, mayo, and sugar. Whisk together until smooth and pour over broccoli mixture. Refrigerate until chilled, serve cold. Enjoy!

Gluten Free Squash Fritters

IMG_2279

Gluten Free Squash Fritters

2 1/2  Cups Shredded Squash (zucchini, yellow, or any squash you prefer)

1/2 Teaspoon Salt

2 Eggs beaten

1/4 Cup Water (or milk)

!/2 Cup Chopped Onion (optional)

1 1/2 Cups GF Corn Bread Mix ( I used Bob’s Red Mill)

1/2 Cup GF Oil ( or enough oil to pan fry)

In medium size mixing bowl mix shredded squash and salt. Let set while you beat eggs and water together and cut up the onion. ( The salt will help bring out the moister in the squash) Then add eggs, water, onion and corn meal. Stir until corn bread mix is wet and well incorporated.  Pour oil into 10 inch skillet and heat on high. When oil is hot drop squash batter by spoonful’s into oil and fry fritters 3- 4 minutes on each side or until golden brown.  Remove from pan and drain on paper towels. Serve while warm and crispy!

Variations: Add chopped jalapenos’ or minced garlic.

Change out the squash for fresh cut or frozen corn (drained) to make corn fritters.

Grilled Garden Veggies

Grilled Garden Veggies

2 Medium Yellow Squash

3-4 Green Onions ( or scallions)

1 Medium Head of Broccoli

Optional- 1 Bell Pepper or Jalapeño

2 Tablespoons Light Olive Oil

1 Tablespoon Softened Butter to grease pan

1 Teaspoon (additive free) Season Salt

½ Teaspoon Sea Salt

1 ½ Teaspoons Garlic Powder

Preheat Grill to 375- 400*

Butter a 9x 13 inch foil pan, or you can make a pan out of foil, but be sure and double layer it.

Wash and slice the squash and onions into 1/4 inch slices, then break apart Broccoli florets and place in pan. Drizzle oil over veggies and toss to coat. Then sprinkle seasoning salt, sea salt and garlic powder over veggies. Cover loosely with foil and place on grill. Close lid and let veggies stem for about 10 minutes. Raise lid and uncover veggies and toss them using a long spatula. If you want grill marks on some of the veggies take out a few of the squash slices and broccoli florets with tongs and place on a well oiled grill grate. Let them brown only for a minute or two, then return veggies to pan. Close lid on grill and cook for another 15- 20 minutes or until veggies are fork tender. Serve warm.

Garden Duck Project

Garden Ducks

We have always had a very large garden, but it was just too big for us to take care of, so last year we decided to cut down the size of the garden. Actually we cut it in half and have been mowing one end of it. I know with all of the modern chemicals and additives they have now, makes gardening easier, but I absolutely refuse to use any herbicides or pesticides in or around our garden or my herb beds! If you have ever gardened, then you know it can be exhausting back breaking work to keep up with the grass, weeds harmful bugs, and feeding the plants in your garden! Even though we did cut down the size, it was getting to be more than I could keep up with….So I had an idea!

Rouen Ducks

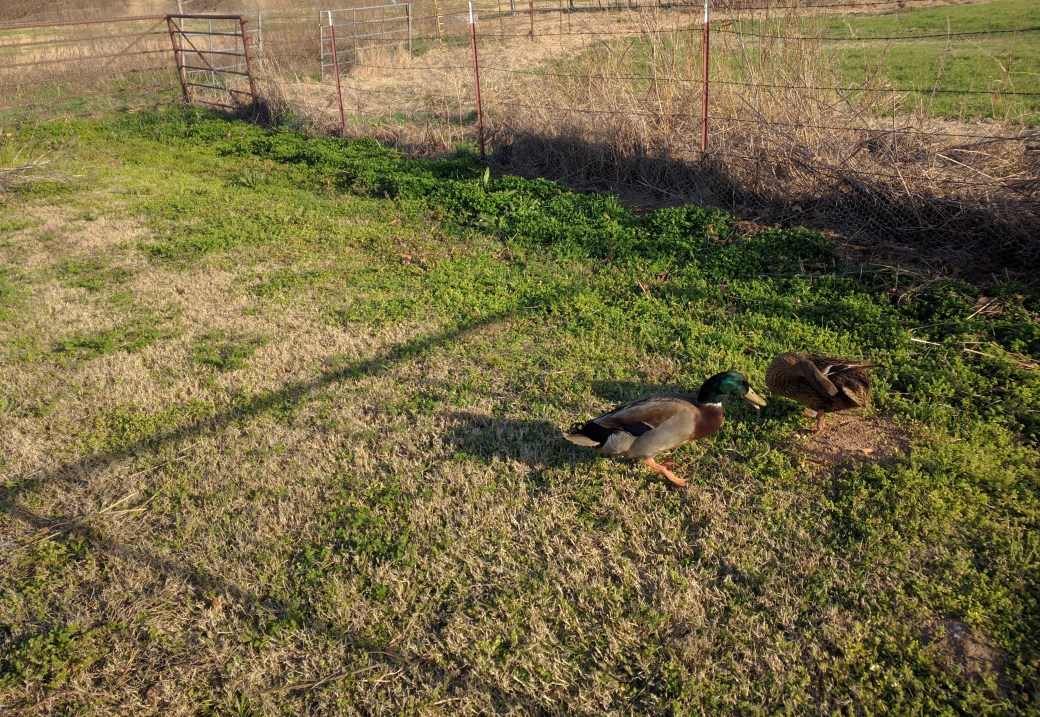
Earlier this year, my Mom decided she didn’t want the two Rouen Ducks she had; ( they didn’t get along with her chickens) so guess what? Yep I took them. What can I say I like Ducks, and I had heard that they are sometimes used in the garden to help control insects and grass. So I did some research and with the help of my Grandsons we put up a fence around the end of the garden that we had been mowing and lined the outside fence with chicken wire. I put the two Rouen Ducks that Momma had given me at that end and they got busy, but it was still too large of an area for only the two Ducks to take care of. So I jumped off into the deep end and ordered Fifteen more Ducks! (By the way, my husband thought I had lost my mind!) I got fifteen baby Runner Ducks from the Hatchery. They were one day old, and thus the Garden Duck Project started!

BabyRunners

If any of you have raised Ducks I would love to hear from you! Even though I was raised on the farm and ranch all of my life, we never had Ducks. So I’m learning and can use all of the help I can get!

The Runner Ducks are now Two Days Old 3-23-2017

2Day old ducks

I had no experience with ducks and my Mom only had limited experience with the two Rouen Ducks, so I asked the Hatchery to send me some info, and of course I went to Pinterest. The Hatchery recommended non-medicated Chick starter to feed them. *(Be aware that the feed does contain Gluten, so you may need to wear gloves and a mask)* Ducks cannot have any kind of medicated feed. Simply because they eat so much they will overdose themselves on the medication. Believe me they do love to eat!!! I gave them free choice as much as they wanted, and those 15 babies were going through A LOT of feed!

Ducks do grow much faster than chickens, but they still need heat like a baby chick. Since we didn’t have a chicken house or Duck house yet, and both barns are open, so I had to use the shop to put them in. Since we have predators,( coyotes, raccoons, owls, etc.) roaming around at night then I had to put them in a secure place. I rounded up an old stock tank with holes in the bottom, and lined it with newspaper, and drug it into the shop. Then found some heat lamps and put at each end of the stock tank. The ducks loved it! I had to change the newspaper out daily because they do like to splash their water and they do poop a lot. But that’s fine. That is exactly what ducks are supposed to do. (They will also help fertilize the garden.)   

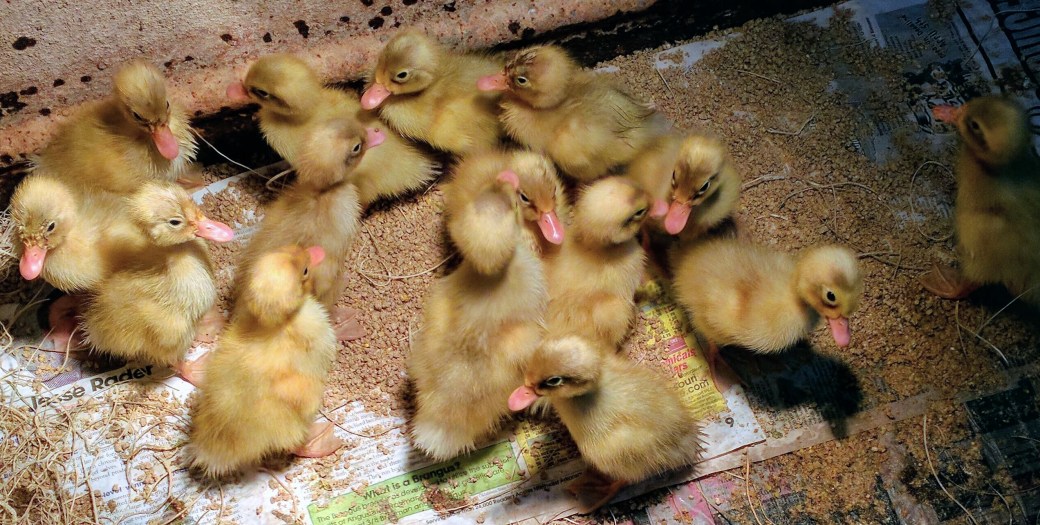
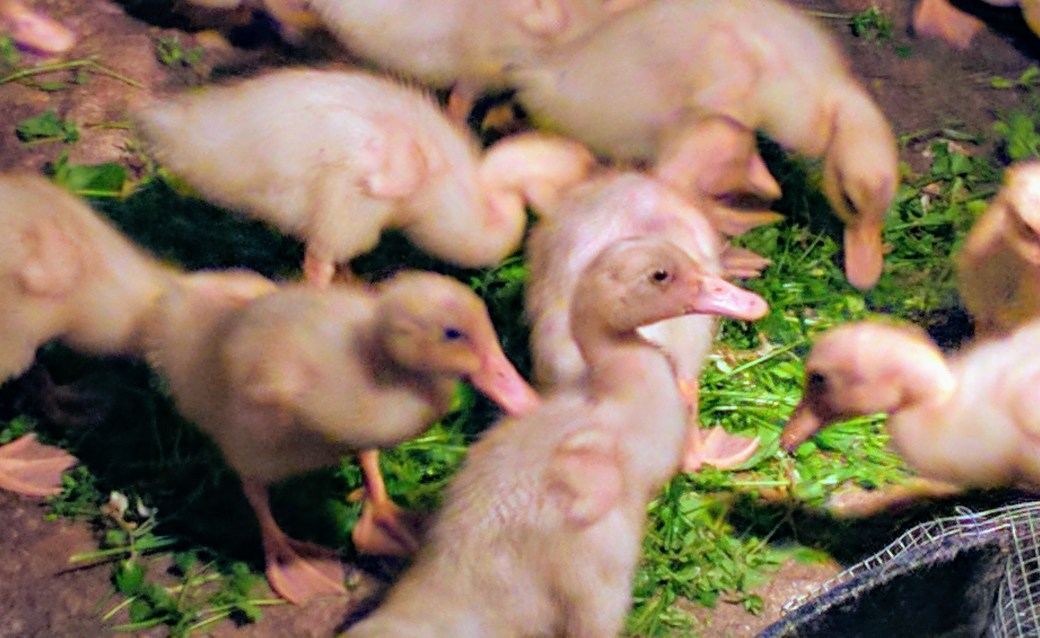
The Ducks are now Seven Days old 3-28-2017! 

Growing Ducks (2)

Ducks really have such a different personality than any other farm animals we have ever had. Notice the little smarty on the right!

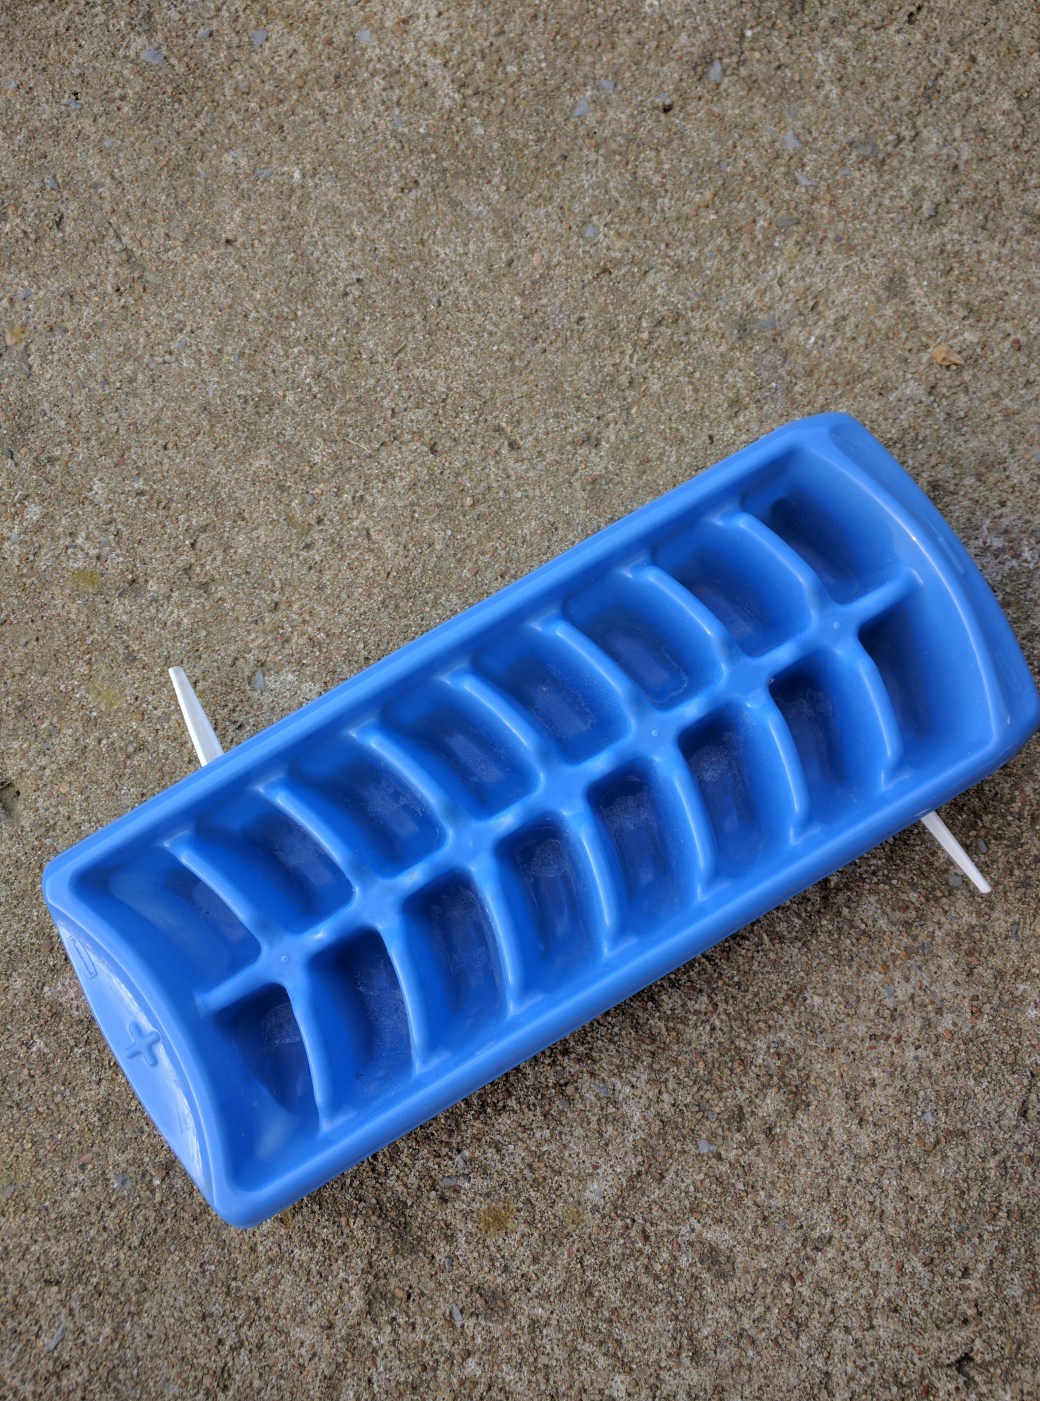
While the ducks are small you have to keep them warm and hopefully dry. That is not an easy thing to do with ducks! They really like to climb into their feed and water. At first I just spread feed on the newspaper and tried to water them in a shallow pan. Well they soon started climbing into their water pan splashing water everywhere! Also one of them flipped over on his back in the water pan and needed help getting out. The pan was very shallow with less than two inches of water, but still I didn’t want any of them to drown.  So of course I went back to Pinterest and started looking for a low cost way to water them. Someone used plastic ice cube trays to water, but I knew  they would​ tip them over so I taped a plastic knife to the bottom at each end of them for stability. It worked great! ( Oh and yes I did use Duct tape.)

DuckWaterer

Ducks Eating Chickweed

The Ducks are now 2 Weeks old 4/4/2017

They are growing so fast and since it is getting warmer and I’m pulling weeds anyway, I thought I’d try giving them some Chickweed grass. They loved it! It was so funny they ran to the grass and just burrowed down into it while eating around themselves. I’m still feeding them Chick starter and a lot of water! They are up to almost a gallon of water a day. It is very important to keep water out for ducks, because they need it before they can swallow their food. I’ve seen them eat a lot of chick feed and hold it in the side of their throat then run to the waterer and stick their head all the way under water, then they stick their little beaks straight up in the air then swallow. LOL, then the lump on the side of their little neck will disappear.

Waterer

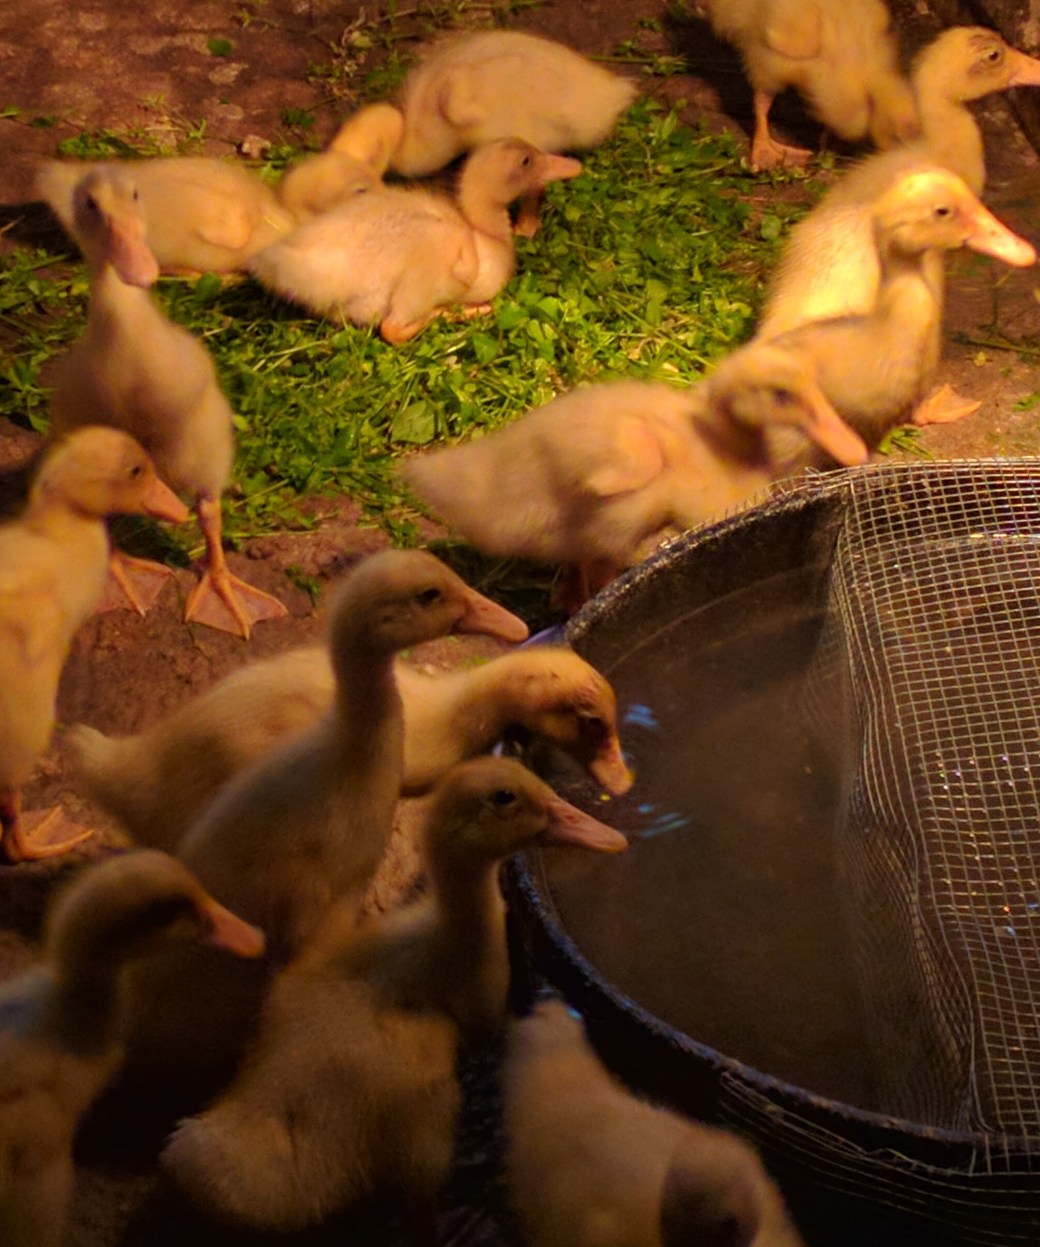
Since they are drinking so much water, I’m also trying a new water system. They still climb up into the ice cube trays, so in order to keep them from splashing so much water out I used a 3 inch deep rubber tub with wire over the top so maybe they won’t climb into it. We will see if it works?

3weeks old

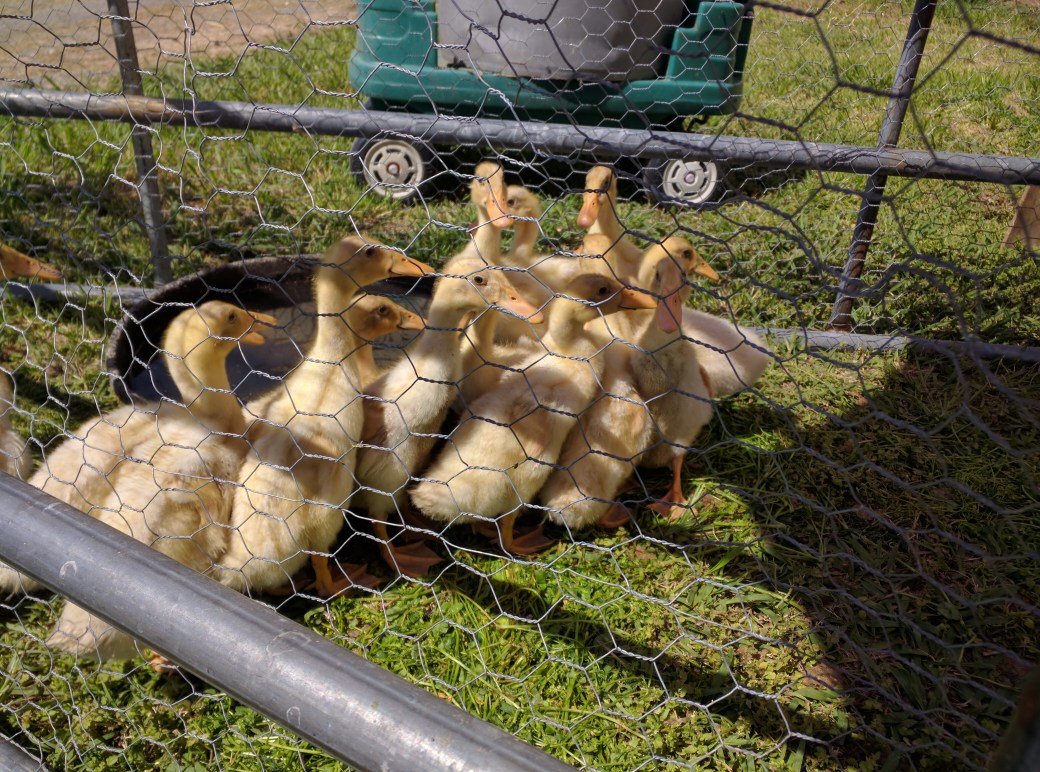
The Ducks are now 3 Weeks old 4-11-2017, and they are outgrowing their area in the shop very quickly! Since we are having some warm days, I made a temporary day time pen for them outside the shop. The task of moving 15 ducks from one location to another is not easy though. I found the little wagon I had used for my Grandson’s when they were little and a plastic half barrel and put each duck into the barrel. They did not like it at all! In case you didn’t know, baby ducks do not quack. They peep and if you put them in a barrel they squawk! Loudly! And it gets even louder when you start pulling the wagon and the barrel slips to one side, nearly dumping them on the ground. We recovered quickly though and made it to the pen. Once I put them out onto the grass, they loved it! The Ducks immediately started picking bugs out of the grass and were very content. I also took the wire off of their waterer and they soon made a swimming pool out of it.  

DuckWagon

The Ducks are now 4 Weeks old, 4-19-17 and it is unbelievable how fast they are growing! I’m finding out that Runner Ducks are very hard to catch even in a small pen, and until they lose all of their down and get their regular feathers, we will have to keep them warm and in the shop at night. So I had to find a better system of moving them outside during the day, than the wobbly half barrel. Ta! Da! The Duck Wagon was invented! I found a pet carrier that fit perfectly on the little wagon and connected a board and plastic fencing with zip ties to make a little loading ramp. I’m finding out that Ducks learn very fast!  I sprinkled a little feed in the bottom of the carrier and put them in. It only took a couple of times and they were running to get in. We have graduated from the stock tank in the shop, to a small pen. So no more chasing them around to catch them! This is great!  

 Grass before ducks

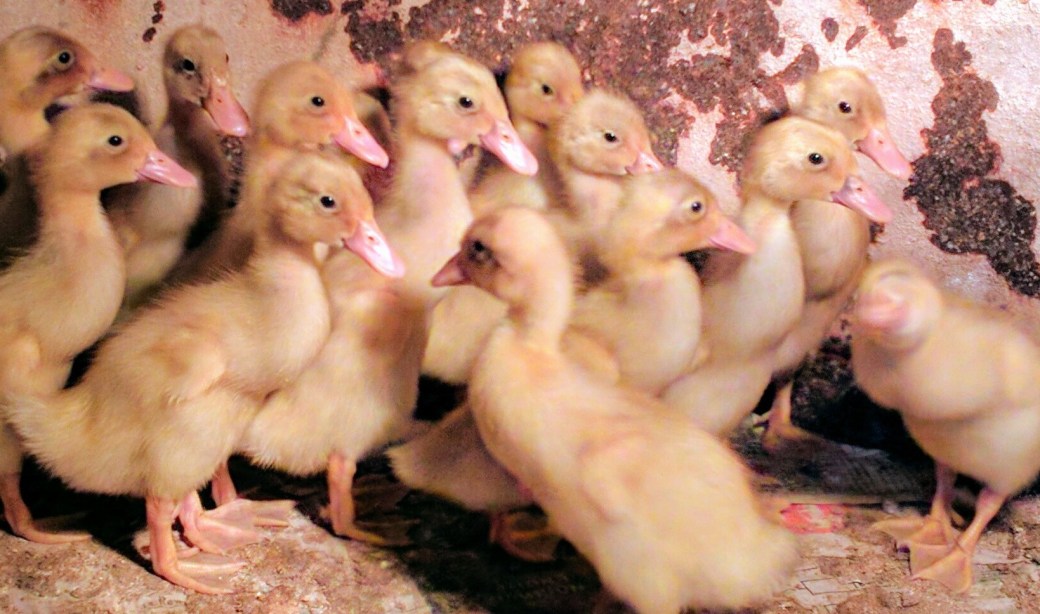
The Ducks are now 5 weeks old 4-25-17 and they have lost a lot of their down feathers now. Their new feathers are much darker and so pretty!

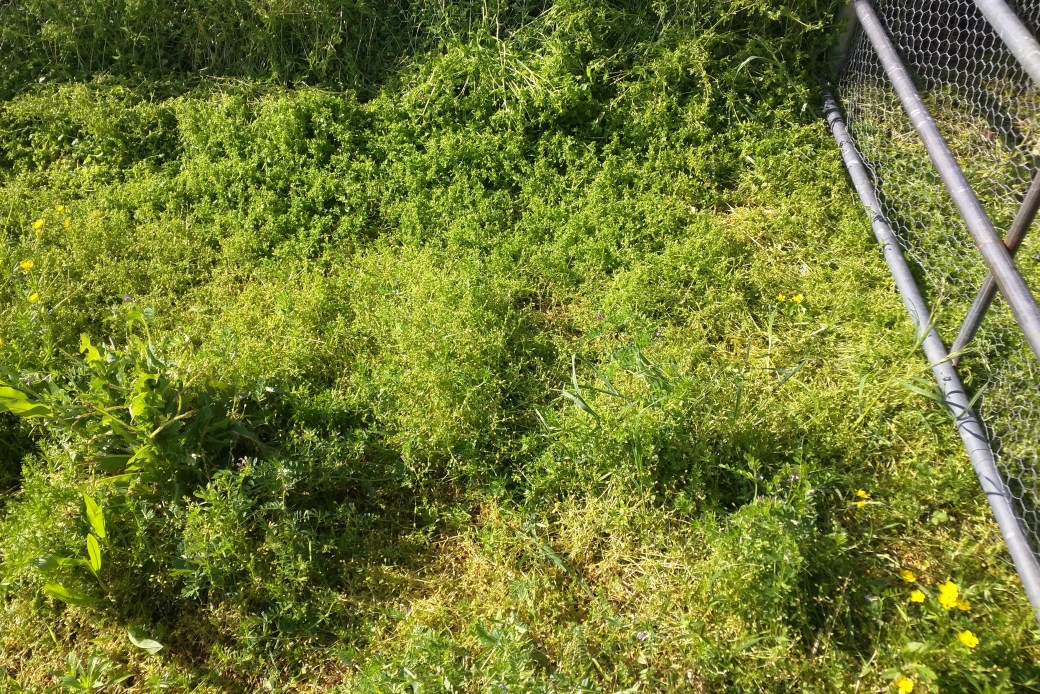
Now that they load themselves in the Duck wagon, we are going to the garden every day. I set up a pen away from the Rouen Ducks, so that the Runners could eat grass and bugs. The above photo is just a few days before I started putting them in, this photo is after they have grazed on the grass and weeds only for 2 days.Grass after Ducks for 2 days 
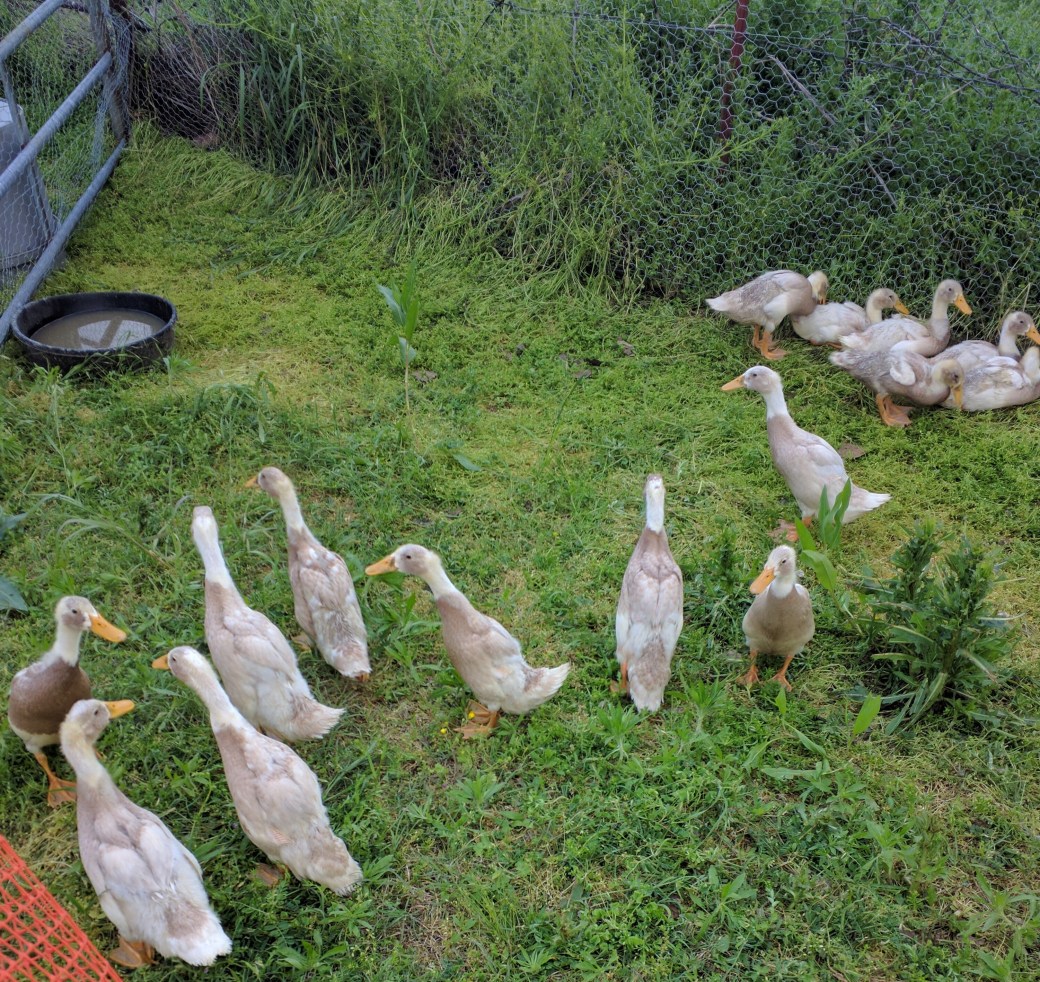
For very young ducks I think they did very well! Of course they go back to the shop every evening. We still haven’t gotten the Duck house built yet and they are no longer under the Heat lamp, but it is still too cool at night and they are too young to be out all of the time.

The Ducks are now 6 weeks old 5-3-17, and we are still going to the garden everyday about 7:30 every morning and coming back to the shop in the evening just before dark.  I’m finding out that they would really rather eat bugs than grass. I hope they decide to like some of the weeds soon, or I may have to give them some help and start pulling some weeds.

They are still growing so fast, and just about too big for the Duck Wagon already! In the video below, you can see some of them have decided to walk instead of ride, which is great! It makes a lighter load for me to pull.

The Ducks are now 7 weeks old 5-10-17, and as you can see from the video all of them are now walking (or running) back and forth from the shop to the garden. We are really doing good! ( I think any way.) They listen to me very well! Much better than the Rouen ducks. Oh by the way, the big ducks don’t like the Runner ducks very well at all! Especially the drake. Sometimes I have to put him in the time out pen. I hope his attitude gets better before we move the Duck House into the garden area!

I hope you enjoy watching my duck pics and videos! I would love to hear from y’all!

Ducks eatingweeds

The Ducks are 8 weeks old, 5-17-17 and are they are still growing so fast! I am just amazed at how fast they grow! As you can see I’m turning them loose in the garden now and they love it! The weeds are growing faster than they can keep up with and they still won’t eat some weeds. The guys are working on my Duck House and soon the Runner Ducks will stay at the garden all the time. I’m so excited!

Duckhouse2

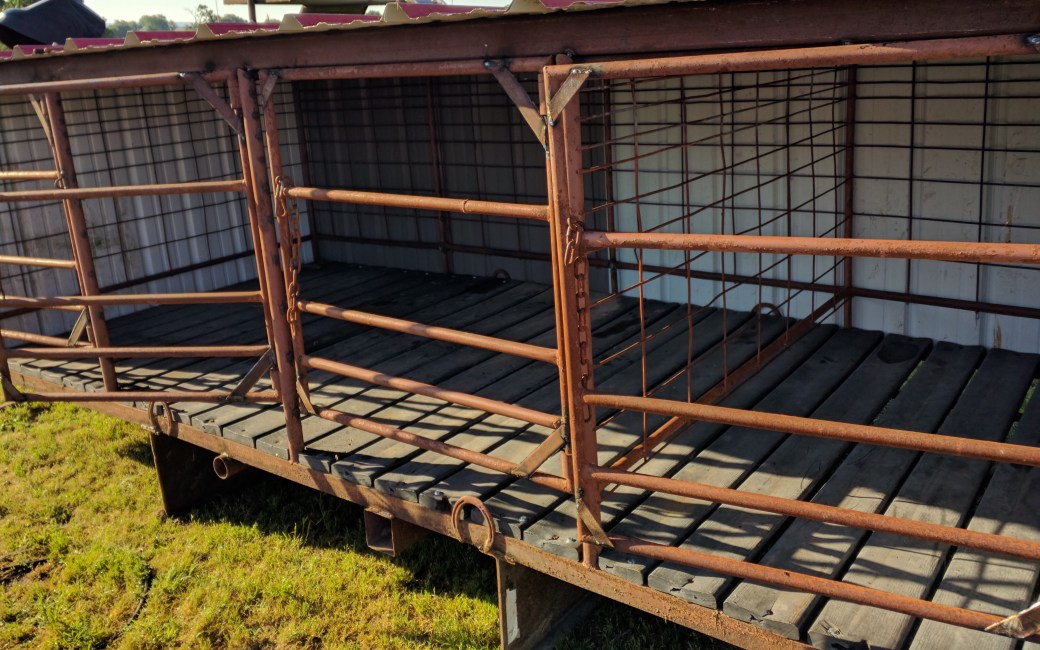
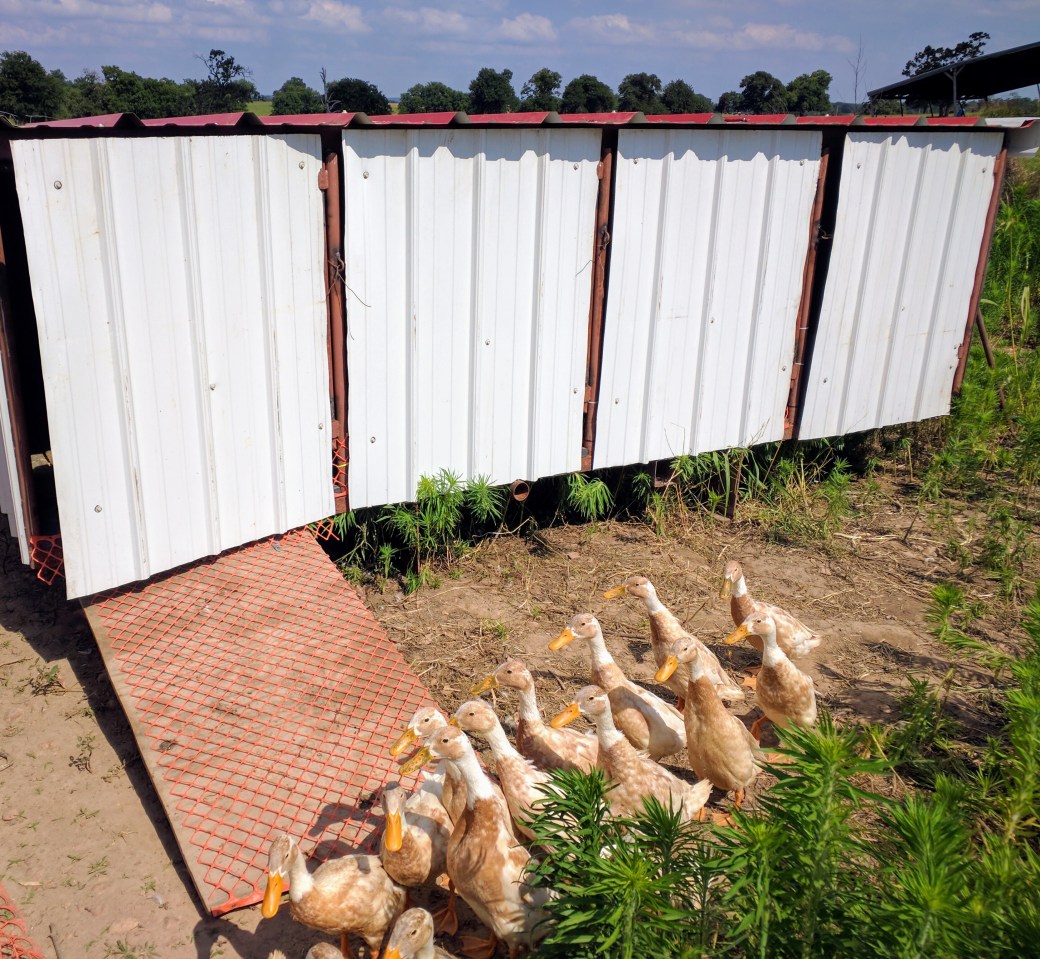
The Ducks are now 9 weeks old 5-27-17 and they are about to be kicked out into the real world on their own into their own house! As you can see from the photos, we converted a calf pen into a Duck House. It has recycled plastic boards, with 1/2 inch gaps in between each board, for the floor, and the whole house is raised up off the ground about 12 inches. This way I can wash it down with the water hose and the duck poop can fertilize the garden at the same time. We can pick it up with the tractor and move it to different areas of the garden to distribute the fertilizer evenly. I also added a ramp that is hinged to lift it when we move it.  

Duckhouse3

The Ducks are now 10 weeks old and my garden plants are big enough that I can let the Ducks into the garden to eat bugs. So far they are mostly eating around the edge of the garden, which is fine with me, because we have had an abundance of baby grasshoppers pop up! It is so funny to watch the ducks go after them. When you walk through the grass around the garden, the baby grasshoppers literally do pop up out of the grass in front of you and the Ducks just snatch them out of the air! We have always had a problem with grasshoppers, but we won’t anymore!!!  

Ducks in Garden1

I know I’m way behind with my Duck posts, but life just gets in the way sometimes. We have had a water leak in our house and if I would have brought the ducks in the house they would have loved it! We have been mopping water and ripping holes in the walls to find it. Thankfully we found it and finally have the mess cleaned up! Duck tails and bills

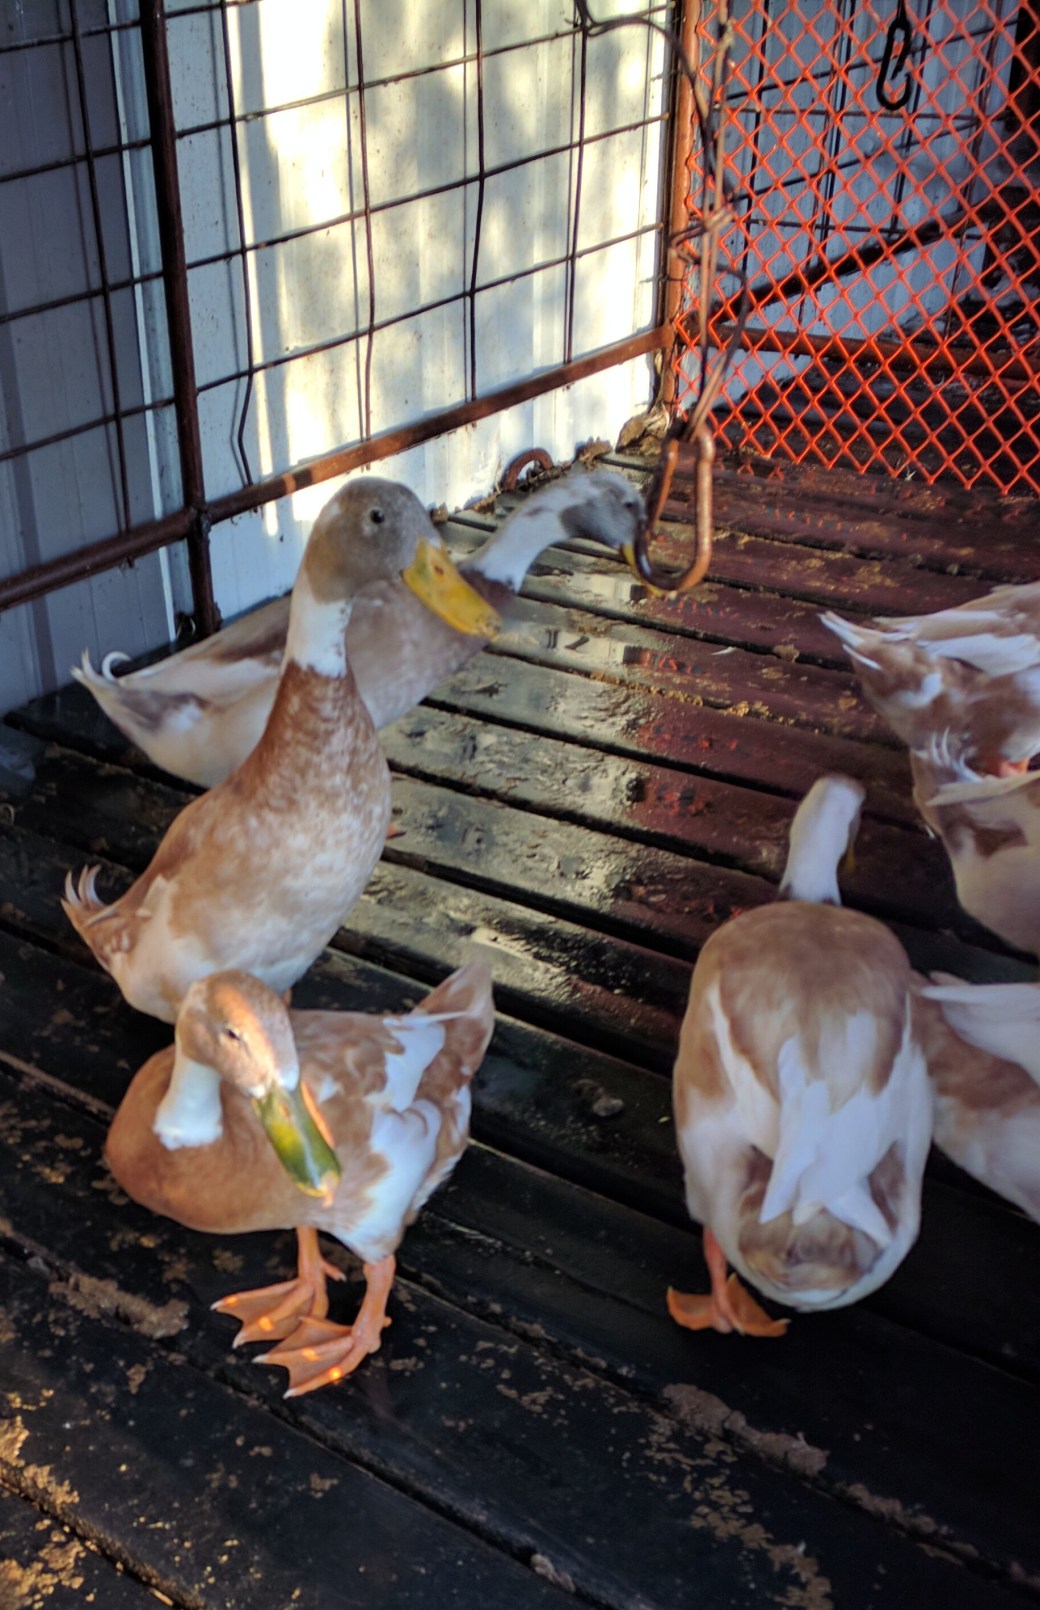
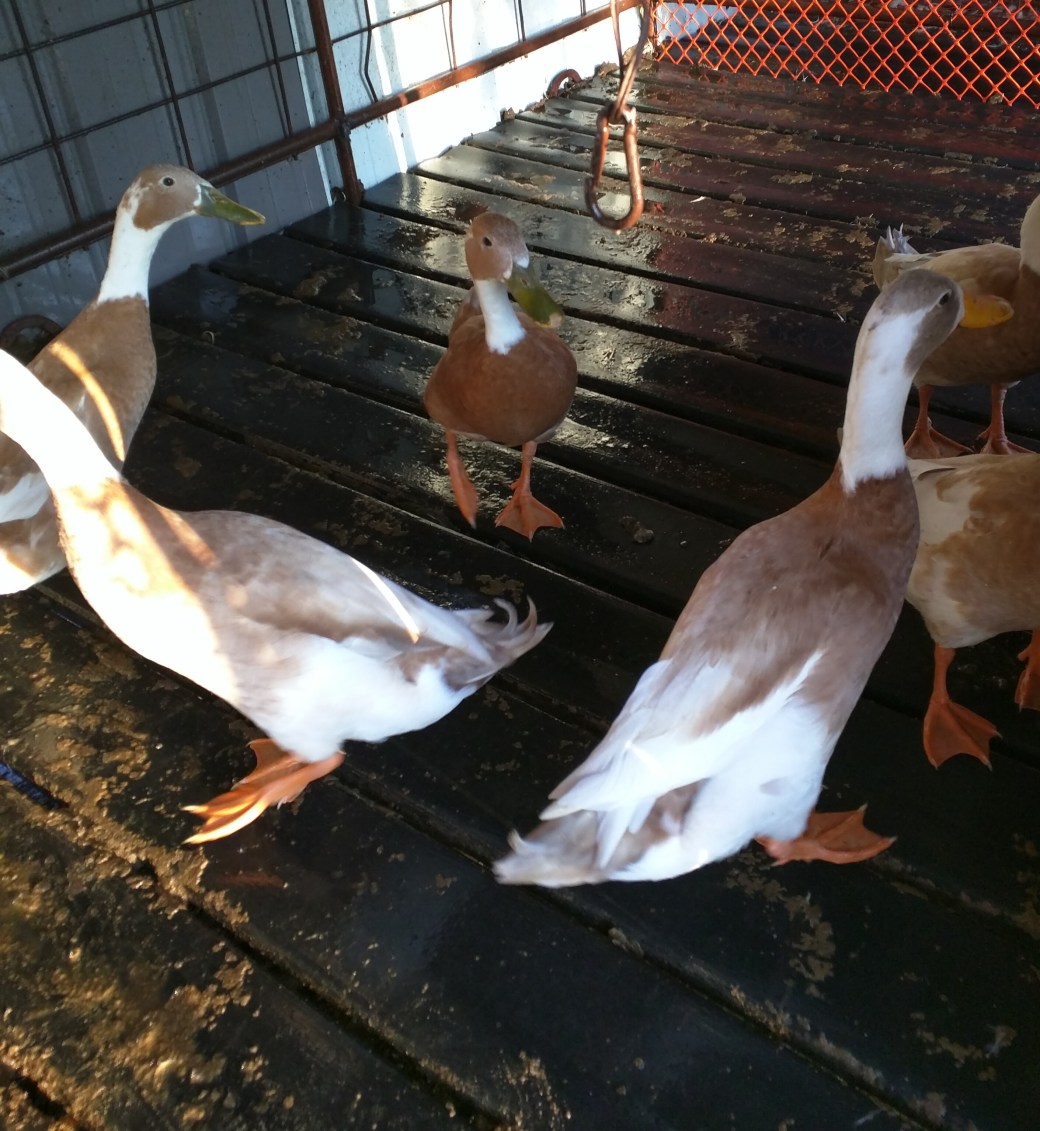
Since I’m so far behind I will fast forward to 20 Weeks Old! Which was 8/9/17. They are changing somewhat in their size and I can start to tell who is a Hen and who the Drakes are. As you can see in the pics, some of their tails are starting to curl, and the Drakes are getting a lot bigger than the Hens. Also I’m pretty sure the Hens are going to be the ones with the green/brownish colored bills.

Sometimes they can be little pests. I was trying to clean the Duck house and they wouldn’t stay outside until I could finish. That’s ok though, I’m glad they trust me!Duck Tails


Herb Roasted Cauliflower

Herb Roasted Cauliflower

2 Medium size heads of Cauliflower

1/4 Cup Olive Oil

1 Tablespoon Chopped Fresh Parsley Leaves

1 Tablespoon Chopped Fresh Thyme Leaves

2 Teaspoons Chopped Rosemary

3 Large Cloves minced Garlic

1 Teaspoon Salt

1 Cup Parmesan Cheese

1/2 Cup Cooked Crumbled Bacon

Preheat oven to 400*

Wash Cauliflower and break off florets, place them single layer in a large baking dish. ( do not stack them) Drizzle oil over the top then Sprinkle herbs, garlic, and salt evenly over cauliflower. Place in oven and bake uncovered for 35 minutes or until fork tender. Top with cheese and bake another 5 minutes. When done remove from oven and top with bacon. Serve warm. Enjoy!


Fresh Southwest Salad

Fresh Southwest Salad

Fresh Southwest Salad

2 Cups Fresh Garden Leaf Lettuce ( I used a garden mix of baby leaf lettuce, lacey leaf, and baby romaine lettuce)

1/2 Cup canned Black Beans ( rinsed and drained)

1/2 Cup canned Sweet Corn (Drained)

Gluten Free Corn Chips

Gluten Free Salsa

Optional 1/2 Cup chopped Tomatoes

Optional 1/2 Cup chopped Ham

In large salad bowl, add washed and rinsed lettuce, pulling apart and tearing leaves into bite size pieces. Add rinsed and drained black beans and corn. If you want you can add the tomatoes and ham. Top with GF corn chips and drizzle with salsa.  Enjoy!!

Okra Fritters

Okra Fritters

Okra Fritters

2 Cups Okra, stemmed and cut in half (about 20 pods of 3-4 inch okra)

1 Cup Gluten Free Cornmeal

2 Eggs

1/4 Cup Milk (If you need an exchange use water or milk substitute)

1 ½ Teaspoons Salt

Enough oil to deep fry fritters.

Wash, stem and cut okra in half. Pour in food processor with the cutter blade inserted. Pulse 4-5 times until okra is chopped but not pureed. Add cornmeal, eggs, milk and salt. Blend just until mixed into dough. Heat oil on high until hot enough to fry. Reduce heat to medium, then drop fritter dough into hot oil and fry until golden brown. ( about 2-3 minutes) Be sure to turn each fritter when brown on bottom side. Also make sure fritter patty is only about 1/2 inch thick. The fritters will not cook well in the center if they are too thick. When done remove from oil and drain to paper towels. Enjoy

Variations: Add garlic powder, or chopped onions for a different taste.

Okra fritters are also great for dipping!

Rosemary Dill Cucumber Salad

CucumberSalad.jpg

Rosemary Dill Cucumber Salad

5 Cups washed peeled and sliced Cucumbers ( about 5-6 Large Cucumbers)

Dressing:

1/8 Cup of Milk

1/2 Cup of Gluten Free Mayonnaise ( I use Hellmann’s original)

1/4 Cup plain Greek Yogurt

2 Tablespoons Lemon Juice

1/2 Teaspoon Freshly Chopped Rosemary Leaves

1/2 Teaspoon Dried Dill Weed

1/2 Teaspoon Salt

1/8 Teaspoon ground Black Pepper

In large mixing bowl (or serving bowl) add all ingredients for dressing and whisk together. Add peeled and sliced cucumbers and fold together. Refrigerate for at least 30 minutes before serving. You can also mix the dressing and refrigerate the night before and it tastes even better. Enjoy!!


Chicken and Fruit Salad

Gluten Free Chicken and Fruit Salad

IMG_1533

Chicken & Fruit Salad

(or you can use Turkey)

2 ½ Cups cooked and cubed chicken ( about 2 large cooked chicken breast)

1/3 Cup finely chopped red onion

1 Small apple, about 1 to 1 ¼ cups chopped apple with the peeling

1 to 1 ¼ Cups quartered and sliced seedless grapes

2/3 Cup chopped pecans

2/3 Cup Gluten Free mayonnaise ( I use Hellmans Real mayo)

In medium bowl add cooked and cubed chicken ( or turkey). Wash and cut up fruit and onion adding this to chicken, along with pecans. Then pour in mayo and mix well. Serve in lettuce wrap or on your favorite Gluten Free bread for a great tasting sandwich. Enjoy!

Fresh Veggie Pizza

Gluten Free Fresh Veggie Pizza with Cream Cheese Filling

IMG_1640

Gluten Free Veggie Pizza

Pizza Crust:

2 Cups Gluten Free Bisquick Mix

2 Eggs

2/3 Cup Milk

2/3 Cup GF Oil

Preheat oven to 325*F.

In medium size mixing bowl, whisk eggs and milk, add oil, and fold in Bisquick mix. Mix well and set dough in refrigerator for at least 30 minutes. The Bisquick is a little gritty, so I like to let it set to absorb the liquids as long as possible. When ready to bake, grease a 12 inch pizza stone or nonstick round baking pan. Pour dough onto pan and spread dough with your hands until completely covering pan and forming a raised crust around the edges. Bake for 25 to 30 minutes or until crust is lightly browned. Let crust cool and cover with filling below.

Filling:

2 – 8oz. packages additive free cream cheese ( I use Philadelphia)

1 Heaping Tablespoon of Gluten Free Mayonnaise ( I use Hellmann’s)

1 Heaping Tablespoon Gluten Free Dry Ranch Mix( see recipe in Vegetables and Dressings)

1 Large head of Broccoli chopped (just florets do not use large stalks)

1 Sweet Red Bell Pepper, washed, seeded and cubed into small pieces

1 Sweet Orange or yellow Bell Pepper, washed, seeded and cubed also

1 medium tomato cubed or about 1 ½ cups of cherry tomatoes sliced in half

In food processor blend cream cheese, mayonnaise, and dry ranch dressing mix, until smooth and creamy. Spread cheese mixture onto cooled crust, then cover with chopped vegetables. Slice into small pizza slices and serve. ( Note: add any vegetables you like, or you can even add chopped avocado, or if you want to turn this into a meat pizza, then add some chopped GF ham. )

Wilted Salad with Hot Garlic Ginger Dressing

Wilted Lettuce Salad with Hot Garlic Ginger Dressing

4 Cups washed and torn Leaf Lettuce

1 Cup washed and torn Baby Kale Leaves

1-2 Chopped Green Onions

Optional- 1 Cup chopped cooked Chicken or Turkey

1/4 Cup light Olive Oil

2-3 Slices Gluten Free Bacon

2 Tablespoons minced Garlic

1 Tablespoon Freshly Grated Ginger ( have garlic and ginger already minced and grated before you start to fry bacon).

In medium size bowl assemble lettuce, kale, onions, chicken, and toss. Plate individual salads onto heat proof bowls or plates. Using a cast iron skillet, heat oil on high and fry bacon until crisp. Remove bacon when done and drain on paper towel. Leaving heat turned up on medium high add garlic and ginger. Fry until garlic sizzles just starts to turn brown, this only takes a few seconds. Immediately remove from heat and pour over plated salads. Lettuce should pop and sizzle so that it will wilt. Crumble bacon over salads, season to taste with salt and or pepper and serve.

Variations: Instead of cooked chicken, you can use cooked and thinly sliced steak.

You may also want to add some chopped hot peppers, or top with grated cheese or boiled eggs.

Some people also like to add a bit of balsamic or white vinegar after pouring oil over salad.

Teriyaki Carrots


TeriyakiCarrots

Teriyaki Carrots

2- 12 oz. Bags of sweet baby Carrots ( I use Green Giant real baby carrots)

1 – 10oz. Bottle of Gluten Free Teriyaki sauce ( I use Kikkoman)

2 Tablespoons minced Garlic (if you like garlic add more)

1 Teaspoon GF, MSG Free Season Salt

Preheat oven to 375* F.

Wash and rinse Carrots then spread them out in a 9×13 inch baking pan. ( I prefer to use glass or stone ware) Pour teriyaki sauce over carrots, making sure all carrots are submerged in sauce. Spread garlic over carrots then sprinkle with season salt. Bake for 30-35 minutes or until carrots are fork tender. Serve warm and enjoy!

Variations: I have also made this on top of the stove in a cast iron skillet as a stir fry. Adding thinly sliced beef or chicken and other vegetables.

Note: If you use the larger size carrots, baking or cooking time will be longer.

Green Onion Potato Cakes

IMG_20160317_113642~3.jpg

Green Onion Potato Cakes

1 peeled and mashed Avocado

3 small baked Potatoes (About 3 cups chopped with peeling on)

2 Eggs beaten

2-3 chopped Green Onions ( about 1 cup)

2 Tablespoons Gluten Free All-Purpose Flour

1/2 Teaspoon Additive Free Garlic Powder

1 Teaspoon MSG Free Seasoning Salt

Optional 1/2 Cup freshly Grated Cheddar Cheese

Preheat oven to 375*F.

In medium size mixing bowl Mix all ingredients. Then spoon onto a greased baking sheet and bake for 25- 30 minutes or until potato cakes are brown and crispy.

You can also fry these if you prefer.

Roasted Broccoli and Canadian Bacon

IMG_20160301_171039~2 (1).jpg

Roasted Broccoli and Canadian Bacon

3 Large Heads of Broccoli

1/3 Cup Pure Olive

1 Teaspoon additive free Garlic Powder

1 Teaspoon MSG free Seasoning Salt (I use Lawry’s)

4-5 slices of Gluten Free Canadian Bacon

Optional-1/2 Cup Freshly grated Asiago Cheese

Preheat oven to 400* F.

Wash and drain broccoli. Then cut broccoli florets into a 9×13 inch baking pan. Drizzle oil over broccoli, tossing to completely coat florets in oil. Spread broccoli out in pan so that it is only one layer deep.  Sprinkle garlic powder and seasoning salt evenly over florets. Using kitchen shears, cut Canadian bacon in ½ inch pieces over broccoli. Place pan in oven and bake for 20 minutes. Then turn broccoli and bacon so that it can brown on the other side. Bake another 10-15 minutes or until tips of florets are turning brown and stems are tender. Remove from oven top with cheese and serve. Enjoy!

Variations: Add chopped pistachios or pine nuts.

Replace the Asiago with Parmesan ( you can also add the cheese the last 5 minutes of baking time to brown the cheese.)

If you really like garlic, replace the garlic powder with sliced garlic and let it roast along with broccoli.


Oven Roasted Worcestershire Garlic Squash

IMG_20160115_144703 (1)

Oven Roasted Worcestershire Garlic Squash

2-3 Small Zucchini Squash (washed peeled and seeded)

3/4 Cup of Gluten Free Worcestershire Sauce (I use Lea & Perrins)

1 Teaspoon additive free Season Salt

1 Teaspoon Pure Garlic Powder

Preheat oven to 375*

Slice peeled squash into 1/2 inch strips. Place in a single layer into a 9×13 inch baking pan. Drizzle Worcestershire sauce over squash. Then evenly sprinkle salt and garlic powder over squash. Bake uncovered for 25-30 minutes or until squash is tender when pierced with fork. Serve warm.

Variations: instead of worestershire sauce use GF Teriyaki sauce, or GF Balsamic vinegar. Or use fresh chopped or minced garlic.

You can also roast this on the grill. It’s really good with the smoke flavor baked in!

Tomatoes and Smoked Peppers

IMG_2288

Tomatoes and Smoked Peppers

I use my canned Tomatoes and Smoked Peppers as I would use Rotel. For casseroles, of for a quick stove top meal using hamburger and pasta. I can just pop open a jar and add a lot of flavor to any dish!

8 Cups Peeled and Diced Fresh Tomatoes (if you prefer you can chop them in the food processor)

2 Large Fresh Bell Peppers diced (about 2 Cups) (wash, deseeded and deveined)

3 Medium Jalapeños diced (about ½ Cup) (wash deseeded and deveined)

2 Large Smoked Chilies diced ( I used the mild Hatch Chilies)

2 Teaspoons Lemon Juice

1 1/2  Teaspoons Salt

In large stock pot add all of the chopped peppers, lemon juice and salt. On medium high heat cover and stir occasionally. Cook for 4 to 5 minutes or until the green peppers start to turn a lighter color and are getting soft. Then add tomatoes and continue to stir. When tomatoes start to foam and boil, cook another 15 minutes. Turn heat off and fill sterilized jars within an inch of the top of the jar, and cover each jar with sterilized lids and rings. Process in a boiling water bath according to your canning directions for your altitude. Here in Oklahoma I process mine for 15 minutes in a boiling water bath so that the jars will seal and there is no spoilage.

I do not invert the jars after processing. This can cause leakage and your tomatoes to spoil.

Gluten Free Squash Fritters

IMG_2279

Gluten Free Squash Fritters

2 1/2  Cups Shredded Squash (zucchini, yellow, or any squash you prefer)

1/2 Teaspoon Salt

2 Eggs beaten

1/4 Cup Water (or milk)

!/2 Cup Chopped Onion (optional)

1 1/2 Cups GF Corn Bread Mix ( I used Bob’s Red Mill)

1/2 Cup GF Oil ( or enough oil to pan fry)

In medium size mixing bowl mix shredded squash and salt. Let set while you beat eggs and water together and cut up the onion. ( The salt will help bring out the moister in the squash) Then add eggs, water, onion and corn meal. Stir until corn bread mix is wet and well incorporated.  Pour oil into 10 inch skillet and heat on high. When oil is hot drop squash batter by spoonful’s into oil and fry fritters 3- 4 minutes on each side or until golden brown.  Remove from pan and drain on paper towels. Serve while warm and crispy!

Variations: Add chopped jalapenos’ or minced garlic.

Change out the squash for fresh cut or frozen corn (drained) to make corn fritters.